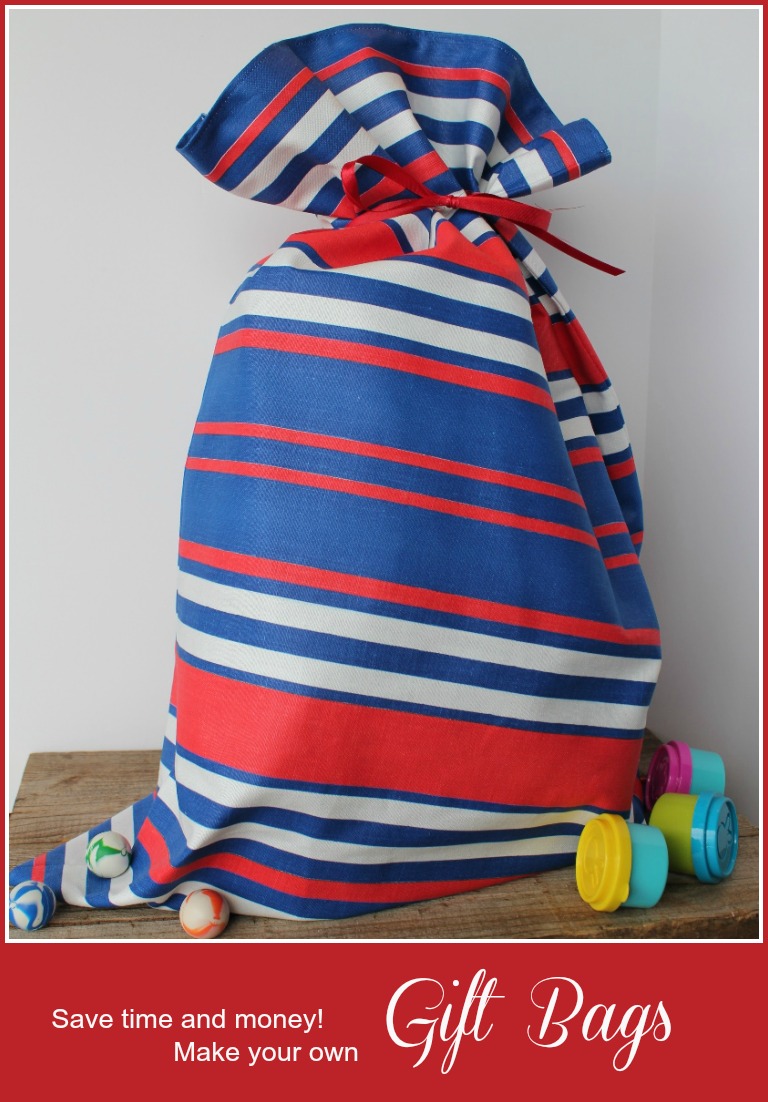
Can you help by making a dozen Fabric Gift Bags for foster children? The plea came at a Kiwanis meeting. And I volunteered. They were so easy to make that I finished all of them in one sitting — less than half a day. The recipient would have a bagful of gifts, thanks to Kiwanis, and a bag that could be used to keep the gifts or any other possessions together. Quick and easy to make, reusable so no piles of wrapping paper to throw away, functional for other uses or easy to store , washable if necessary and, best of all, colorful and fun. I thought it was such a good idea that I have made them for gifts given to other children, who were thrilled to get them — with gifts inside, of course 🙂 — and to use afterwards.
The ones I made for foster children were already cut with necessary hems pressed into place so no measuring and folding, and only needed a few pins in strategic places before sewing. They were made from wide variety of heavy tightly woven fabrics such as Duck cloth. They measured about 16 x 20 inches and the ribbons were cut about 36 inches long. That’s a good general size. Even adding time to cut the fabric, using a standard size to make a dozen bags would still be less than a half day’s work.
For Christmas I wanted to make a bag to hold a sleeping bag and pillow for a sleep over. Plus I wanted enough room to add a pair of pajamas and a change of clothes so the recipient could use the bag to hold all her sleepover gear. Here’s how you customize a gift bag:
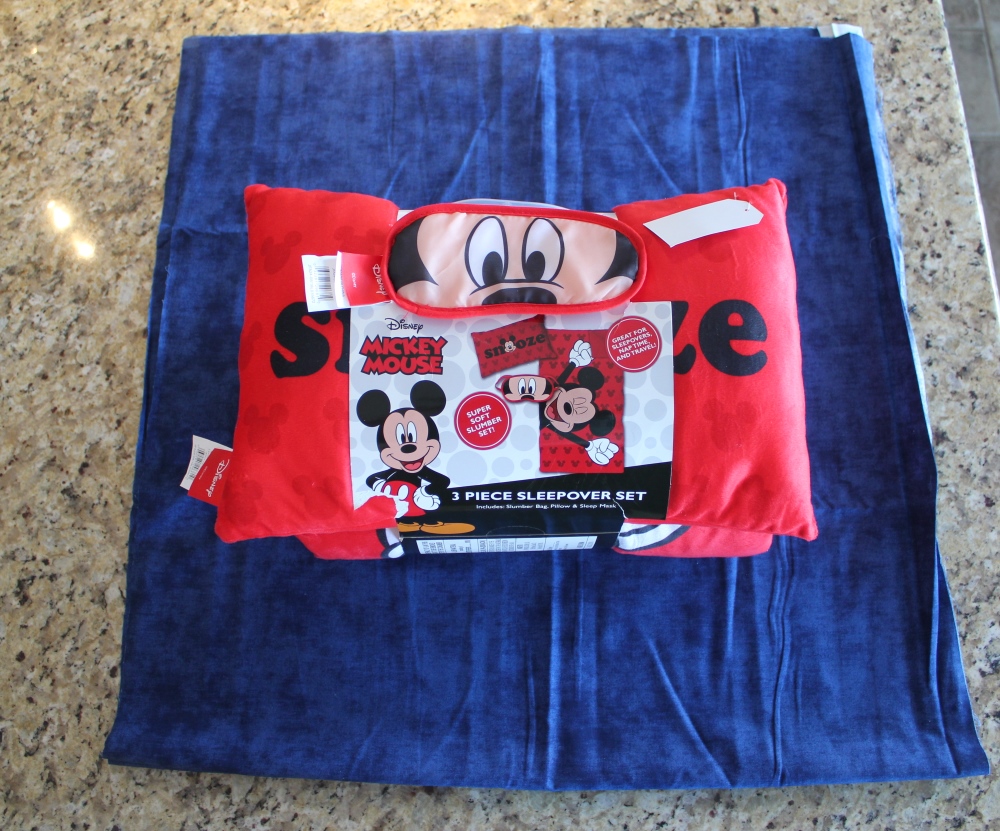
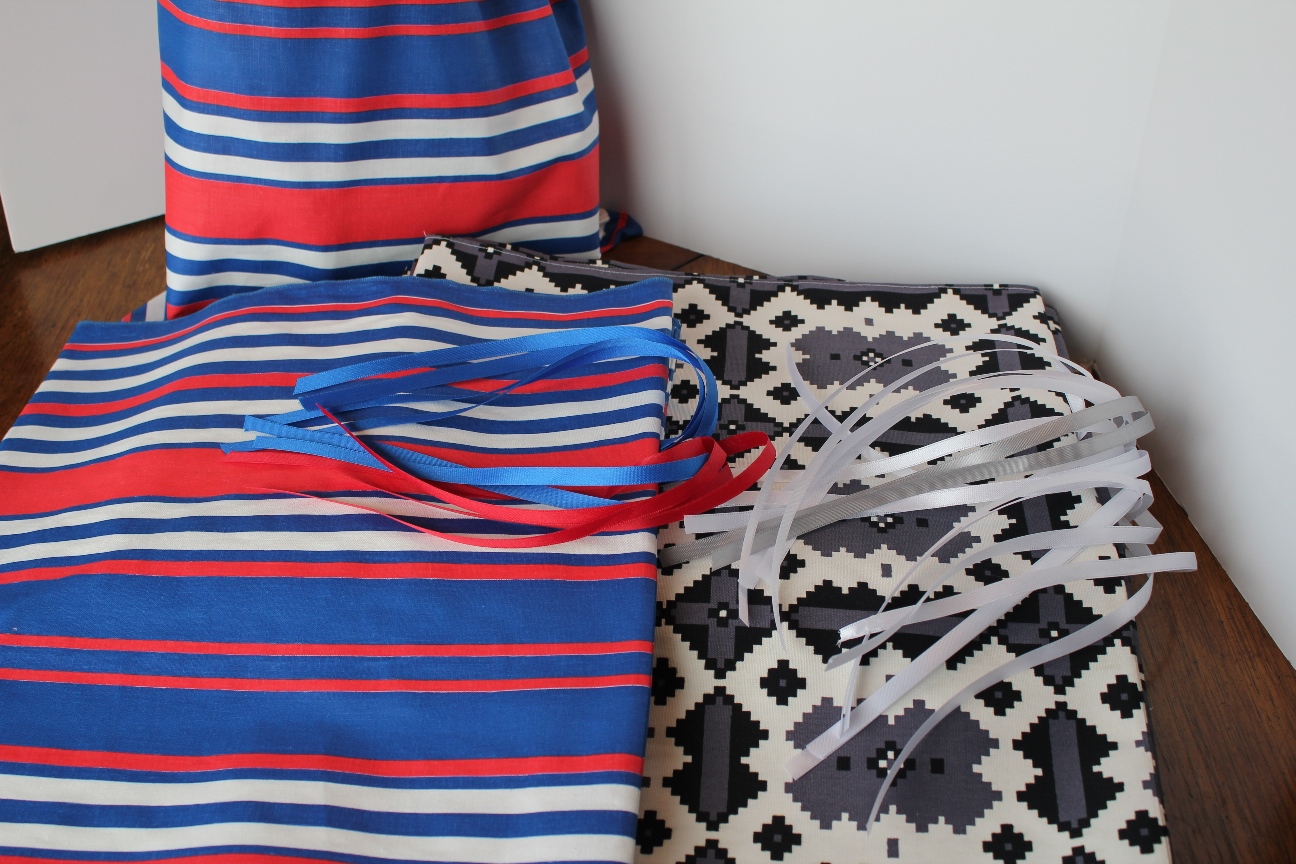
I purchased a remnant of fabric for $4 and was able to make two bags from it. Ribbon I had on hand, but the rolls were a garage sale purchase for a quarter each. Not bad! My finished bags were 26″ long by 24″ inches. To make sure things fit, the edges pulled up on the sides should be at least halfway up the item you want to wrap. In my case there was plenty of overlap so the finished bag would accommodate additional items. The length of the bag needs to be equal to the circumference of the item/s you want to stow in it — PLUS 5-6 inches to allow for hem and placement of the ribbon tie.
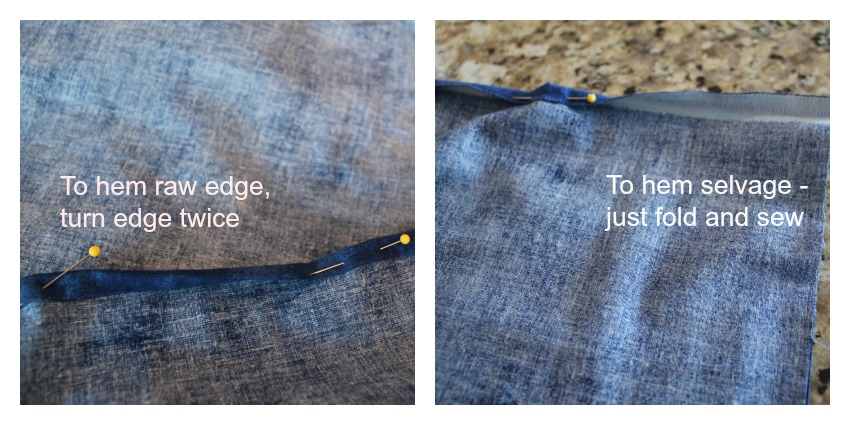 Hem what will become the top edge of the bag. A selvage will often have a different color of thread showing along the edge where it is more tightly woven creating a “self edge” so it won’t ravel. If you have TWO selvages along the top, you can just leave them unfinished and not worry about hemming. (NOTE: If you see directions to trim off the selvage when making a dress or something where fit matters — yeah, do it. But for this kind of sewing, fast is the name of the game!) Usually you will end up with one raw edge and one selvage edge so to make them look uniform, turn the selvage over just one about 1/4 inch and stitch. You don’t want the raw edge to unravel so turn it over once about 1/4 inch and then turn it again the same measurement so the raw edge is tucked inside.
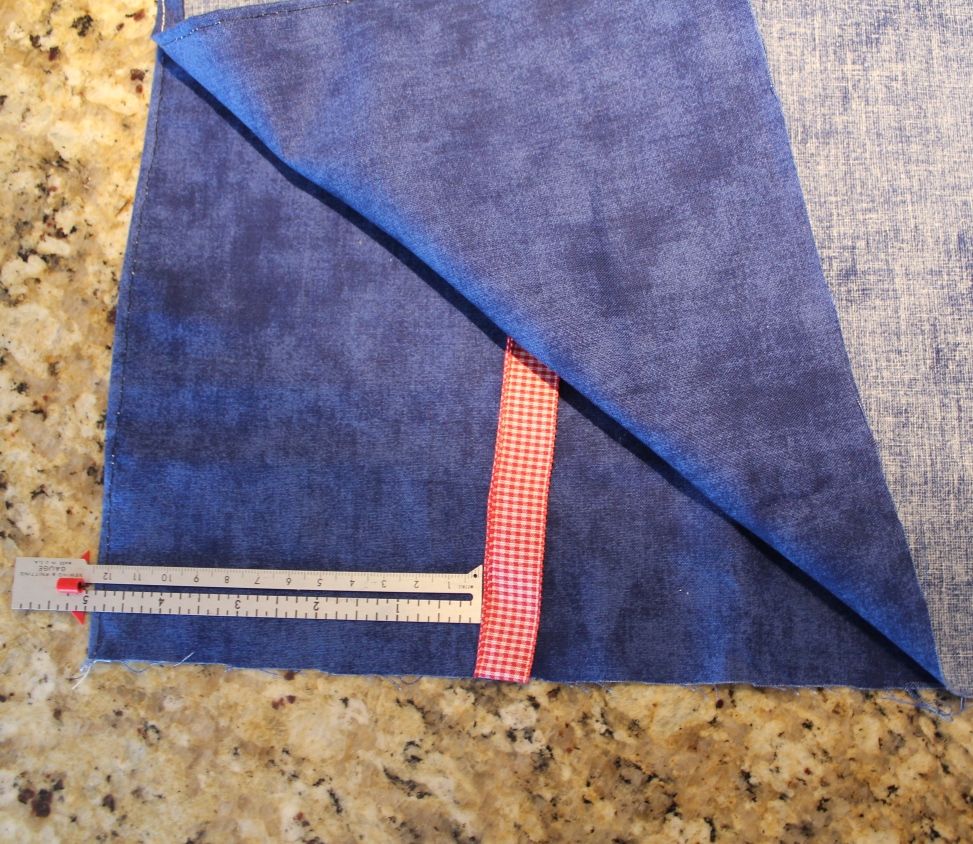
Fold the hemmed fabric with right sides together and hems together. Cut ribbon 36 inches long and fold in half. Place fold of ribbon on one edge of fabric, five inches from top. The length of the ribbon goes toward the middle of the bag. Turn folded corner back into place, pin at top and at ribbon location. Stitch along edge of bag, from top to bottom, 1/2 inch in from cut edge. (NOTE: If you have trouble keeping the seam straight, try a piece of colored masking tape placed on your sewing machine at the correct distance. A longer visual guide is easier to follow than the markings on the machine.)
Turn the bag right side out and smooth the side seams. Push the corners out if necessary. For heavy fabric, you might need to cut the point of the corner off so it will lay reasonably flat. Careful not to nip into the stitching!! The ribbon will be secured in the stitching on one side.
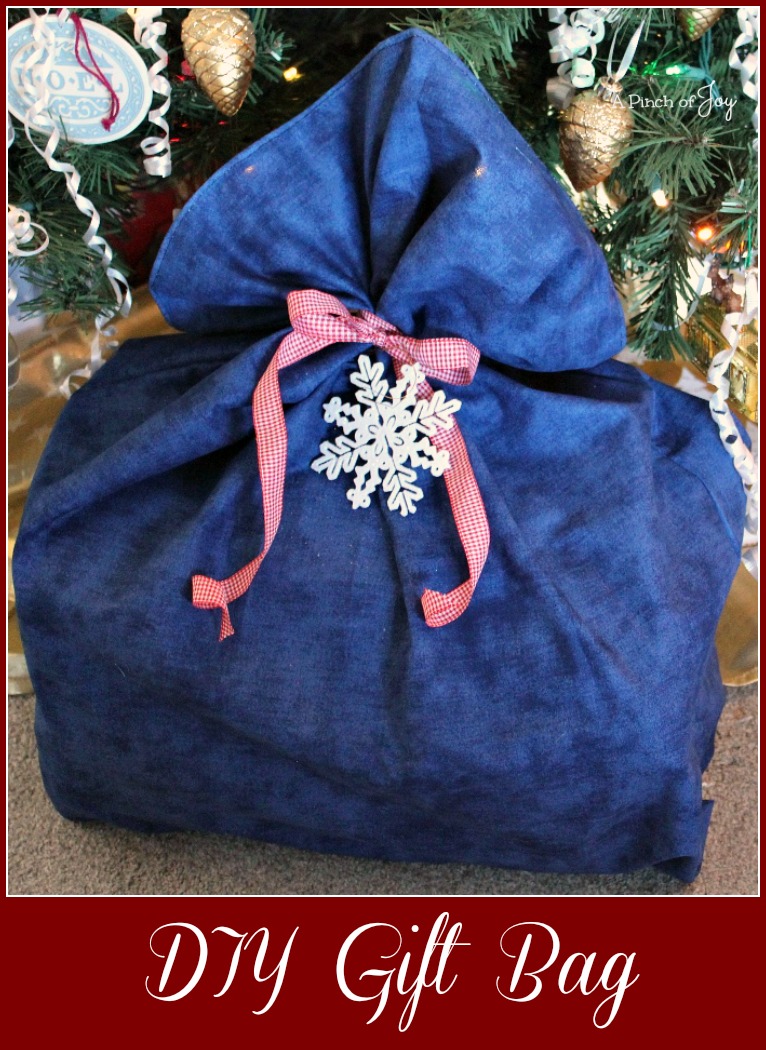
Add gift. Pull one end of the ribbon behind the bag, the other to the front, gently gathering the fabric. Knot loosely, arrange the edges to your satisfaction and tie the bow tightly to hold it. All done!
Welcome to A Pinch of Joy! I’m so glad you stopped by today! Follow A Pinch of Joy using the icons on the teal bar at the top of the page so you don’t miss a thing! I’d love to have your company on this venture!! Share: if you found this helpful or inspiring please click one of the buttons below! Your support of A Pinch of Joy is appreciated!
Shared with these awesome link parties here
Discover more from A Pinch of Joy
Subscribe to get the latest posts sent to your email.

 Welcome! I’m Charlene. I love to share quick and easy recipes, whatever I’ve learned in our last DIY project – anything that helps make life easier, better and more fun!! I hope you will find inspiration and add a pinch of joy to your day!