
A chandelier is jewelry for your room. It’s like the statement necklace or exquisite brooch that takes an outfit from good looking to beautiful. Chandeliers come in a variety of sizes and styles to fit any room or decorating style. Replacing your outdated light fixtures is an easy way to update a room. New lights add style, make a design focal point and provide illumination for living in that space. Chandeliers can be used in every room of the house, but they are most often the light fixture of choice for a dining room. Here are five tips to make choosing, installing and using your new chandelier easier!
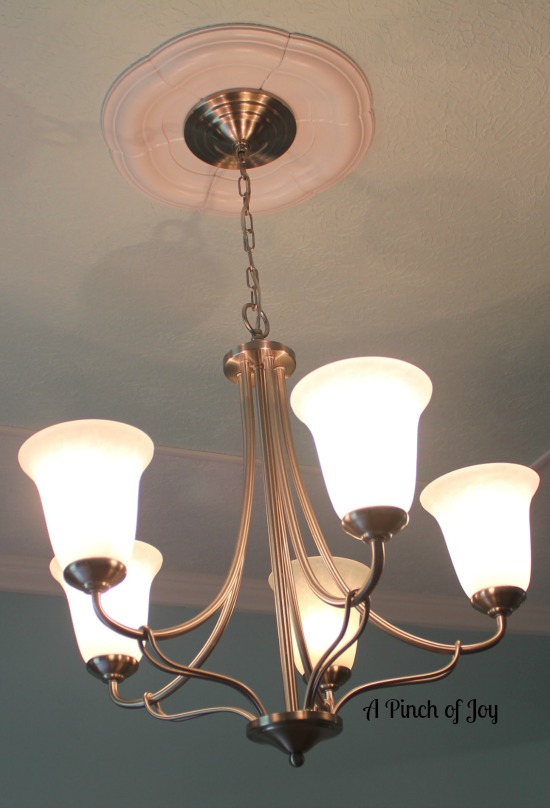
1) Choose your style: Stroll through any home store lighting department and you will find contemporary, traditional and every style in between, a variety of materials and sizes. Choosing a chandelier is easier if you have some basics in mind before you stroll. I knew we wanted simple lines in a silver tone, soft white shades, a little on the large side to make it the focal point of the room. I wanted a serene feeling to the room to encourage lingering over a meal. Just those few elements eliminated a host of others and made the selection so much easier. As soon as we saw this particular fixture, both Wheels and I said “Oh, there it is!”
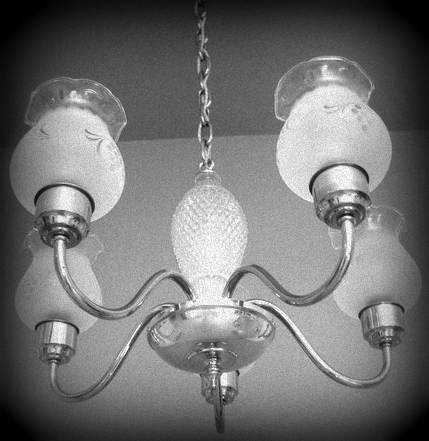
This is the one that we replaced – a shiny brass one that went to Habitat for Humanity’s ReStore.
2) Choose where to hang your chandelier. Lighting for a dining room needs to illuminate the food and activity that center on the dining room table. At the same time you don’t want it to shine in anyone’s eyes, whether seated or standing. Hang the chandelier in the middle of the table location. If the table will set in the middle of the room, as it does in our dining room, then the chandelier will also hang in the center of the ceiling. The size of the chandelier is loosely based on the size of the room and the size of the table. Larger rooms will visually handle a larger chandelier. A narrow table calls for a narrow chandelier so diners don’t bump it when they stand. Our sleek silver light is 24 inches in diameter; the table is 40 inches across. This means the chandelier leaves 8 inches of clearance on both sides when the table is centered underneath. That is pushing the recommended 10 inches of clearance on both sides – but I did want something on the large side to make a visual statement!
The rule of thumb is to make the bottom of the chandelier hang between 30 and 34 inches above the table top. Have someone hold the chandelier at the ceiling and shorten or lengthen the chain until you determine the best height for your situation. Wheels is tall and Bytes is taller but the bottom of our new chandelier is thirty inches from the table. The curvature of the arms that hold the light is such that the lights set above their line of sight even when standing.
3) Read and follow directions. Switching out old fixtures is pretty straightforward. In most cases, you simply remove the old and attach the new fixture to the existing wires. However, read the directions that come with the new chandelier. They will tell you if additional support is needed to carry the weight of the chandelier. Follow those recommendations. If you’ve not done this diy task before, read through and understand the directions for removal of the old and installation of the new. Straining to read small print with the electricity off, nightfall darkening the room and the baby crying is stressful! If you don’t have a clear picture of the steps needed to accomplish this task, research it before you start.
4) Plan for safety. TURN OFF THE ELECTRICITY at the circuit box before beginning. Make sure you have the correct light bulbs before beginning (those directions again!) . Go get the step stool or ladder, instead of standing on the padded dining room chairs (or worse!) Gather tools you’ll need before starting. Have a helper standing by to receive the old fixture and to help lift and position the new chandelier. Leave a service loop when you shorten the electrical wire so you have enough to maneuver the new fixture and tuck everything into place.
5) Plan for versatility in your lighting. If you don’t already have one, consider installing a dimmer switch. This allows you to dim the lights and enjoy a romantic dinner for two or brighten them for a rowdy family birthday party for the two year old! Do not exceed the recommended wattage, but you might want to use a lesser wattage for more even light. Or clear bulbs vs tinted bulbs. If there is room to set a lamp or two, or add wall sconces or place flameless candles on furniture pieces, consider the atmosphere options they will offer. Lighting should make a room, the occupants, home furnishings and prized possessions look their best.
I found the ceiling medallion, new and in the package, at a garage sale for $2, much less than at the store! Here is how we created the faux tray ceiling and the chair rail installation is here. This is much better, don’t you think?
I’m so glad you stopped by today! Be sure to follow A Pinch of Joy so you don’t miss a thing! I’d love to have your company on this venture!!
Subscribe: email on the sidebar or follow on Facebook / RSS feed / bloglovin’ / twitter and check out my pinterest boards. Share: if you found this helpful or inspiring please click one of the buttons below! Your support of A Pinch of Joy is appreciated!
Discover more from A Pinch of Joy
Subscribe to get the latest posts sent to your email.

 Welcome! I’m Charlene. I love to share quick and easy recipes, whatever I’ve learned in our last DIY project – anything that helps make life easier, better and more fun!! I hope you will find inspiration and add a pinch of joy to your day!
Brooke @ Inside-Out Design says
These are great tips! I would love to replace every light in my house (except the dining room because we’ve already done that one.) You are so right- lighting is the jewelry in a room and it’s my favorite part of a room’s design!
Amy mayen says
Thanks for the great post! I agree that chandeliers totally dress up a room!
Amy mayen recently posted…Ruffled Diaper Cover/ McCalls 6345
Nikki says
I love that you called it the jewelry of the room! So true. I love accessoring a room & I love bright colors in the summer. The colors match the seasons of course. Unless like earlier this year I was just ready for winter to be over so I started decorating in pastels in march.
Nikki recently posted…It’s Ok Thursday