
Our fireplace has been a cold spot in our life ever since we moved in. You could feel the air move around it — and see it because it was enough that lighted candles would flicker in the wind! A couple of years ago, we installed a fireplace balloon which helped enormously. However, there was still a draft around the bottom of the fireplace and the hearth. Last fall we were working toward winterizing the house and noted a huge vine had separated this door from the chimney. A two inch wide opening for winter air to pour into the house! How do we weatherize the fireplace? A little exploration along the aisles of Lowe’s and Home Depot and we were able to solve the problem with the fireplace and a couple of other outdoor openings.
The answer was a spring loaded access panel, a tube of silicone caulk and strong shears to remove the vine. Here’s how we closed up the opening and stopped the candle extinguishing breeze in the house.
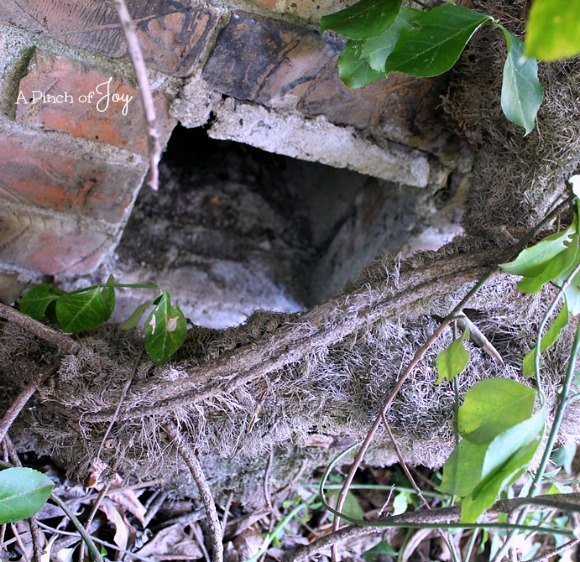
This was (and maybe still is) a common arrangement, if our neighborhood is any indication. The homeowner could brush the ashes through an opening in the firebox. They would fall into a pan below. The pan could then be removed through the chimney door outside. The pan was gone when we bought the house so we never used that feature. I have strong reservations anyway about sweeping ashes and perhaps smoldering embers into a pan which may or may not catch them before they go right down into the basement wall beneath! You can see the opening into the basement wall in the photo.
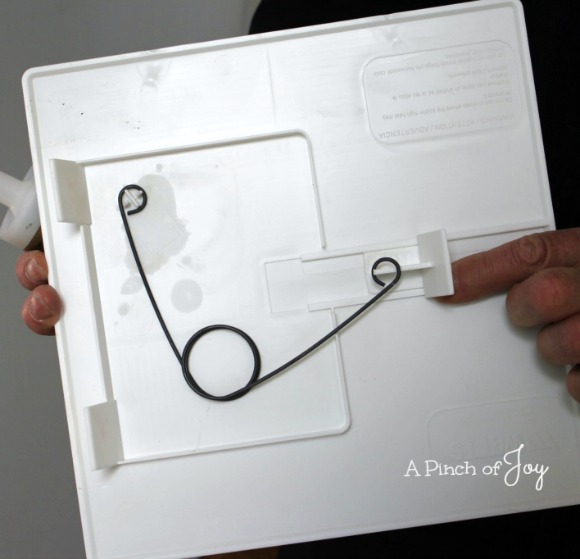
A heavy plastic panel has two fixed stops on one edge and a springloaded stop on the other side. The spring allows the panel to lock tightly into the opening.
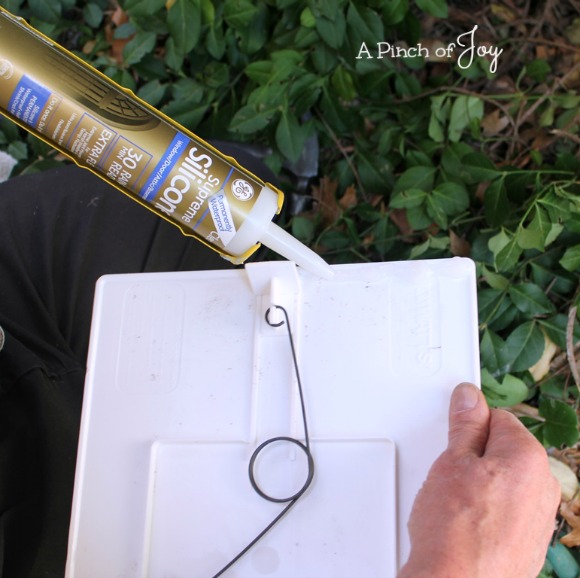
Wheels used clear silicone caulk all around the edge of the panel to create a tight waterproof (and bugproof!) seal. He added another line of caulk along the outside edge of the panel so that there were no gaps between the rough brick and the flat panel. We discarded the rusted out metal door.
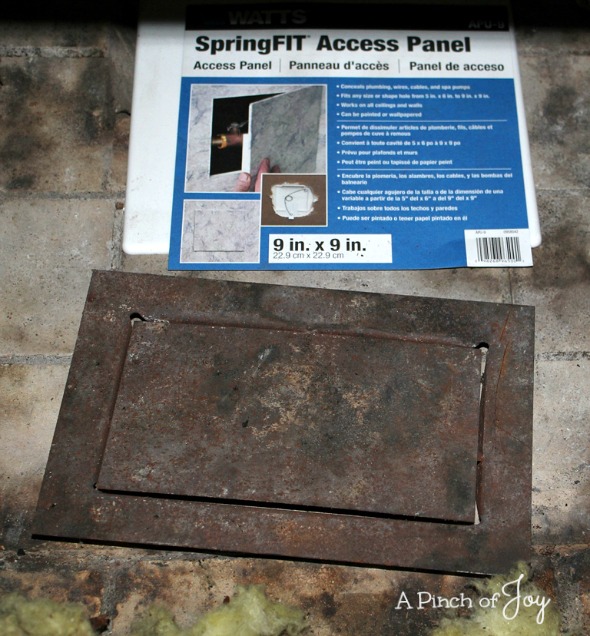
Inside the firebox was this loose fitting door. When the door and its frame were lifted out, Wheels just snapped the springloaded panel into place. It fit more tightly than the metal door even without caulk. We did not caulk it and we set the metal door back in the corner of the fireplace. That way If we ever need to use the fireplace, it will be easy to remove the plastic panel and replace it with the fire safe door. There have been a number of occasions without electricity when we’ve needed the backup so it just seemed smart to be prepared! The fireplace balloon can also be easily removed if we do need to build a fire.
And the good news: no draft all winter. Candles stayed lighted. More importantly, there was a huge difference in the comfort level of the room, especially near the fireplace. These inexpensive panels can be used to securely close off any opening and look good at the same time!
I’m so glad you stopped by today! Be sure to follow A Pinch of Joy so you don’t miss a thing!
Subscribe by email on the sidebar or follow on Facebook, RSS feed, bloglovin’ twitter and check out my pinterest boards. If you found this helpful or inspiring please share below! Your support of A Pinch of Joy is appreciated!

Discover more from A Pinch of Joy
Subscribe to get the latest posts sent to your email.

 Welcome! I’m Charlene. I love to share quick and easy recipes, whatever I’ve learned in our last DIY project – anything that helps make life easier, better and more fun!! I hope you will find inspiration and add a pinch of joy to your day!