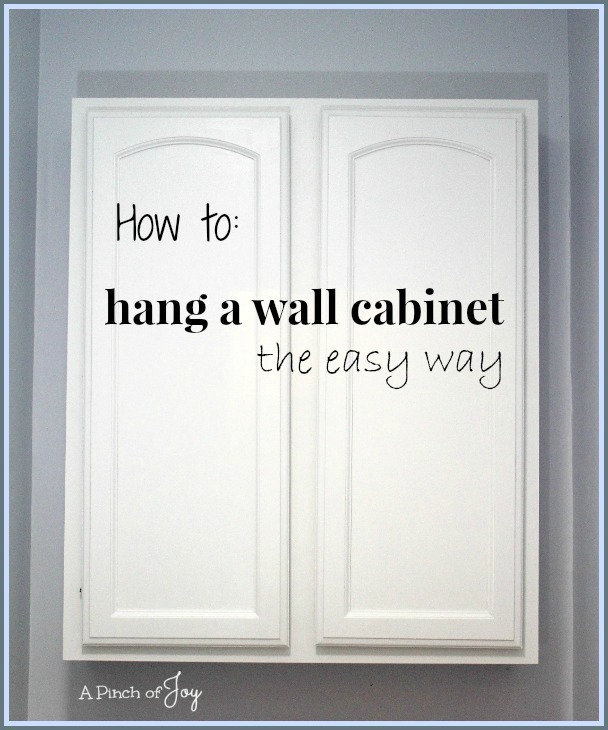
So happy with the transformation of my $5 bathroom cabinet! I think it turned out well and I love, love, love the amount of storage we have now! The white really pops against the new paint color — Frost, a very light gray with blue tones that goes from lavendar to blue to gray as the light from the Sola Tube in the ceiling changes throughout the day. Our kitchen cabinets delivered about the time we were ready to hang this. Geek that I am, I looked through the directions included for hanging wall cabinets. The directions they gave looked like a great idea! So Wheels and Bytes opted to try it out. And the method worked like a charm!
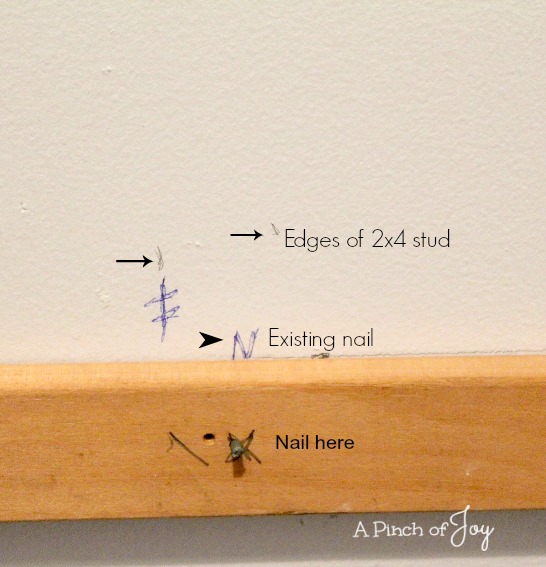
First Wheels determined where the studs were in the area where the cabinet was to hang. The old one that we were replacing was light weight and was installed with wallboard inserts. The new one is much heavier and definitely needed to be installed directly into one or more studs to keep it from pulling off the wall. Having been stung by false positives in the past, he used a combination of methods — stud finder, magnet, knocking on the wall, searching for nail heads in the dry wall. Where the methods agreed, he marked the studs on the wall. Use your best magic 🙂
Once you have those measurements, determine where the stud location/s will fall on the back of the cabinet. Mark the stud location on the inside back of the cabinet with masking tape at every point you want to place a screw.
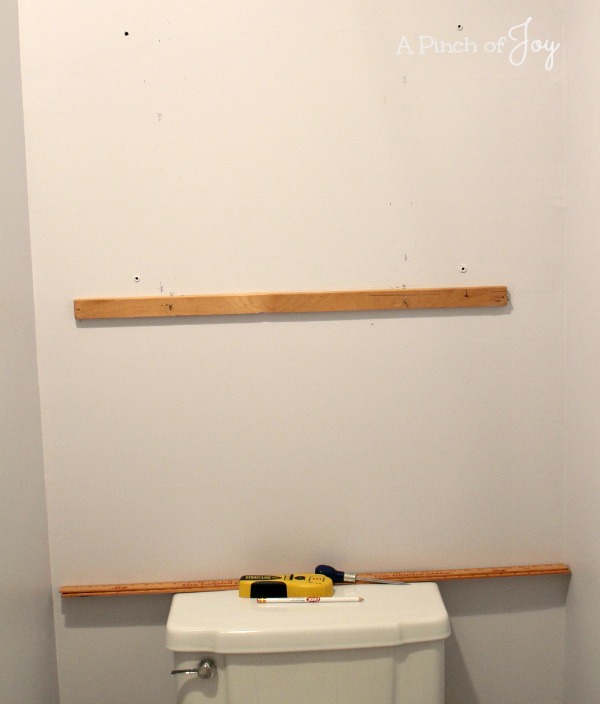
Determine the height you want to hang the cabinet. We “discussed” various methods of determining the height, including the typical 17-18 inches between base cabinet and wall cabinet in the kitchen. Finally, I measured the distance between the tank lid and the bottom of the cabinet in the first floor powder room. Which we also installed. Who knows how we determined that height? It was settled when it was demonstrated that one would not bump one’s head when rising from the seat below the cupboard. You are welcome to use our 20 1/2 inch distance. Draw a line across the wall at that point. Place a sturdy guide board at least 1 inch by 2 inches in size, extending the full width of the cabinet, with its top along the line. Check to make sure it is level. Nail into the studs.
I don’t have a picture of the next step. Well, I do. But all it shows is the blurry back of two men. In a thirty inch alcove there wasn’t much room for photography. The guys picked up the cabinet and slid it straight onto the guide board. No jockeying around and no guess work — they knew exactly where it belonged. Once it was in place, the board held the weight with no stress on the installers and no chance of slipping.
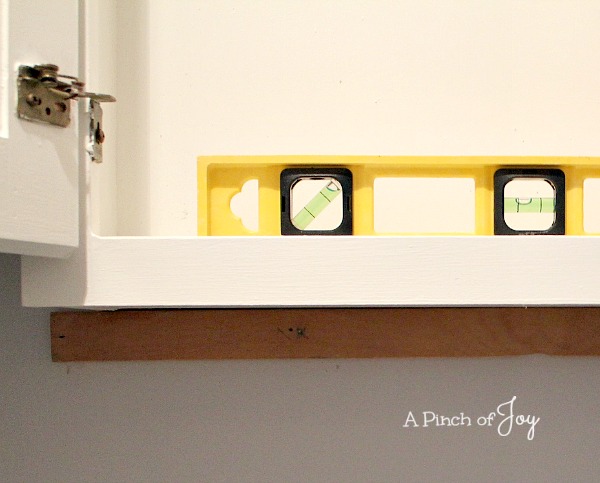
Check the level again. The bottom of the cabinet was not precisely even, so the level is a bit off.
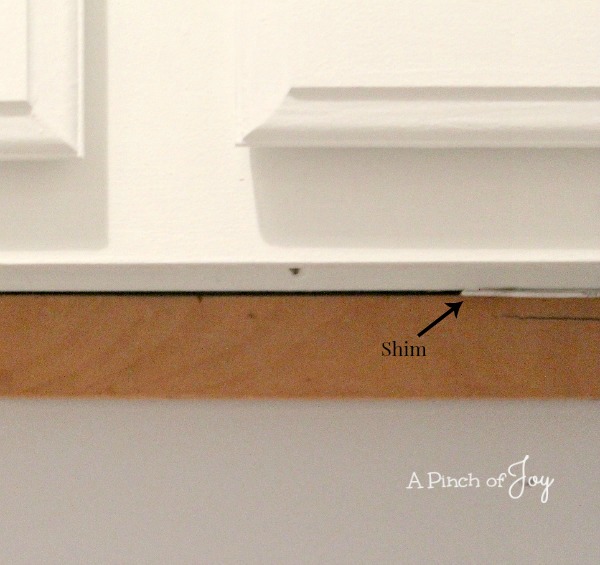
Holding the cabinet in place on the wall with one hand, Bytes added a shim between the cupboard and the guide board until the level showed that the cupboard was —- level.
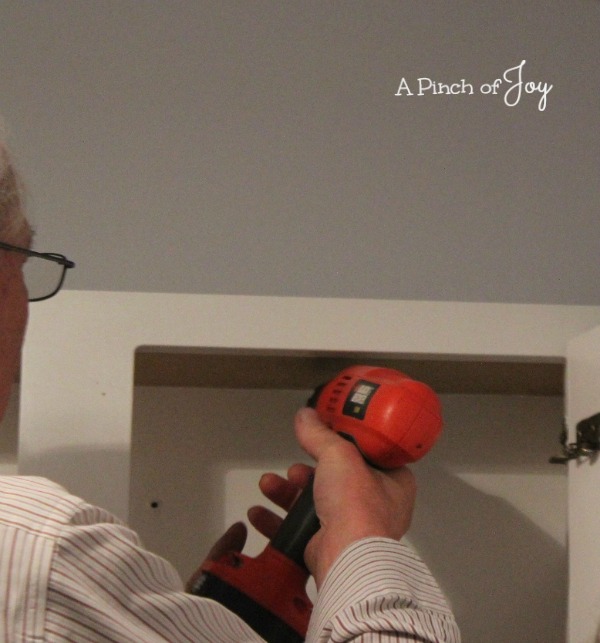
Wheels stepped up and quickly zapped screws into the studs at the location marked earlier on the inside back of the cabinet. Six screws and they were done. Didn’t even break a sweat! Bytes gently pried the guide board from the wall, being careful not to mark the wall. And we had ice cream to celebrate working smart!!!
I’m so glad you stopped by today! Be sure to follow A Pinch of Joy so you don’t miss a thing! I’d love to have your company on this venture!! Subscribe: Facebook / RSS feed / bloglovin’ / twitter // pinterest boards. Share: if you found this helpful or inspiring please click one of the buttons below! Your support of A Pinch of Joy is appreciated!
Discover more from A Pinch of Joy
Subscribe to get the latest posts sent to your email.

 Welcome! I’m Charlene. I love to share quick and easy recipes, whatever I’ve learned in our last DIY project – anything that helps make life easier, better and more fun!! I hope you will find inspiration and add a pinch of joy to your day!
Patti says
So easy and smart. Pinned.
Patti recently posted…Texas Chocolate Chocolate Sheet Cake
Julie Fiato says
This cabinet looks great, Charlene! I’m so happy you linked up @ Inspiration Monday Party, and hope you will e back this Sunday!
Joyce Mayhan says
Thanks for an easy to follow plan.