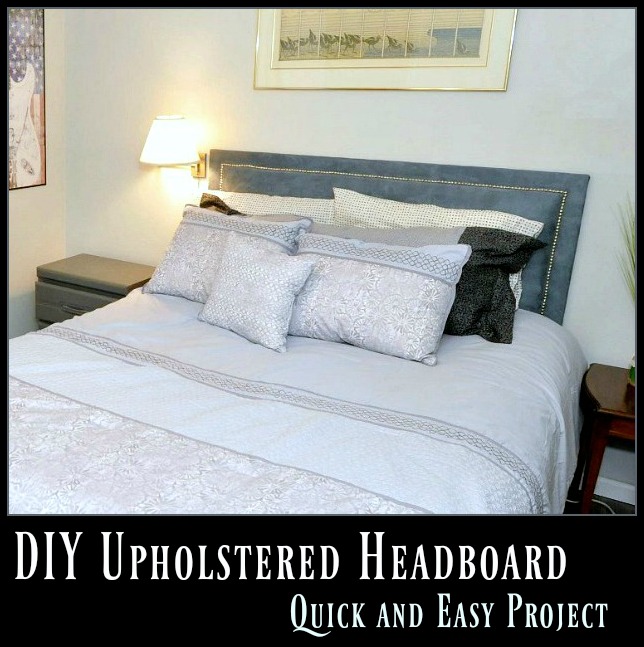
Bytes put together his DIY upholstered headboard, including the nailhead trim, in just one evening — recruiting an extra set of hands now and then to speed things up. If you are doing this by yourself, it will probably be a Saturday project — if only, to let your hands rest from all the stapling. 🙂
When we were preparing to sell our Ohio house, I suggested to Bytes that he needed a new look in his bedroom. And that it could start with a great upholstered head board. I like my bedroom just fine, he said. I said, you can make what you want. He looked at me as if I had three heads. But I kept “planting seeds” , as my one boss said was necessary in getting ideas to fruition. Other people might call it erosion due to drip, drip on stone. I call it persuasion and motivation – traits of good leadership. Whatever works 🙂 We’re not asking Bytes, okay?
We happened to have a 4×8 sheet of half inch plywood on hand. Bytes decided to cut the 8 foot side to the dimensional width of the queen sized bed. A queen sized bed is 60 inches wide. For height he chose to use the four feet dimension and let the headboard set on the floor. If he decides to go higher at a future date, legs can always be added. We made a trip to the fabric store where he selected a fabric with a slight nap in a neutral denim blue color. Then we bought the nailhead trim in a roll. Instead of putting in individual nails, you drive a small nail into every fifth nailhead, saving time and making it easier to keep the nailheads in a straight line. We also found a large roll of quilt batting. The foam seemed expensive for what we needed, so we opted to look at other sources. I found a queensized 1 ½ inch foam mattress topper at Big Lots on clearance – worked perfectly once the excess was cut away! Here’s the steps he followed after all the materials needed were rounded up.
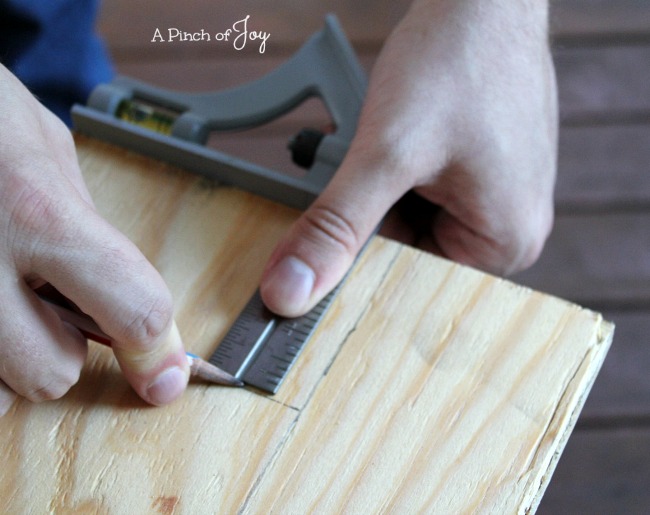
Cut plywood to size. Working on a large flat surface, measure in three inches from each edge of the plywood, marking with pencil. We used the picnic table on the deck as a work surface.
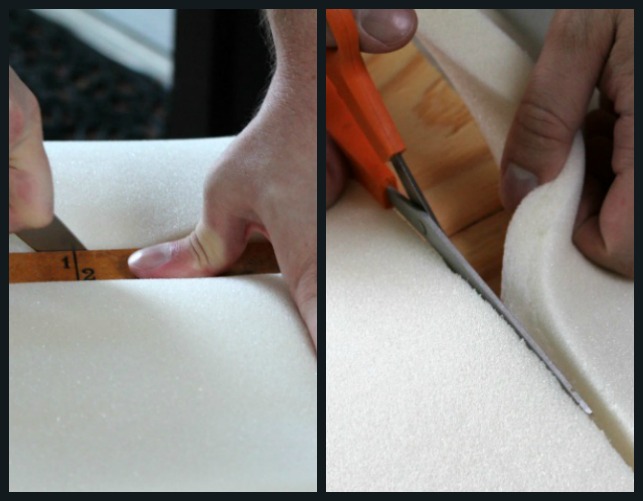
Cut foam to size of ply wood sheet MINUS three inches on all sides. This makes the area inside the nailhead trim puffy. Measure and mark with a sharp felt tip. Use a sharp blade and a straight edge to begin the cut, then, if necessary, use scissors to finish cutting through the foam. Repeated slices of the knife can make the foam jagged. A smooth edge makes a smoother finished product.
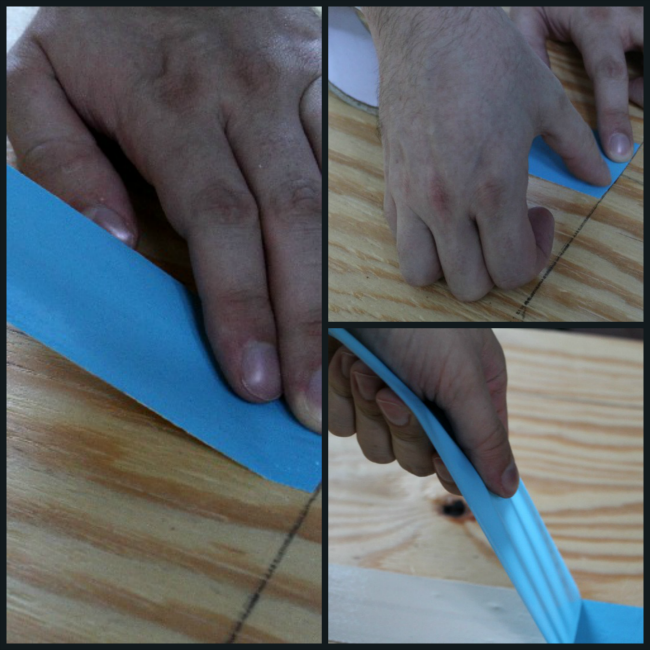
Place double stick carpet tape all around the plywood, as accurately as possible just inside the three inch marked line. Buff the tape with a smooth edge to make sure it is securely adhered all the way around. Remove the protective film to expose the second sticky side.

With helper/s, carefully position foam on tape, one side at a time. The outer edge of the foam should be at the pencil line drawn on the plywood sheet. You will have three inches of bare wood around the foam. You can do this yourself, but it is so much easier with help. Remember when the foam touches the tape – you’re done. That’s where it will stay!
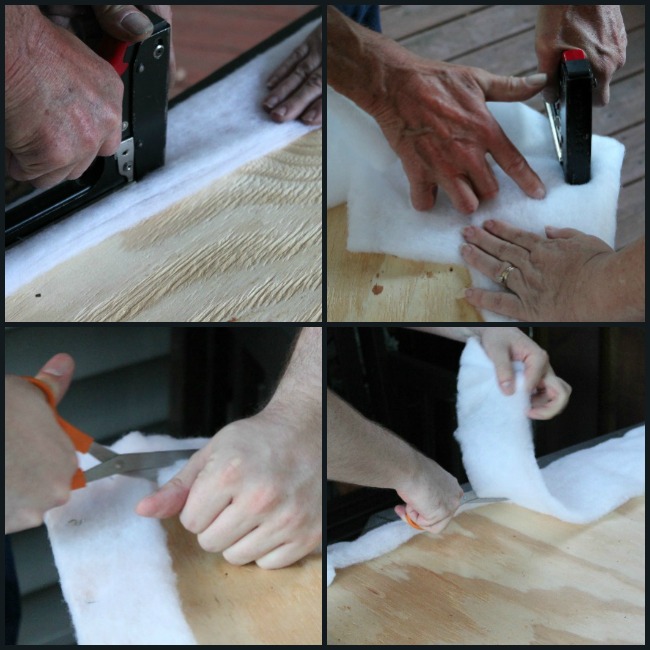
Unroll the quilt batting and fold it so you are working with two layers. Cut to size of plywood sheet PLUS three to four inches on all sides. Stretch the batting over the foam and wood, making sure that there is enough batting to cover the entire piece of plywood and fold over to the back.
When batting is centered, carefully pick up the plywood and turn the whole shebang over so the batting is on the table, and the back of the plywood is facing up. This is easy if you are 6’4” with long arms – like Bytes. The rest of us mere mortals have a more difficult time – made less so if you can find a helper.
Fold batting over the edge of one side of the wood and staple every 4-5 inches. Work on keeping the folded batting even on the back of the wood. When finished, add staples as needed between the ones you placed earlier so that batting lies evenly. You are creating a smooth firm base from which to pull it taut on the other side. Move to the side opposite of the one you just stapled. Pull the batting straight across until it is taut. Staple. Repeat down the whole side. Be firm when you pull, but not so tight that you tear the batting. Repeat these two steps for each end. Note – if you need to remove staples for any reason, use a straight screwdriver between the wood and staple to pry the staple out.
For corners, pull the corner of the batting straight down over the corner of the plywood and staple in place. Fold one side toward the center and staple in place. Repeat for the other side to make a square corner. Cut away excess batting as you fold and staple.
Trim off excess batting along the sides. Turn the plywood over and staple the batting at the edge of the foam pad underneath it. This will create the “puffy” effect in the middle of the headboard and help you to place the nailheads later.
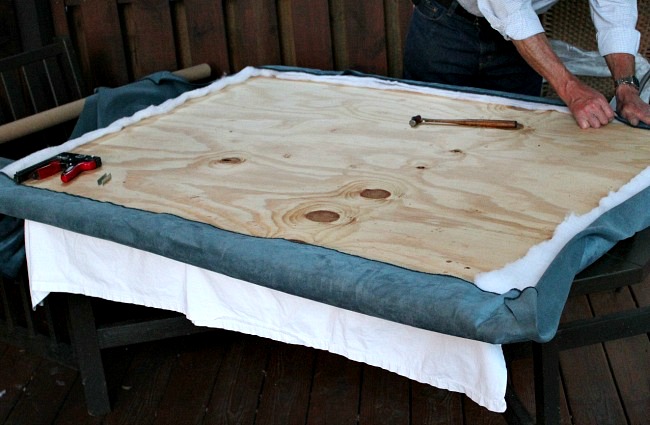
Add the fabric. Bytes lifted the headboard, I positioned the fabric FACEDOWN on the table, trying to center it. Place the foam and batting coverings DOWN when you put the board on the fabric. Shift things around as needed to make sure the edges are straight and even, especially on the edge that will be the top of the bed. (That’s an old sheet in the picture, intended to keep the fabric clean on the outdoor table. Big nuisance and it quickly disappeared. And the hammer was to make sure all staples were seated so the wouldn’t snag anything.)
Beginning at what will be the top of the headboard, fold fabric over the edge of the plywood at least three inches and staple every 4 inches. Bytes used his hand as a measure — quick and uniform. Staple in between staples as needed to make sure fabric is smooth and securely fastened before beginning work on the opposite side. On the first side concentrate on keeping the foldover even and smooth. Stop stapling about 4-6 inches before you reach the corner.
On the opposite side, pull the fabric taut, starting in the middle and stapling. Make the sure the fabric is smooth and even across the headboard. Continue pulling taut and stapling, working toward first one end and then the other. Stop before the corner as above.
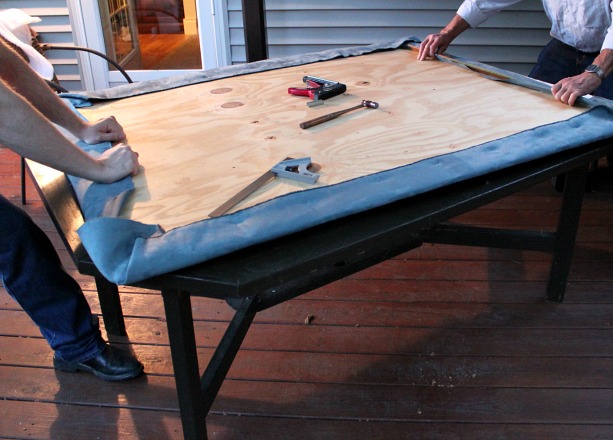
Repeat for each of the ends, leaving the corners unstapled. Wheels is helping Bytes stretch the fabric firmly across the headboard. You can do this yourself, by pulling first one side taut, stapling and then tightening the opposite side and stapling. Begin at the middle and work your way from one side to the other.
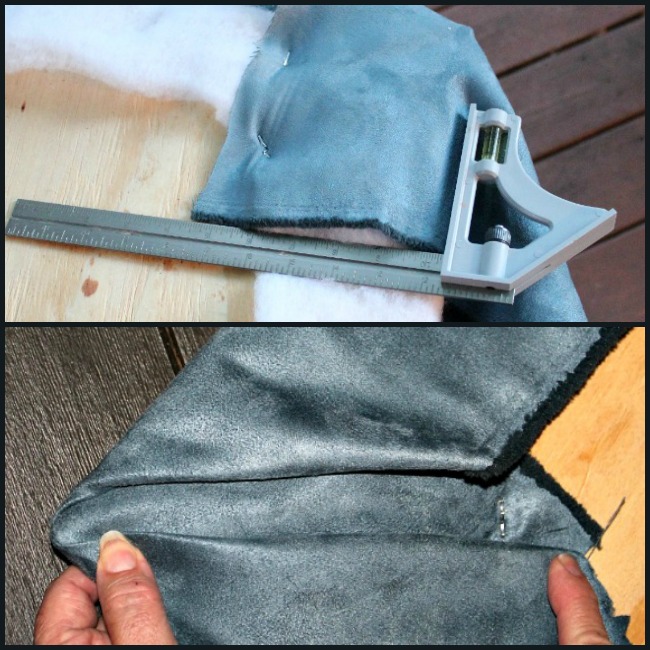
On corners, fold tightly and staple. Cut away excess fabric as needed. Fold the corner of the fabric over the plywood corner. We used the square to make sure the fabric was pulled straight down — corner over corner. Staple. Fold the fabric on each side as shown. If fold is too bulky, cut away excess fabric until it will lay smooth. Pull fabric taut against the wood before stapling in place. Precise corners will make the finished product look professional.
To be continued — adding the silver nailhead trim strip.
P.S. I noted that the old (and too small) headboard went with the next load of donations after Bytes installed the new one. Apparently Bytes likes the new headboard better. Personally I thought the finished product looked great!! It was part of the fresh look the house needed to sell!
I’m so glad you stopped by today! Be sure to follow A Pinch of Joy so you don’t miss a thing! Subscribe by email on the sidebar or follow on Facebook, RSS feed, bloglovin’ twitter or pinterest If you found this helpful or inspiring please share below! I’d love to have you along on this journey!
Discover more from A Pinch of Joy
Subscribe to get the latest posts sent to your email.

 Welcome! I’m Charlene. I love to share quick and easy recipes, whatever I’ve learned in our last DIY project – anything that helps make life easier, better and more fun!! I hope you will find inspiration and add a pinch of joy to your day!
Summer says
The headboard is really nice ♥ Very beautiful ♥
Charlene says
Thank you! It looks great in his room at the new house too!
Charlene recently posted…Upholstered Headboard – A quick and easy DIY