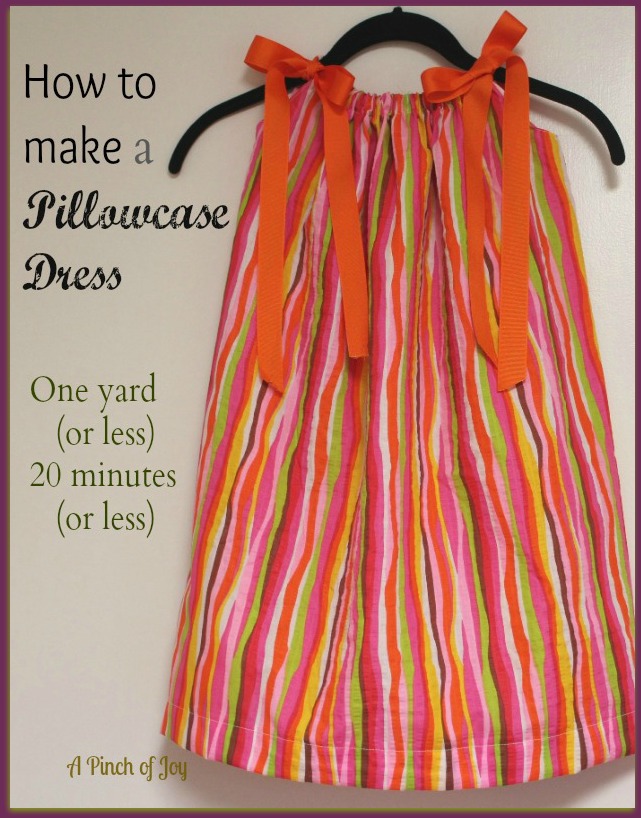
Pillowcase dresses are so quick and easy to make! They are cool and comfortable, perfect for warm weather! You can make them from an actual pillowcase just by following the instructions for armholes and casing below. Or create a dress to match a personality with cute and colorful fabric. Pillowcase dresses are so easy a beginner can make one.
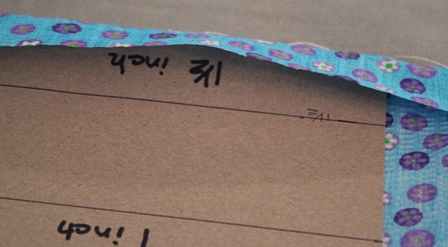
Buy one yard of 42″ – 45″ sturdy fabric, and 2.5 yards of 1″ wide grosgrain ribbon for each dress you plan to make. All dresses are made from the full width of the fabric. I used a full yard for the dresses I made. However, if you want to customize the length: Measure from the base of the child’s neck down to the point on the leg where you want the dress to end. Add 5 inches to that number to allow for casing and hem folds as given in directions below. That is the length you will need to cut. Or you can check the size chart here to determine the length of the fabric you will need.
** I recently made several of these dresses in one sitting so don’t let the different fabrics throw you. I didn’t remember to take pictures of all the steps for any one dress! Sorry – –

Prepare the fabric. This cotton fabric had a crooked end. To straighten it, make a cut about into the fabric about 1 inch from the edge. Firmly grasp the fabric in both hands and rip it straight across. The rip will follow the threads and create a straight line. Match the selvages together so the fabric lies smooth and the right sides are together. Beginner note: The white in the picture above is called a selvage (from “self edge”). The weaving process creates a tight edge on the sides of the fabric that will not fray. Not all selvages are white.
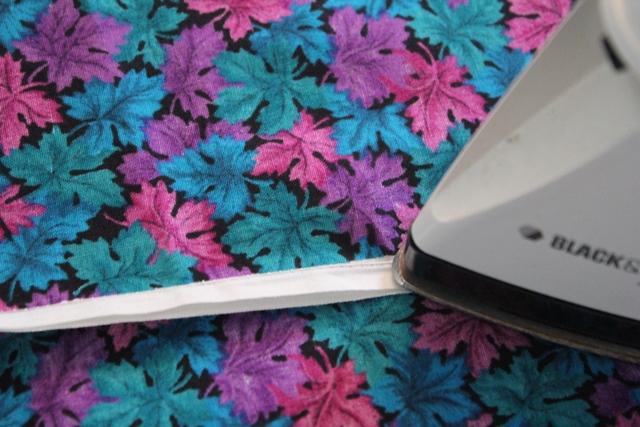 Stitch along the selvage, making a seam about 1/4 inch wide. You will end up with a fabric tube with the right side of the fabric inside. Press the seam to one side. It will be in the center back of the finished dress. You can press it down with your fingers, but an iron makes a sharper crease that will stay.
 Place the seam you just sewed on the center crease of the fabric. Keep the right sides of the fabric together. Beginner note: The center crease is the one that shows from when the fabric was on the bolt. If it doesn’t show, lay the fabric on your table to the stitched end lays flat and is on one side. The fold created on the other side will fall on the center. Mark the fold with a pin or a light pencil mark. Place the seam at that point.
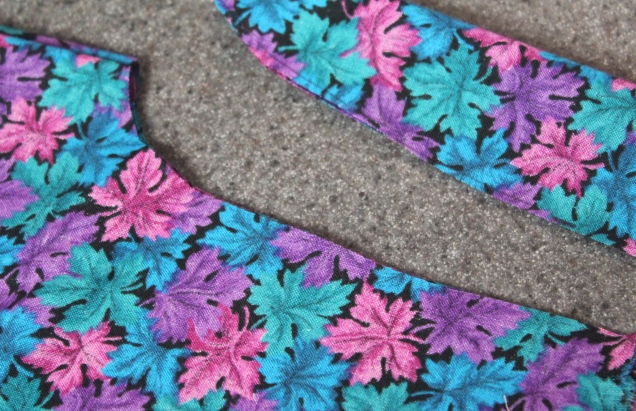
Fold the fabric in half with the seam to the inside. The armholes are cut on the side with TWO folds. Mark a point two inches in from the two folds on the end of the fabric. Measure 5 inches down and mark on the fold. Connect the two points with a “J” curve as shown in the picture. Cut the armholes.
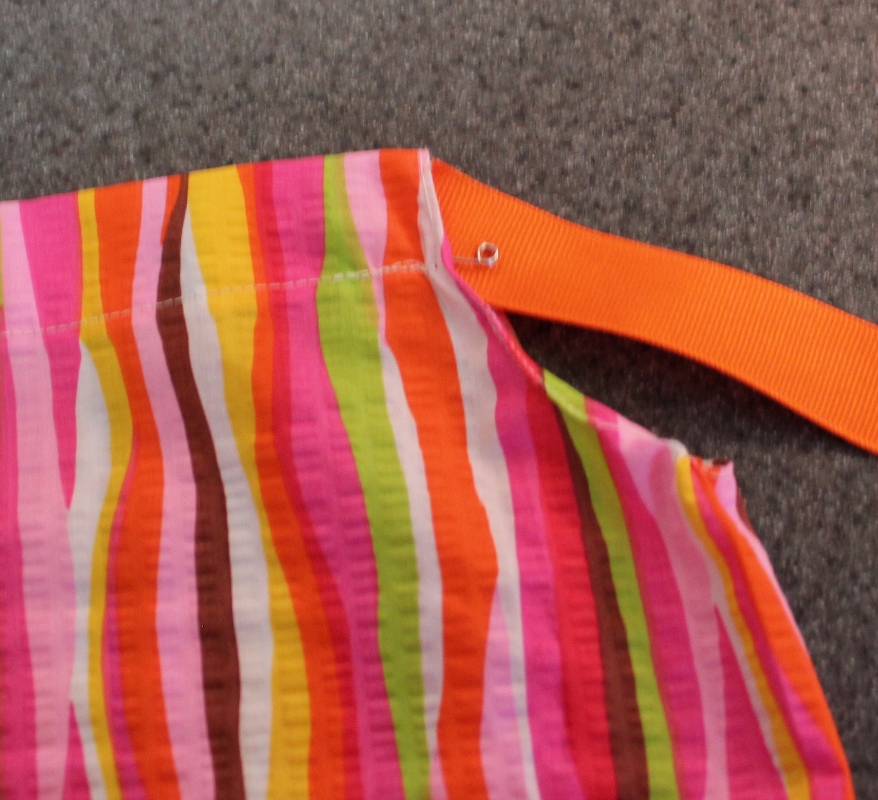
There are two ways to finish the armholes. Bias tape can be used to bind the armhole. I prefer to just put in a quarter inch hem like this: While the fabric is still on the work surface, fold over 1/4 inch of fabric all the way around the armhole. If fabric does not lie flat, use the point of your scissors to snip from the edge to the fold. This will open the curve and flatten the fabric. Repeat the quarter inch fold to make a double fold. Pin if needed to hold fabric in place. Press and then stitch armhole hem in place.

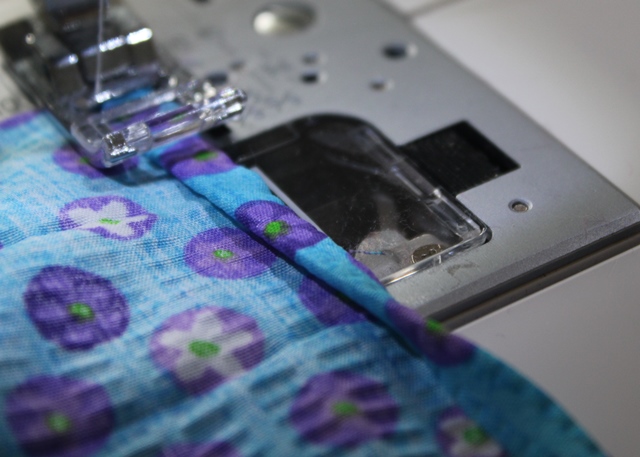
With the wrong side of the fabric still on the outside, place it on your work surface. On the end between the armholes, measure down one half inch and fold, pinning or pressing to hold in place. Measure down from that fold, one and a half inches. Make a second fold at that point toward the the center of your garment. Press or pin to hold in place. This forms the casing for your one inch wide ribbon. Stitch along the edge of the casing as shown. Beginner note: At the end of each casing reverse the stitch without cutting the thread. This means you will stitch backward for a few stitches. Release the reverse button and stitch forward again until your needle is off the fabric. The triple stitching that you create this way, makes the end of the stitching stronger. It will be better able to resist tearing out if the ribbon is pulled too hard.
Repeat this procedure at the bottom of the dress, measuring down one and a half inches for the first fold. Fold again at the edge of the first fold. You will end up with a double fold one and a half inches wide. Press or pin the hem in place. Pressing gives the finished garment a more polished look for its lifetime as it “locks” in the seams and folds. Stitch around the entire dress along the edge of the hem. Beginner note: You can make hems as small as one fourth inch wide. The narrower the hem, the longer the dress. Handy to know when sewing for a tall child! Also a helpful adjustment to know if your fabric is a little less than a yard in length!
Hint: If you are making more than one dress, take thirty seconds to make a template for the casing and the hem. Having a template will save you tons of time! I used the back of an instant oatmeal box to make mine. On one side, measure down one half inch on the two ends. Mark those two points and draw a line connecting them. On the other side, make your line one and a half inches from the edge. To use template: Place it on the fabric near the edge. Fold the fabric over and adjust the template and fabric until the fabric lies smooth. The edge of the template should be in the fabric fold and the edge of the fabric should be on the line. Press the fold with an iron on medium heat. Phew!!! That took way longer to explain than it will take you to actually do it!
Cut two pieces of ribbon, each 45 inches long. Fasten a safety pin on one end of a ribbon and begin to work it through the casing.
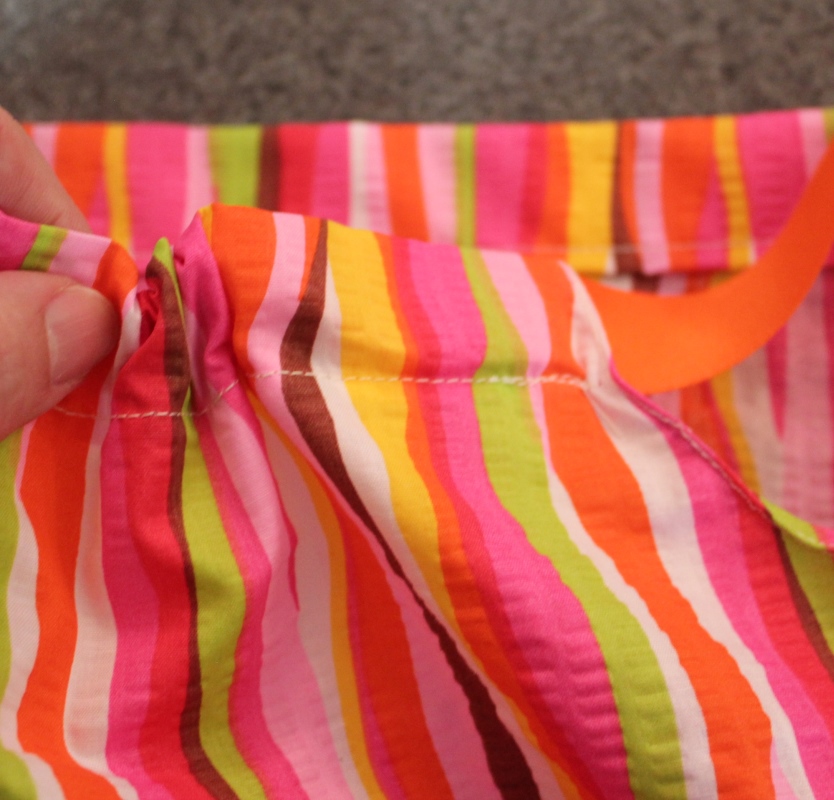
Push and scrunch the pin through the fabric, smoothing out gathers along the ribbon. When pin and ribbon emerge on the other side, pull the ribbon through so that an equal amount is on either side. Pull the second ribbon through the second casing and adjust ribbons if needed. Find the center of each casing (measure or eyeball, either one). Stitch from the edge of the dress to the line of stitching, reverse to the edge of the dress and come forward to the line of stitching again. This creates a strong line of triple stitching to hold the ribbon in place so it does not come out when laundered.

D O N E !!!
You can leave your Pillowcase Dress plain as I did or your can add pockets, ties, ruffles and so much more. Check out my Pillowcase Dress Board on Pinterest here for inspiration!
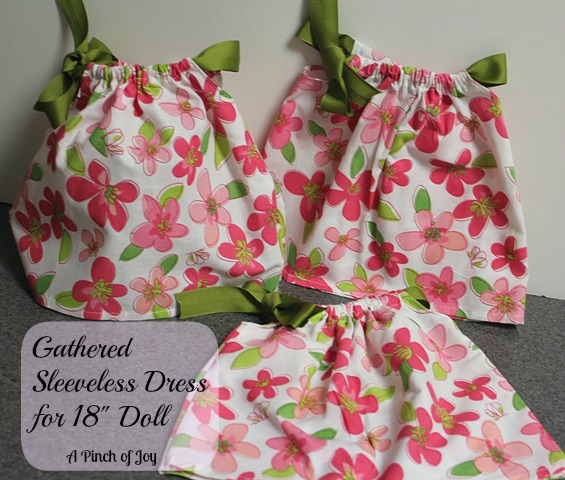
Make a matching dress for a doll
You might also like
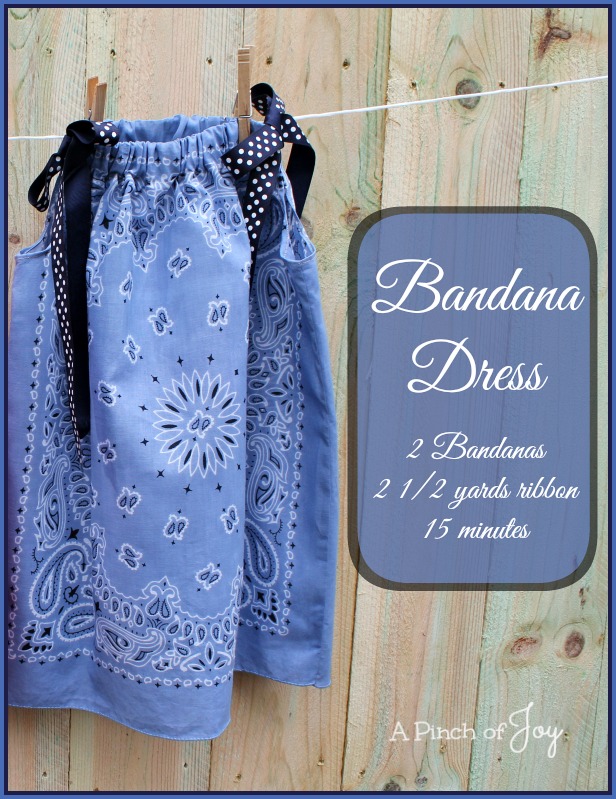 How to Make a Bandana Dress
I’m so glad you stopped by today! Be sure to follow A Pinch of Joy so you don’t miss a thing! Subscribe by email on the sidebar or follow on Facebook, RSS feed, bloglovin’ twitter and check out my pinterest boards. If you found this helpful or inspiring please share below! Your support of A Pinch of Joy is appreciated!
Discover more from A Pinch of Joy
Subscribe to get the latest posts sent to your email.

 Welcome! I’m Charlene. I love to share quick and easy recipes, whatever I’ve learned in our last DIY project – anything that helps make life easier, better and more fun!! I hope you will find inspiration and add a pinch of joy to your day!
Kathy Moody says
This is so adorable and such a great idea! I love it. Thank you so much for sharing at A Bouquet of Talent last week. So thrilled to have you join the party! So sorry I am late visiting. Hope you are having a wonderful weekend. 🙂
XO
Kathy
Linda says
Your pillowcase dresses are sweet. Wish I had known how to make them when my girls were small. Looking forward to scrolling through more of your blog.
Linda
mysewwhatblog.blogspot.com
Charlene says
Welcome!