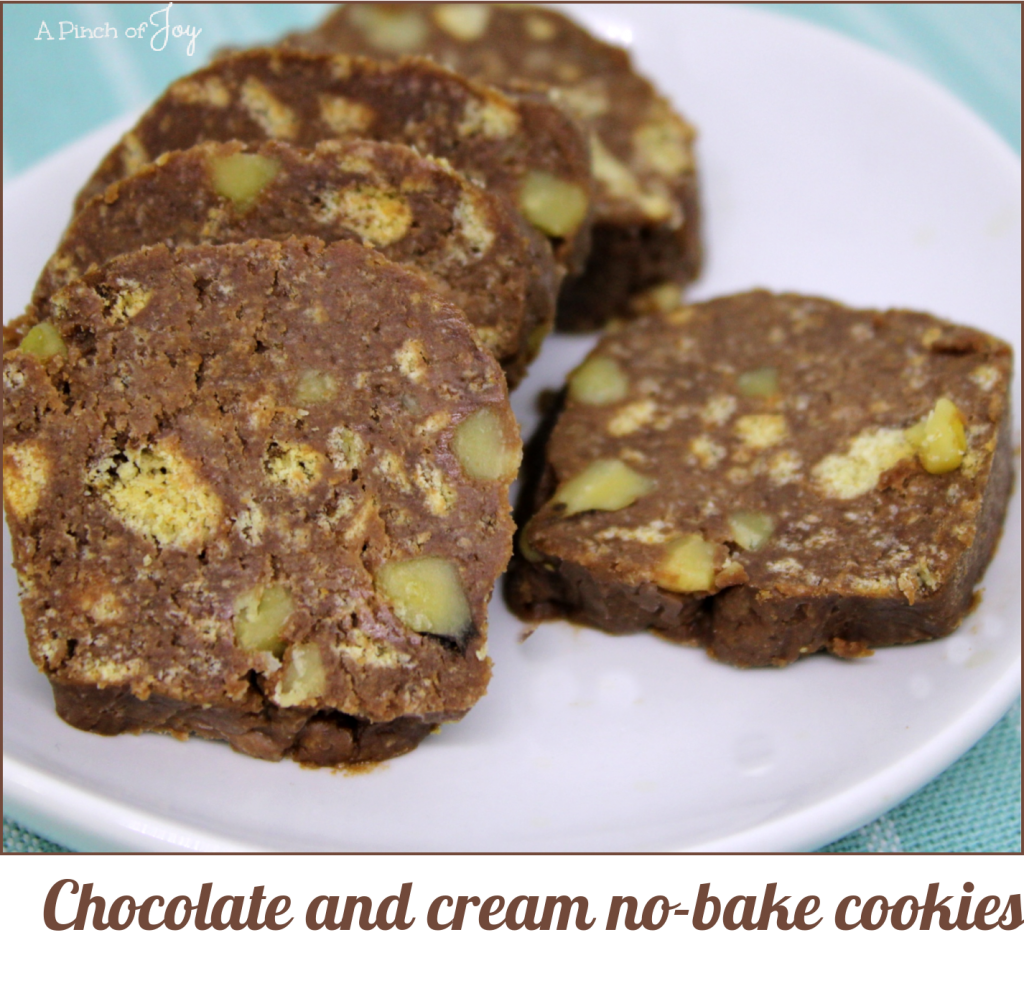
Peppermint Patties

Peppermint Patties:  A Pinch of Joy made all the mistakes so you don't have to!

 I asked Bytes what kind of birthday cake he wanted.   None, he says, but I do have a recipe  you could make instead.  He disappeared into that mysterious office and popped back with a recipe for peppermint patties.  You know the kind that makes your breath arctic fresh and makes little hand drawn pictures swirl around your head. 

Easy peasey!   Ummmmm —- w e  l l l.  You know what they say about not judging a book by its cover?  Well, you CAN judge a recipe by its brevity.  A list of ingredients is good.  A few instructions are good.  Some detail in instruction is even better.  But handholding is greatly underestimated.  The directions for this recipe said “Mix. Form log. Chill 45 min. Cut and dunk in chocolate.”  The one I’m giving you below — that one includes hand holding!

 I used the mixer to make the filling.  Went exactly as expected and came together beautifully.  I laid out a piece of waxed paper on the counter and lightly dusted it with powdered sugar.  Not in the directions, but I’d made refrigerator cookies in 4-H once.  That’s what you do.  I took a spatula and pushed the filling around in the bowl until it was all in one piece and shaped like a fat log.  Then I lifted it out and rolled it a bit on the waxed paper to lengthen and shape it.  Quickly done. 

Log o mint filling

Roll up the filling in the waxed paper and put it in the refrigerator to chill over night.  The directions said 45 minutes but by the time I got back to it, I thought a night’s sleep was also important so I over rode the directions.  This one actually turned out to be good. 1) It helped “mature”  the flavor of two teaspoons peppermint flavoring.  2) Being thoroughly chilled is important to the finished product.

slice mint filling

 Slice the chilled filling into quarter inch pieces.  What I should have done – wrap half the slices and put them back in the refrigerator to stay chilled.  Repeat: Being thoroughly chilled is important to the finished product.

Last piece

  While you are doing that, melt the chocolate coating in the microwave according to package directions.  I chose a low flat bowl, thinking it would give me room to work.  I ended up with everything squished into one corner to make it deep enough to dip the filling in, even before I got to the last piece shown here.  A regular cereal bowl or any microwave safe bowl that size would work fine and keep the chocolate warm, therefore fluid.  And deep enough to dip.

Put the slice of filling in the chocolate.  Work quickly to spoon chocolate over the top of it.  Scoop it out with a fork, smooth off the excess with the back of a kitchen knife and use the knife point to shove the candy off the fork to its resting place.  You don’t even want to know what didn’t work.  You also don’t want to know  what happens if you dally around taking pictures  with the candy setting in the warm chocolate.  Or if you put a room temperature piece of filling into the chocolate.  Droopage, that’s what happens. 

 I put a piece of waxed paper on the counter and set a rack over it to cool the dipped chocolate.   Big mistake.  Skip the rack and go straight for the waxed or parchment paper on the countertop.  When the candy cools, you will find it very difficult to remove from the rack.  When you do, it will look like this:

 back side of mints

I managed to salvage a  dozen peppermint patty mints that look pretty good  okay    edible from the top.  And another couple of  dozen  that are badly wounded.  But I’m pretty sure that didn’t hurt the taste.  Actually, I KNOW it didn’t hurt the taste.  I kept checking it out.  Just for you, of course. 

 Happy Birthday, Bytes. 

Peppermint Patties

Yield: 36 patties

Serving Size: 1 patty

Peppermint Patties

A delightfully refreshing mint wrapped in sweet chocolate.

Ingredients

  • 2 1/4 cup powdered sugar
  • 2 Tablespoons butter
  • 2 teaspoons peppermint extract
  • 2 tablespoons cream OR half and half
  • 12 ounce chocolate candy melts

Instructions

  1. Mix the powdered sugar, butter, cream and 2 teaspoons peppermint extract with mixer until smooth and creamy.
  2. Place waxed paper on counter and dust with powdered sugar.
  3. Use two spoons or spatula to form mixture into an elongated ball in the bowl.
  4. Lift mixture onto waxed paper and quickly roll into a uniform log. Handle as little as possible as the heat from your hands will make it sticky.
  5. Roll log into waxed paper and chill for at least one hour. Overnight is better.
  6. Place candy melts in microwave safe bowl and melt according to package directions.
  7. While candy coating is heating, remove log from refrigerator and slice into uniform slices 1/4 inch thick. Return half the slices to the refrigerator.
  8. When candy coating is melted, place a filling slice on a fork and quickly dip into the chocolate. Use a spoon if necessary to lift chocolate over the top of the slice.
  9. Let chocolate drip back into the bowl for a few seconds, then push the candy off the fork with a sharp knife point onto a piece of waxed paper or parchment paper.
  10. Let chocolate harden before serving.
  11. Store in the refrigerator.

Notes

Charlene @ A Pinch of Joy

http://www.apinchofjoy.com/2013/04/peppermint-patties/

To save this recipe to your ZipList Recipe Box, click the blue button.  To find out more about ZipList, click here.

I am so glad you stopped by!  Follow A Pinch of Joy so you don’t miss a thing!  Click the buttons on the header to subscribe by email or RSS feed, follow on facebook or twitter to catch the latest post!    If you found this helpful, please share on your favorite network by clicking one of the buttons on the bottom of this post.


~~~~~~~~~~~~~~~~~~~~~~~~~~~~~~~~~~~~~~~~~~~~~~~~~~~~~~~~~~~~~~~~~~~~~~~~~~~~~~~~~~~~~~~~~~~~~~~~~~~

Linking up to these awesome parties here [Read more...]

Related posts:

How to make chocolate mousse – a Saturday Share

Rich and indulgent, chocolate is often at the top of everyone’s list of special treats. In this video, The Skinny Chef Jennifer Iserloh shows you how to make a healthier version of a creamy chocolate mousse.

Email subscribers – if you don’t see the video, click on the title to go directly to A Pinch of Joy website.

Related posts:

Sweet News about Dark Chocolate

Vintage advertisement for cocoa and chocolate

Several years ago, for Valentine’s Day Wheels gave me two bags of Dove Dark chocolate and a magazine article about the health benefits of dark chocolate.  He’s a keeper!  Gave me chocolate and a reason for eating it!  If you need a reason to eat your Valentine chocolate, you’ve come to the right place!

Surprisingly, chocolate is much better for health than Americans recently believed.  In fact, the earliest use for chocolate was medicinal. Chocolate is plant based, as are the fruits and vegetables recommended for good health.    Used by the Aztecs to keep public officials healthy and give their warriors strength and endurance, the beans of the cacao tree were made into a frothy bitter brew.  The Spanish explorer Cortes took cacao beans back to Europe where it was used medicinally and also became a popular drink. Later, it was given its scientific name, theobromo cacao, or “Food of the gods”. But then people began adding milk and sugar and chocolate’s health benefits were forgotten.  If you wrap it around quantities of caramel, nuts, marshmallow cream fillings, not only does the calorie meter go through the roof, but the real benefits of chocolate are cancelled out.   Just the  chocolate, ma’am – just the chocolate.

Many of the  processes used in processing cacao beans around the turn of the century were designed to remove the bitterness – but also removed health benefits associated with chocolate.  Dark chocolate maintains more of the original flavor and the flavenoids that make it healthy.  In general, the darker the chocolate the more health benefits.  However, several manufacturers have recently developed new processes that preserve up to 95% of the flavenoids (including the makers of Dove).   According to all chocolate. com, some of the specific health benefits of eating dark chocolate include:

  • improves cardiovascular health thanks to high amounts of  flavenols, plant based antioxidants similar to those found in green tea and blueberries
  • Anti-aging properties, also due to the antioxidants
  • Reduces moderately high blood pressure and improves blood flow
  • Helps prevent the build up of plaque in arteries from cholesterol
  • Maintains an even level blood sugar level because of its low glycemic index
  • For people at risk for diabetes, flavanols help restore more normal function between  cells and insulin to better control blood sugar.
  • Source of significant amounts of  copper, potassium and magnesium, minerals that are crucial in cardiovascular health and prevention of type 2 diabetes.
  • Improves mood

Studies  point to 1 ounce of dark chocolate daily as the optimum for health.  Dark chocolate is lower in calories than its milk  chocolate cousin, but unfortunately still is higher in calories than other plant based sources of heart healthiness.  Enjoy your daily square of chocolate – but don’t overdo!!

And the story of the case of tuna is for another Valentine’s Day!

Don’t miss a thing!  “Like”  A Pinch of Joy on facebook, subscribe to receive new posts by email, follow on twitter or RSS feed.

Illustration courtesy of the Graphics Fairy. If you haven’t met the Graphics Fairy yet, take a trip to the website where she has been  loading vintage graphic images every day since 2007.    Click on her name above to go to home page or this link will take you to the chocolate image as seen above.

If you’d like a free printable of this exquisite child advertising chocolate, “like” a Pinch of Joy on facebook and then go to the exclusive downloads link.

Related posts:

Chocolate Cheese Ball

Wheel’s sister, Ela, emailed this recipe with glowing recommendation!  She  made it several times  and had rave reviews each time.   This photo, by daughter Ali, is from their family Christmas celebration.

Ela used chunky peanut butter and  1/2 cup semi-sweet chocolate chips. She chopped walnuts in which to roll the finished cheeseball, but says pecans or peanuts would also work well.    Ela said she is looking forward to experimenting a bit with adding other ingredients such as coconut or crushed peppermint candies.  Just keep it easy to spread.  This time she added a chocolate bar chopped into small chunks (made about 1/4 to 1/3 cup) .  Sounds like a versatile recipe!

Enjoy!

Chocolate Cheese Ball

Chocolate Cheese Ball

Ingredients

  • 1 8 oz. pkg. cream cheese, softened
  • 1/4 cup butter, softened (1/2 stick)
  • 1/4 cup peanut butter
  • 3/4 cup confectioners' sugar
  • 2 Tbsp. brown sugar
  • 3 Tbsp. unsweetened cocoa
  • 1/2 cup chocolate chips
  • 1/3 to 1/2 cup bits o' brickle
  • 2/3 cup finely chopped nuts

Instructions

  1. Beat cream cheese, butter, and peanut butter until creamy.
  2. Stir in remaining ingredients, except nuts. Cover and refrigerate for 2 hours, or until firm.
  3. Shape the mixture into a ball and cover with the chopped nuts by patting the nuts over the ball, OR putting the nuts on a plate and rolling the cheeseball in them.
  4. Store in refrigerator, but allow to soften by letting it set at room temperature for 20-30 minutes before serving.
  5. Serve with graham crackers, vanilla wafers, apple slices, pretzel crackers or your choice.
http://www.apinchofjoy.com/2011/12/chocolate-cheese-ball/

Don’t miss a thing!  Follow A Pinch of Joy on facebook, twitter, RSS, bloglovin’ or by email.   The holiday downloads on facebook disappear at the end of the year so “like”  for access.  If you are already a follower, look for the exclusive download link on the upper left!

Related posts:

Grandma’s Peanut Butter Double Chocolate Bars – no bake

Peanut Butter Double Chocolate bars - A Pinch of Joy

Christmas at Wheel’s family farm included candy.  Lots and lots and lots of candy.  After dinner dishes were done, Grandma would bring out the candy and start filling the dining room table. The sisters would dive into bags, boxes and carriers for their contributions.  The table would start to groan and candy would overflow onto other surfaces.   The “it takes a special touch” kind of candies – divinity, penuche, peanut brittle.  The smooth chocolate candies. Peanut butter fudge.  Cherries.  Nuts. Coconut.  Dipped candies.  The cereal, marshmallow and kid friendly candies.   But I zeroed in on the Peanut Butter Chocolate confection Grandma made.  So good!!!

This is a very simple recipe – four ingredients counting the secret and unexpected one.  It’s faster to make with a food processor and the microwave, but easily done by hand.  I cut the recipe in half to make 32 pieces in an 8×8 pan instead of the 48 pieces Grandma made in a 9x 13.   Line the 8×8 pan – not to keep the candy from sticking as in the Best and Easiest Gift Fudge – but to make “handles” so you can lift the candy out of the pan for slicing without losing a single piece.  The bottom layer of chocolate is optional.  I omit it  unless I am making this for a gift or a party.  (Added later:  Store brand chocolate chips may set up too firmly for this soft peanut butter mixture. )   The candy is pretty rich so slice it into one inch by 2 inch bars – or even 1 inch squares fancied up in paper candy cups.  I’ve always thought this would be pretty at Christmas time with a little drizzle of red or green, but it never lasts long enough to try that!    Oh – the secret ingredient?   Graham cracker crumbs give it body and texture.

You can buy this candy in the store with a bright orange wrapper — aka Reese’s Peanut Butter Cups!


This recipe was featured on Kristen’s Creations, The Craft Barn,

Grandma’s Peanut Butter Double Chocolate Bars – no bake

Grandma’s Peanut Butter Double Chocolate Bars – no bake

Ingredients

  • 2/3 cup graham cracker crumbs (6 sheets of graham crackers)
  • 1/3 cup butter melted
  • 3/4 cup peanut butter
  • 1 3/4 cups powdered sugar
  • Chocolate top and bottom:
  • 1 1/2 cups chocolate chips – 3/4 cup for each layer, preferably Nestle's or Hershey's

Instructions

  1. Line 8x8 pan with waxed paper
  2. Make chocolate bottom -- optional. Melt 3/4 cup chocolate chips in microwave 40 seconds on high and then in 20 second intervals until chips become soft and begin to lose shape. Stir smooth. Spread in waxed paper lined 8 x 8 pan and place in refrigerator to harden. You can do this step ahead of time, even a day or more in advance.
  3. Make graham cracker crumbs, if using whole crackers, by pulsing in food processor until fine OR using rolling pin to crush.
  4. Melt butter 30 seconds in microwave, 10 second bursts until loses shape and add to graham cracker crumbs, Pulse in with two 10 second bursts. OR stir in well.
  5. Add peanut butter and pulse once for 10 seconds OR mix in well.
  6. Add 1 cup powdered sugar and pulse OR stir until well mixed. Add ¾ cup powdered sugar and mix well again. Mixture will form a soft but defined. slightly dry looking ball.
  7. Add peanut butter mixture to 8x8 pan and press down into even layer.
  8. Make chocolate topping. Melt 3/4 cup chocolate chips and in microwave 40 seconds on high and then in 20 second intervals until chips become soft and lose their shape. Spread over peanut butter bars.
  9. Refrigerate for 1-2 hours until firm. Let set at room temperature for a few moments before cutting so chocolate will slice without breaking. Cut into 1 x 2 inch bars to place on plate or 1 inch squares, if using paper candy cups.
http://www.apinchofjoy.com/2011/12/grandmas-peanut-butter-double-chocolate-bars-no-bake/

Don’t miss a thing –  subscribe by email or RSS feed, follow on facebook or twitter to catch the latest post!  If you found this post helpful, please  give it a Stumble, Tweet, Pin, or Facebook Like. Your support of A Pinch of Joy is greatly appreciated!

 If you’d like the bigger recipe without doing all the math, you can find it on A Pinch of Joy Facebook page. “Like” if you are not already a follower.   And just because I think it is interesting to see how recipes change, Grandma’s original is on the same download.


Related posts:

Best Easy Gift Fudge

Best Easy Gift Fudge -  A Pinch of Joy

Awesome, smooth and oh, so chocolaty!  This  simple and easy recipe came to me literally on a plate. A plate with three kinds of fudge dreams to delight the tastebuds.  And, such a sweet friend, she included the basic recipe!  Make it once and it will become your signature gift, too.

Line an 8×8 pan with waxed paper, covering the bottom and up the sides.  Do NOT skip this step or you’ll be sorry!!!!  No, armed thugs won’t show up at your door threatening to break your legs.  It’s just that the fudge will come out in messy spoonfuls instead of beautiful, giftable squares.  In a pinch, you can substitute parchment paper.  Waxed paper is best so add it to your shopping list.  Even if you don’t use it again until next year, it is worth it.

If you buy chocolate chips in 12 oz bags, you will need one and a half bags for this recipe.  Pour all ingredients into a flat bowl or pan so ingredients heat uniformly and can melt together.   Microwave on high for 1 and one half minutes (90 seconds).  Remove and stir thoroughly, bringing up the melted mixture from the sides and folding it in and then stirring widely so what was in the middle moves out to the sides. Not as complicated as it sounds!  Microwave one more minute (60 seconds).

Pour into your prepared waxed paper lined 8×8 pan.  Refrigerate for at least two hours so it is set.  Yes, you can speed up the process by putting it in the freezer for an hour – not long enough to freeze, but until it sets well.  And yes, if you live in an area where it is really cold in the winter and want to make multiple batches at one time, you can set them on a clean spot in the unheated garage to cool.  We won’t go into the details of how I know that – ‘mkay!

Cut and package beautifully.  Gift worthy of kings and the royalty in your life — neighbors, friends, coworkers, teachers, mail carriers and anyone else who deserves a royal treat.


Best Easy Gift Fudge

Best Easy Gift Fudge

Ingredients

  • 1 can sweetened condensed milk
  • ¼ cup butter
  • 3 cups of chocolate chips

Instructions

  1. Line 8 x 8 pan with waxed paper across the bottom and up the sides. Do not skip this step!
  2. Pour all ingredients into large shallow microwave safe bowl,
  3. Microwave for 90 seconds.
  4. Mix thoroughly until all ingredients are well incorporated.
  5. Microwave 60 seconds.
  6. Pour into waxed paper lined pan, smoothing into corners and making an even layer of fudge.
  7. Refrigerate for about 2 hours until firm before cutting.
http://www.apinchofjoy.com/2011/11/best-easy-gift-fudge/

Linked to some of these awesome parties:  [Read more...]

Related posts:

No Bake Chocolate Cookie Gems

No Bake Chocolate Cookie Gems - A Pinch of Joy

Bytes decided he was in the mood for Grandma Call’s  no bake chocolate cookies.  It was a favorite of his.  And of Grandma’s thirteen other grandkids who wandered through her kitchen.   She always had some goodie tucked away for their visits and this was a frequent flier!  When the clink of the cookie saver lid was heard from the kitchen, it was usually a taller grandchild helping themselves and a cousin.  Or one of the adult kids or spouse.  Too close to dinnertime and Grandma would peer around the corner into the kitchen and warn the red handed cookie holder that mealtime was imminent. But if  timed  right, she would pretend she didn’t hear a thing and the pilferer was home free.

For one of her birthdays, the family compiled a  book of Grandma’s classic recipes, including this one.  Originally it called for four cups of sugar, but that’s pretty sweet for modern taste so it was reduced somewhere along the line.  One sister noted  this was a “flexible” recipe – Grandma would omit the coconut if she was out, or add raisins or a bit of cereal of whatever kind needed to be “used up so it wouldn’t go to waste.”  Another sister noted that this was most frequently made on Sunday afternoons.  Her recipe, in Grandma’s small, hurried but precise handwriting, notes on the bottom that it was from Party Line, a call-in radio program with a recipe segment. I haven’t seen it, but I’ll bet it was written on the back of an envelope!

Use a medium heat for cooking the chocolate syrup.  If heated too quickly or too hot, the sugar will crystallize and the cookies will be crumbly.  Stir constantly while mixture is boiling for the same reason — to keep the sugar from crystallizing.  (What?  It’s only two minutes!  See wooden spoon tip on this post.)  Adding the chocolate mixture into the oatmeal and coconut  needs to be done quickly or the mixture will begin to set up.  I keep a bit of milk close at hand, because sometimes that is necessary to keep the mixture moist enough to drop onto the paper.

Bytes must have mastered the technique.  The cookies disappeared in less than two days.  The few he shared with  friends brought a request for the recipe.  Here it is – and you get to share in this classic too!

No Bake Chocolate Cookie Gems

No Bake Chocolate Cookie Gems

Ingredients

  • 3 ½ cups sugar
  • ½ cup cocoa (3/4 cup for more flavor)
  • 1 cup milk
  • 1 cup margarine
  • 1 teaspoon vanilla
  • 2 cups coconut
  • 6 cups quick oats (18 oz box)

Instructions

  1. Measure oatmeal and coconut and mix together in large container.
  2. Place waxed paper or parchment paper on counter ready for cookies.
  3. Stir together, sugar, cocoa and milk in large saucepan over medium heat.
  4. When well mixed, add butter. Butter will melt as the mixture heats.
  5. Bring mixture to boil, stirring frequently.
  6. Boil for two minutes over MEDIUM heat, stirring constantly with long handled wooden spoon.
  7. Turn off heat and add vanilla.
  8. Pour over oatmeal and coconut mixture and stir everything together quickly with wooden spoon.
  9. Drop by tablespoonful onto prepared paper.
  10. Cookies will harden as they cool.
  11. Yield: 4 -5 dozen depending on size.
http://www.apinchofjoy.com/2011/11/no-bake-chocolate-cookie-gems/

If you enjoyed this recipe, please pin it using the button at top or share with one of the buttons below.  You can subscribe by email or RSS feed, follow on facebook or twitter so you don’t miss a thing.  I’d love to have your company on this venture!


Linking to these awesome parties:  It’s a Blog Party Cookie Swap,


Related posts:

Hot Fudge Sundae Cake

Hot Fudge Sundae Cake - A Pinch of CakeApple Valley Sue sent this recipe saying “This is the best recipe.  You can make it in 10 minutes.  Put it in the oven right when you start the meal and you have a hot, delicious dessert.”  I did and it was!  Thank you for sharing!

Being curious and of questioning mind, I actually made this several different ways.  Maybe the second time was because the first time my curious mind did not register the correct size of pan – which Sue clearly stated in her email.  Be sure to use a square 9 x 9 pan.  Just sayin’.  The recipe as written will turn out fudgy, sundae saucy and yummy!

I really was curious as to how this could make the fudge sauce under the brownie.  The secret is the sugar.  Sugar is not just a sweetener.  It is a hardworking part of the complex reactions that take place in baked goods.  In this recipe, sugar’s primary role is to attract moisture.  The brown sugar on top attracts even more moisture than white sugar, besides giving a more robust flavor.  As the saucy cake bakes the layers begin to build, with the heavier moisture laden sauce layer collecting on the bottom of the pan and the lighter cake layer coming together on top.   Just to see what happened, I made it again and reduced the amount of sugar in each layer by one quarter cup and was rewarded with pudding on the bottom instead of sauce.  Good, but no comparison to the original.

Sue says to let the cake cool for 15 minutes, then cut the cake into squares.  Serve warm with  ice cream, topped with the sauce scooped from the bottom of the pan.  Enjoy!

This recipe was featured at Miz Helen’s Country Cottage, RoCa and Company,     Thank you!


Hot Fudge Sundae Saucy Cake

Hot Fudge Sundae Saucy Cake

Ingredients

    Mix together in 9 x 9 square pan, greased
  • 1 cup flour
  • ¾ cup white sugar OR Splenda for Baking
  • 3 Tablespoons of cocoa
  • 2 teaspoons baking powder
  • ½ teaspoon salt
  • Mix together in measuring cup, then pour over dry ingredients and mix well.
  • ½ cup milk
  • 2 Tablespoons canola oil
  • 1 teaspoon vanilla
  • Mix together and shake evenly over the cake
  • 1 cup brown sugar (packed)
  • ¼ cup cocoa
  • Pour evenly over the entire cake and topping. DO NOT MIX!
  • 1 ¾ cup hot water

Instructions

  1. Preheat oven to 350 degrees, while following directions above
  2. Bake 40 minutes
  3. Let cool 15 minutes
  4. Cut into squares and invert each on to plate.
  5. Serve with ice cream topped with the sauce scooped from the bottom of the pan.
  6. Nine servings.
http://www.apinchofjoy.com/2011/10/hot-fudge-sundae-saucy-cake/

Don’t miss a thing!  Follow along by email, RSS, twitter or facebook!    If you found this post helpful, I would love it if you gave it a Stumble, Tweet, Pin, or Facebook Like. Your support of A Pinch of Joy is greatly appreciated!


~~~~~~~~~~~~~~~~~~~~~~~~~~~~~~~~~~~~~~~~~~~~~~~~~~~~~~~~~~~~~~~~~~~~~~~~~~~~~~~~~~~~~~~~~~~~~~~~~~~~~~~~~~~~~~~~~~~~~~~~~~~~~

Linked to: Taking A Timeout Thursday, Mouth Watering Monday, Joy of Desserts, Sumos Sweet Stuff,  Tasty Tuesday , Delicious DishesTea Party Tuesday, Crazy Sweet Tuesday, Totally Tasty Tuesday , Cast Party Wednesday , This Chick Cooks , Full Plate Thursday , Show Off Your Stuff, Hookin’ Up, Simply Link Party Making It with Allie, It’s A Keeper Thursday,  Strut Your Stuff Saturday, It’s A Rockin’ Party, Sweet Tooth Friday,


Related posts: