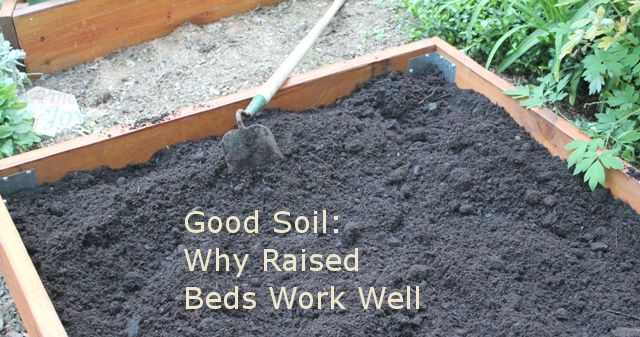
Here is how we built our raised garden beds. The next step is to add soil – a step which provides major benefits for using raised beds. The saga continues:
To fill the beds we had the choice of having soil delivered on the driveway and wheel barrowing it to the back lot line. Or purchasing bagged soil. For the relatively small quantity we needed, the cost factor was almost a tossup. And we didn’t build the boxes all at once so there would have been dirt in the driveway for a couple of weeks. So Bytes and his bubbly friend Angle drove to the local general store.
I had figured the cubic yards of dirt necessary to fill each box. Width times length times depth. Start out by finding cubic feet. Oops — the height is in inches – no problem! Divide that number by 12. In our case the height was 10 inches. 10 divided by 12 (inches in a foot) is .8 ft. Each of the sides was four foot. So 4 ft multiplied by 4 ft multiplied by .8 ft. gives us 12.8 cubic feet. To find cubic yards divide by 9 (3 feet x 3 feet x 3 feet).
Only they couldn’t find cubic yards OR feet marked on the bags. Seems as though mulch comes that way. Not dirt. In bags. At the general store. So they took a guess. And made a second trip.
The soil they brought back was top quality garden soil, mixed with compost, manure and peat. We ended up leaving a couple inches at the top to allow for working more compost into the mixture each year. Most of the vegetables and herbs we planned to plant were shallow rooted so six to eight inches was an adequate soil base. (And it saved a third trip!) Bytes and Angle spread the dirt evenly and were careful not to compact the planting beds by stepping on them.
A benefit in using raised beds is being able to improve your soil conditions and you can even grow plants in areas with extremely inhospitable soil. If your garden is sandy or you have a lot of very heavy clay as ours does, it can be difficult to grow much in it. By creating a raised bed, you can create your own soil mix or put purchased soil mix into the frame. Happy plants!!!
Because you are starting with fresh soil, weeds are also less problem in a raised bed. Weed seeds in the existing soil are buried under far too much soil to sprout. We also put down a layer of cardboard to discourage any weeds or other invasive plants that were in the existing ground. As I mentioned before, the cardboard will eventually disintegrate and become part of the soil. If any weeds do pop up, they are easier to spot in the raised bed. They can be removed easily and quickly before they have a chance to spread or do other damage.
One of the biggest benefits is the ability to harvest more produce from the same space. Raised bed gardens can actually double or even triple the amount of produce harvested from the space! This is due to the fact that the square footage needed for pathways is reduced considerably, and more space can be devoted to the plants. Next: Adventures in Planting
Thanks, Angle, for your help!
If you enjoyed these tips, please feel free to pin using the button at top or share with one of the buttons below. You can subscribe by email or RSS feed, follow on facebook or twitter so you don’t miss a thing.
Discover more from A Pinch of Joy
Subscribe to get the latest posts sent to your email.


 Welcome! I’m Charlene. I love to share quick and easy recipes, whatever I’ve learned in our last DIY project – anything that helps make life easier, better and more fun!! I hope you will find inspiration and add a pinch of joy to your day!
Tamara @ Etcetorize says
Great tips! Thanks so much for sharing at Etcetorize this week~