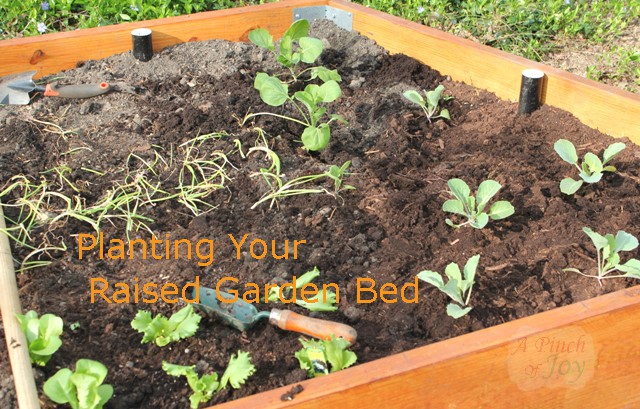
Wheels and I have been intrigued by the idea of square foot gardening for a long time. With a very early spring, and a schedule that was a little more flexible than usual, we decided this was the year. Wheels and Bytes figured out how to build raised garden beds here. Bytes and friend filled them with organic soil, a mix of about 1/3 peat, 1/3 soil and 1/3 compost. And I got busy planning.
Square foot gardening requires about 80% less space and produces 5 times more than usual gardening. It uses less water, is all organic, and uses far fewer seeds than traditional gardening. The raised bed is divided into one foot square sections that house plants of various sizes. We saw pictures that used string to mark the grid, but didn’t think that very weather worthy. We decided to just mark out the squares in the dirt before we planted, on the theory that once the plants were in the ground they didn’t care about the grid.
If you want to grow a large plant like broccoli or cabbage, it takes one entire square foot of that grid. If you want to grow radishes, section that square foot into sixteen separate spaces, each one housing a single radish! This was getting a little complicated. I went online. I looked at several interactive garden planners, then came back to the first one tried — Gardener’s Supply Company. It’s fun to use – easy to change. Drag that radish into a square and it populates it with the correct number. Pop in a green pepper icon and it enlarges to fit the full square. The interactive planter calculated the number of each variety of plant we could use in the space we had. Best of all, you can print a copy to take with you!
I knew I wanted one of the four foot beds for herbs, like chives and basil. For the other two beds, we made a list of the vegetables we like and that should grow well in our zone. Nothing fancy or complicated. Things like beans, peas, tomatoes, lettuce, kohlrabi and radishes for Wheels, cabbage, beets and green peppers. We chose the ones we knew would grew in cooler weather to plant first, about six weeks before our frost free date.
Spring days were unusually warm but night temperatures were still on the cool side. We looked forward to bountiful harvests of spring crops. Our plan told us just how much of that wonderful produce we could expect. We adjusted a little bit to make sure there wouldn’t be a shortage of the things we really liked or an oversupply of the vegetables that were marginal on our list of favorites.
We went on to lay out plans for the remainder of the gardening season. After warmer weather arrived we would remove the spent spring plants and replant the garden with summer crops. They, of course, required a whole new set of plans but this was getting easy and it was fun! And then in the fall when it began to cool down, we’d plant cool weather crops again. Another set of plans. Three harvests, one season of organic, fresh vegetables from our own garden.
That was the plan.
We made a trip to the garden center.
Our plan quickly began to fall apart.
To Be Continued . . . . Planting a Raised Garden Bed, The Good, the bad and the ugly. here
I’m so glad you stopped by today! Be sure to follow A Pinch of Joy so you don’t miss a thing! I’d love to have your company on this venture!!
Subscribe: email on the sidebar or follow on Facebook / RSS feed / bloglovin’ / twitter and check out my pinterest boards. Share: if you found this helpful or inspiring please click one of the buttons below! Your support of A Pinch of Joy is appreciated!
Discover more from A Pinch of Joy
Subscribe to get the latest posts sent to your email.


 Welcome! I’m Charlene. I love to share quick and easy recipes, whatever I’ve learned in our last DIY project – anything that helps make life easier, better and more fun!! I hope you will find inspiration and add a pinch of joy to your day!