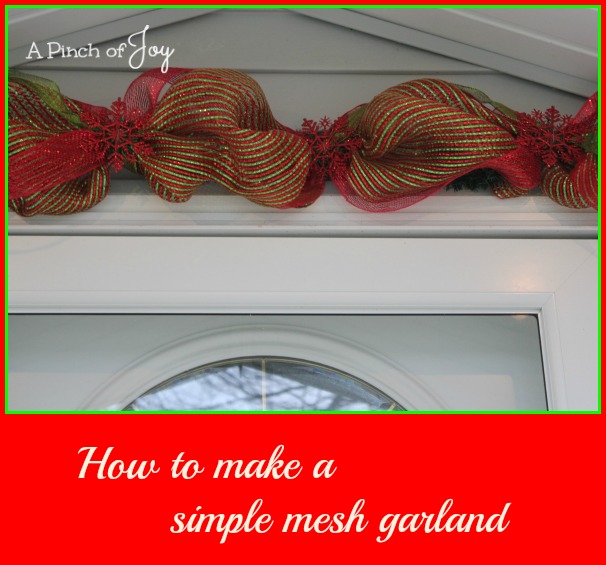
Our front porch decor needed something new for winter. In fact, it could even use a little bling for Christmas, I thought. We love traditional on the inside, but the outside can be fun and daring. The mesh wreath I made for Halloween was so quick and easy I decided to try my hand at a simple mesh garland for the front door. I looked through the possibilities at the hobby store. The lime green and red kept calling my name. Hmmmm — gray house with white trim in a neighborhood of lawns and conventional houses. Definitely daring. But — it’s only up for a month — and in the basket it went! (And wait until you see the door swag I made to go with it!) Below is a quick step by step of how I made a simple mesh garland. Scroll down for the video version. Or click here if you want to go directly to the video as it is more detailed and may answer any questions you might have as you make your own.
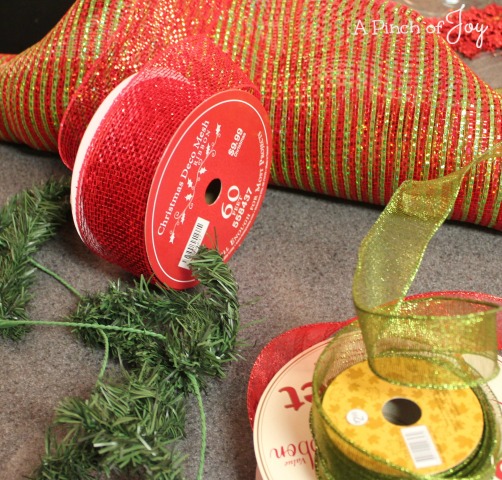
Supplies needed: 1 work garland (9.5 feet long), 1 roll of 21 inch wide mesh, 2 or more rolls of ribbon in complimentary colors, at least 10 feet of each color. A pair of scissors are necessary and a ruler is handy to have within reach.
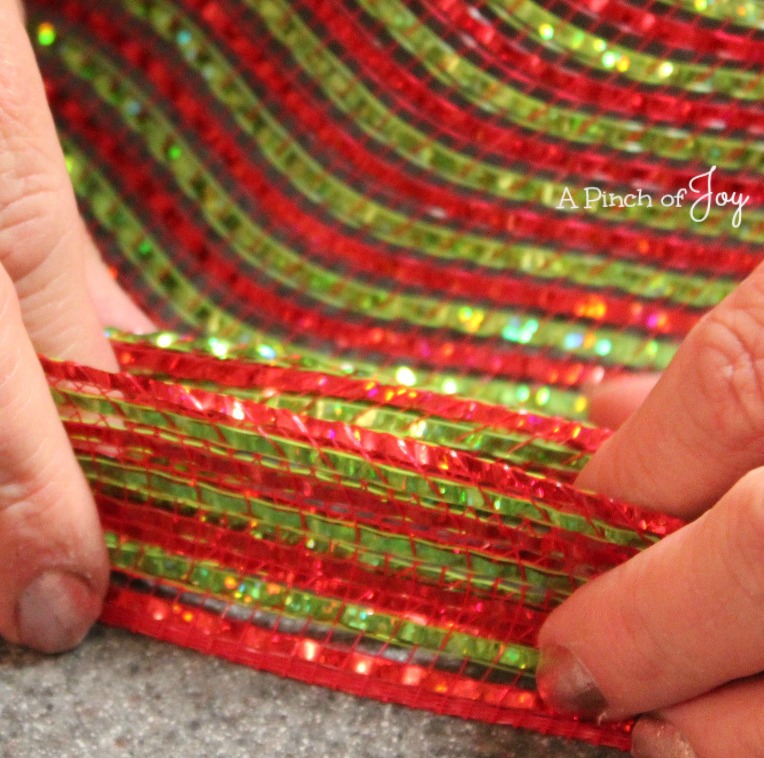
Measure two feet from end of roll of mesh. This will make the finished end of the garland. Begin pleating the mesh at the two foot mark, forming pleats about an inch wide. Pleats will give the finished garland a more uniform look and you will be better able to control the pouf and fullness of each garland segment.
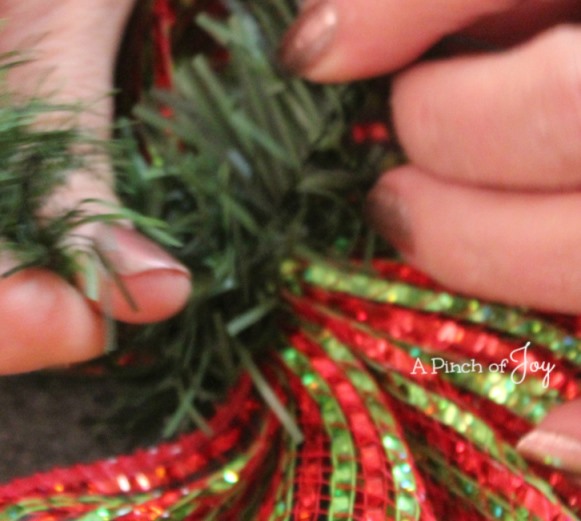
When you have pleated all the way across the width of the mesh, place the edge of the pleat in the center of the first twist tie / chenille stem on the work garland. Cross the tie and twist securely.
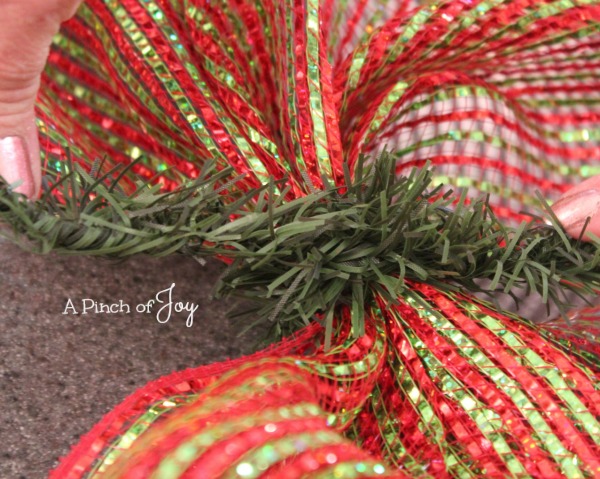
Measure about fourteen inches down the mesh and pleat as before. If you want a full, lush garland, fasten the pleats in each of the twist ties. I needed a slimmer version for the space I had, so I only fastened the pleats in every other chenille stem on the work garland. Whichever you do, keep the length of mesh at about 14 inches. Measure (I usually eyeball it, after I measure a couple of times), pleat and fasten. Repeat for the length of the garland. Flatten the secured tie to hold it in place and prepare it for another layer. Leave a two foot tail on the end of the completed garland. To finish the garland and keep the mesh from raveling, gather the very end of the mesh and tie a knot as close to the end as you can. Pull it tight and roll the knot up and into the newly formed pouf. Repeat on the end where you began the garland.
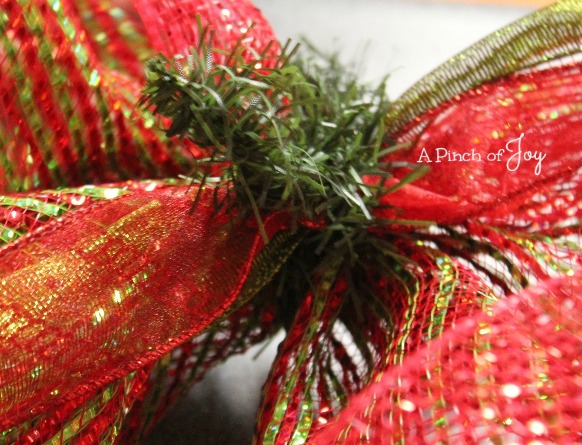
Take a look at the garland when completed and adjust any noticeable differences until the poufs are uniform and pleasing. You may have to lay it on the floor to do this — especially if you are like me and your workspace is the not very long kitchen counter. To add ribbon, place the two (or more) ribbons side by side and pleat just like you did for the mesh, using small pleats. Again this gives you more control of the ribbon, than just wadding it together. To fasten, lay the pleated ribbon on top of the twisted chenille stem and repeat the cross and twist motion to secure the ribbon to the garland.
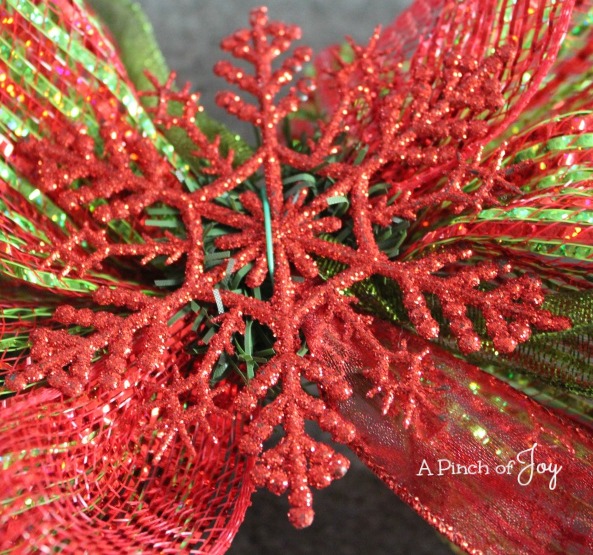
Add embellishments at the ties. I needed something that would stand up to being handled for hanging, rolled for storage and would not blow apart in the wind. Plus it need to fit in the space available. I opted for glittery dollar store snowflakes wired securely to the garland.
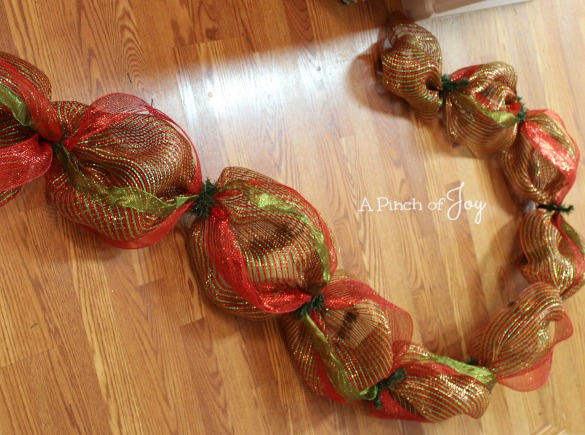
Finished garland waiting for embellishment and your creativity! This skinny garland will fit in narrow spaces. If you have more room and opt for the full lush look created by fastening at every twist tie, the ornamentation is limited only by your imagination. Use these garlands for door swags, to decorate stair cases, to create a backdrop on a buffet table, or a dozen other places. A mesh garland is very versatile!
I’m so glad you stopped by today! Be sure to follow A Pinch of Joy so you don’t miss a thing!
Subscribe by email on the sidebar or follow on Facebook, RSS feed, bloglovin’ twitter and check out my pinterest boards. If you found this helpful or inspiring please share below! Your support of A Pinch of Joy is appreciated!

[amazon box=”B099Z9GBF3″]
Discover more from A Pinch of Joy
Subscribe to get the latest posts sent to your email.

 Welcome! I’m Charlene. I love to share quick and easy recipes, whatever I’ve learned in our last DIY project – anything that helps make life easier, better and more fun!! I hope you will find inspiration and add a pinch of joy to your day!