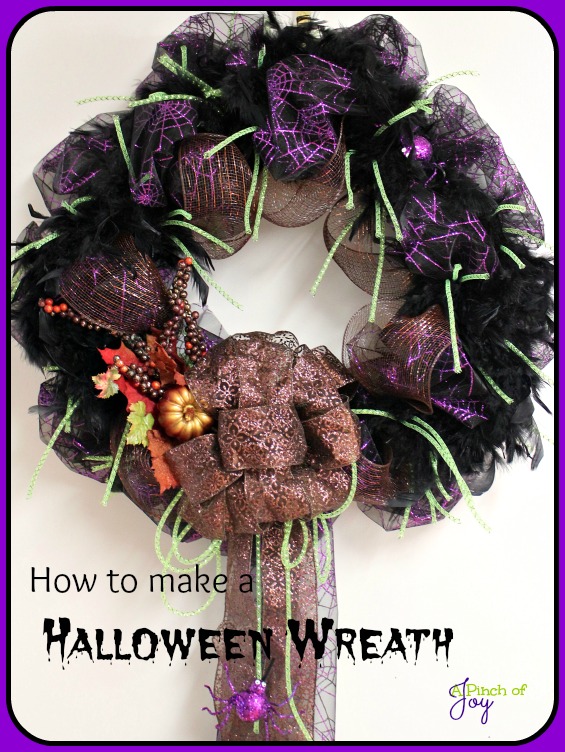
I love wreaths of all kinds. No idea why! I just like the looks of a lush full circle hanging on a door, a window, a mirror. It just sings! I first saw mesh wreaths on Kristen’s Creations and fell in love with the fullness and possibilities! It helps that her site is full of gorgeousness and rich colors and tons of creativity and inspiration.
Halloween seemed the perfect time to try my hand at making a mesh wreath. I knew I wanted to use a feather boa — just for fun. I hesitated because I didn’t want to use greenery for Halloween and the black wreaths I found weren’t . . . ummm . . . fun. And fastening the mesh to the not round grapevine wreaths I found seemed rather daunting. And then. . . . I found the solution at HobLob. A sixteen inch work wreath — two levels of round wreathery with twisty stems placed every few inches to hold the mesh and embellishments in place. The bronzy ribbon for the bow was at the end of the same aisle. Sold!
First a series of photos to take you step by step in How to Make a Halloween Wreath. It wasn’t enough that this was my first Mesh Wreath. You’ll also find my first ever video tutorial at the bottom of the post. It was a spur of the moment decision with no rehearsal (or script!) and done in one take. Be kind 🙂 I hope it will be helpful and answer any questions. In the meantime, here’s a quick pictorial. . . .

Here’s the work wreath. Mine was 16 inches in diameter.
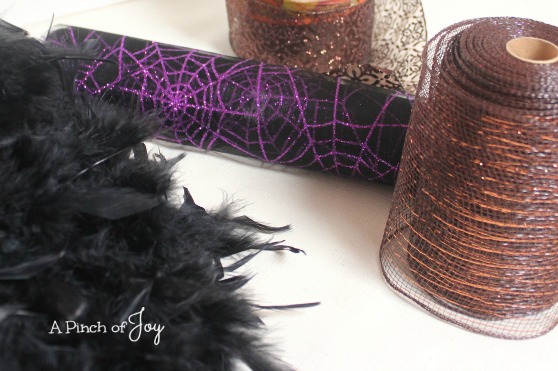
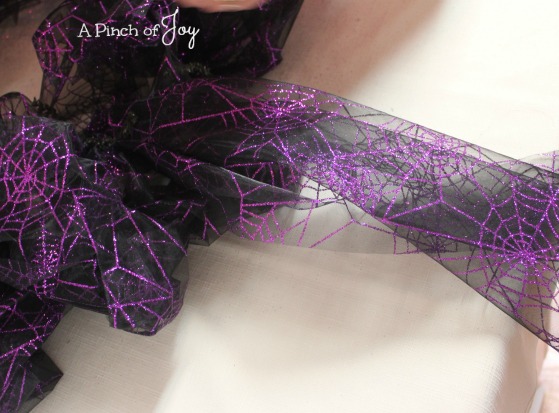
Materials needed: 1) Base– 1 roll 21 inch wide Deco Mesh (or other brand). I used a sheer fabric with spider web glitter that was with the mesh display and was 21 inches wide. 2) Secondary color –1 roll 5 inch wide mesh 3) Optional: filler material as the 6′ long feather boa 4) Ribbon for bow or readymade bow 5) embellishments such as a fall pick and a package of the lime green tube ribbon I used.
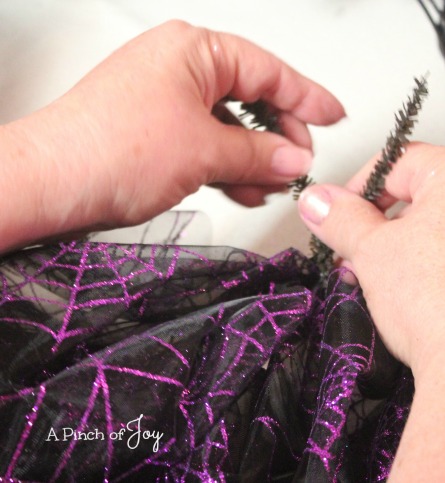
Gather and pleat one end of the mesh and fasten it to the work wreath using the pre-attached twisty stems. Move down the mesh about one foot and repeat. Since the twisty stems are about four inches apart your mesh will loop or puff and provide the fullness for the wreath.
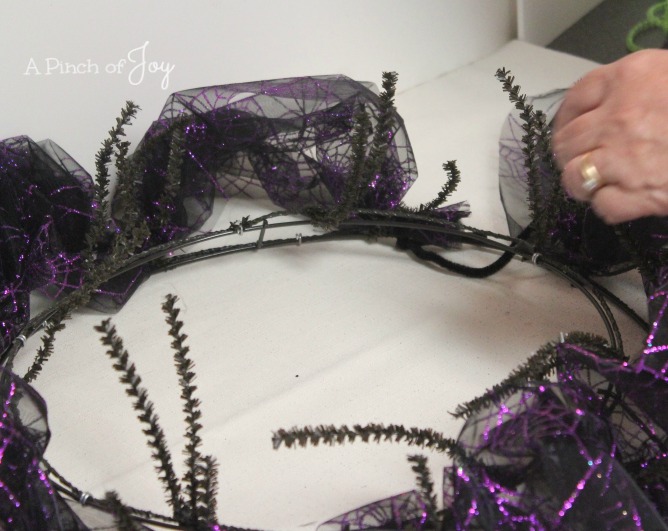
When you complete bottom layer, move up and repeat the process on the top layer. Do NOT cut the mesh, just move up
When I completed the top layer, I cut the mesh leaving a 20 inch tail to hang behind the long ribbon tails I planned to use.
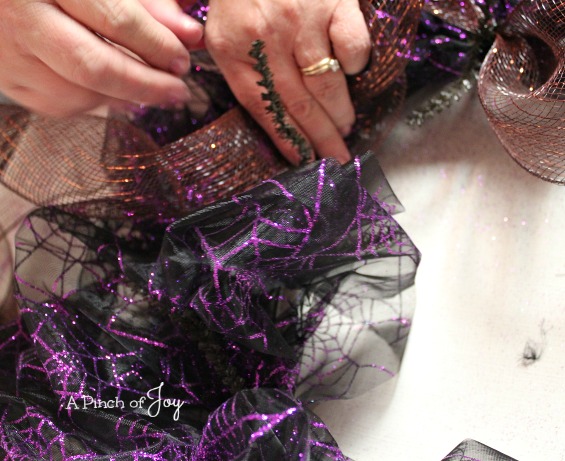
Add secondary color to top row only. Use the same gather and pleat method and fasten into the twisty ties exactly as you did the base layers. The only difference: use 8 inches of mesh between each fastener instead of the 12 inch loops used for the wider layer.

Add boa or other optional filler. Fasten to top layer, gently laying the boa between the base layers. Leave some looseness in the boa, without letting it loop or pull tight.
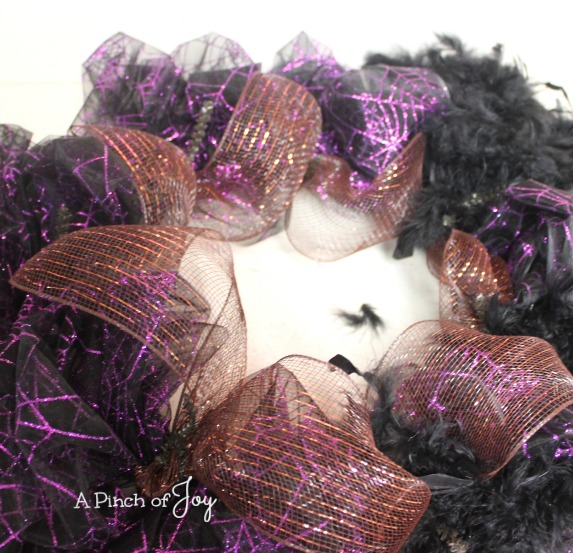
The boa will begin and end on either side of the 10 inch loop bow.
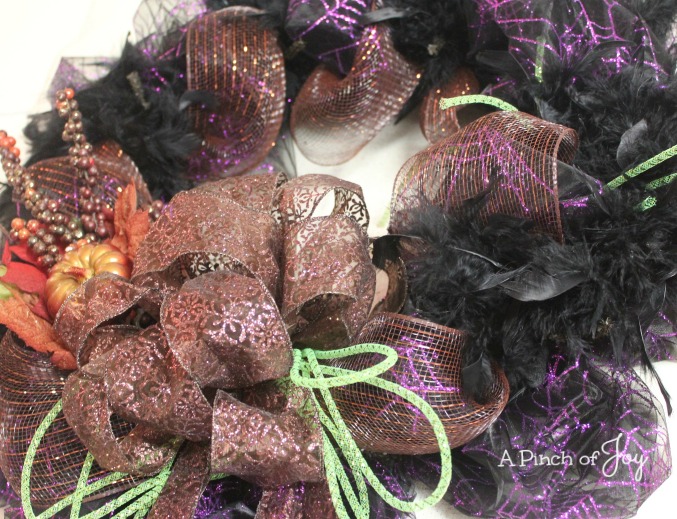
Add bow and embellishments. I made the bronze bow ahead of time and then looped the lime green tube ribbon behind it for a pop of color. Insert a fall pick, nestled under the bow and up the side. Add groups of three lime ribbons cut in random length to each twisty stem around the wreath for movement and fun.
D O N E !
Need more Halloween ideas? Check these links: Preschool Party Snacks and Games How to Make Pom Pom Spider Fun Foods for Kids Halloween Party Grasshopper Guts Smashed Frogs Zombie Brains
I’m so glad you stopped by today! Be sure to follow A Pinch of Joy so you don’t miss a thing!
Subscribe by email on the sidebar or follow on Facebook, RSS feed, bloglovin’ twitter and check out my pinterest boards. If you found this helpful or inspiring please share below! Your support of A Pinch of Joy is appreciated!
Discover more from A Pinch of Joy
Subscribe to get the latest posts sent to your email.

 Welcome! I’m Charlene. I love to share quick and easy recipes, whatever I’ve learned in our last DIY project – anything that helps make life easier, better and more fun!! I hope you will find inspiration and add a pinch of joy to your day!
Susan @ Oh My! Creative says
Stopping by to tell you that your wreath has been featured today from the Whimsy Wednesday link party! Thanks for linking – you can see the feature here http://bit.ly/1bQ1kL6
I also pinned all the features into our Whimsy Wednesday Group Board – yeah!
Susan
Susan @ Oh My! Creative recently posted…16 Do It Yourself Halloween Home Decorating Ideas
Sherri @ MadeFromPinterest says
You look like a crafting guru from what I see here. What fun! Such talent.
We would love to have you share with us at our weekly Super Saturday Link Party. http://www.madefrompinterest.net/2013/10/super-saturday-link-party-13/ Your recipes and ideas would be a hit with our crowd. It would be our honor to have you join us!
marissa | Rae Gun Ramblings says
so fun! pinning Thanks for linking it up to our Block Party
Traci says
What a beautiful wreath. Thank you for all of the step by step instructions. I don’t have a Halloween wreath for our door yet. Time to get started!
Traci recently posted…Watermelon Lime Spritzer