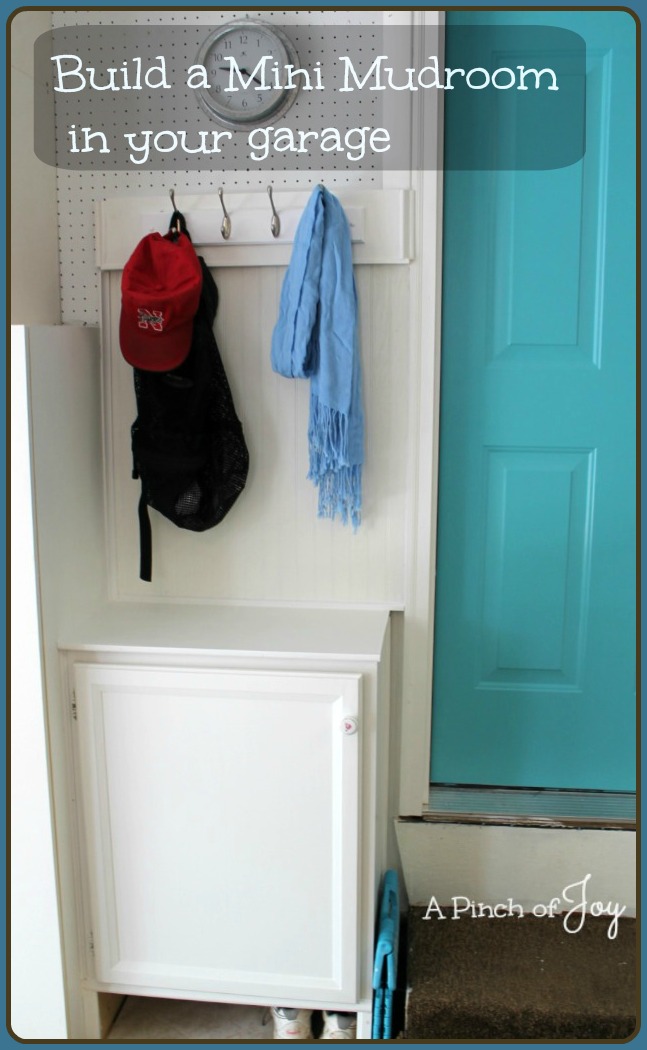
We lived here only a very short time before realizing that a house designed and built in 1977 needed some work to make it livable for today! When our house was built, it was a big deal to have a two car garage open directly into the kitchen so groceries in paper bags could be carried in easily. One of the things I have long wanted is a landing place by the garage door because a lot of other things happen around that garage door nowadays! I wanted to be able to kick muddy garden shoes off and out of the way, a place to store reusuable grocery bags and assorted household “stuff”, somewhere to hang caps or light jackets so they weren’t tossed who knows where. In short, someplace convenient for storing things to be picked up and used and returned as we come and go through that turquoise door in daily life.
The kitchen remodel gave us the perfect opportunity to repurpose an old upper cabinet to improve the situation. We used scrap trim, repurposed plywood, scrap lumber, a piece of found beadboard and came up with a great mini mud room! Here’s how we did it for a cost of $2 and 63 cents (almost), a weekend’s worth of time – most of which we did something else while paint dried. Little investment but so worth it.
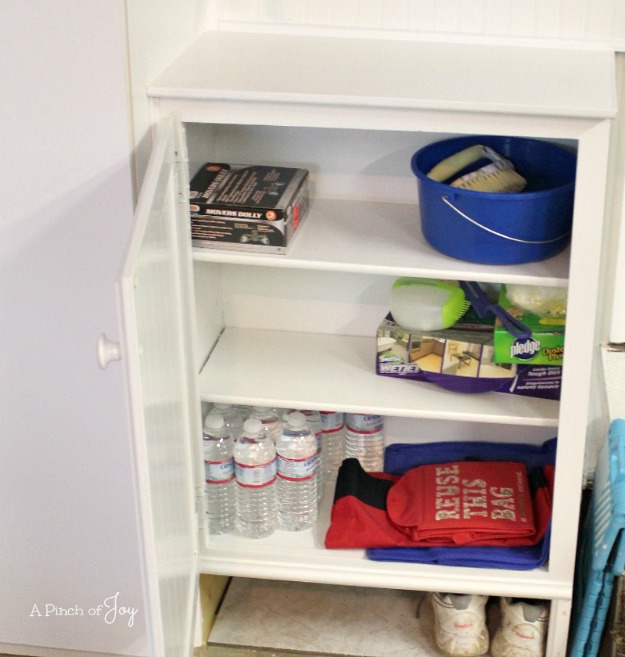
An upper cabinet, 24 inches wide, 30 inches high and 12 inches deep, fit perfectly in the space between the step and other permanent cabinets. I flipped it upside down so the knob would be at the top of the door.
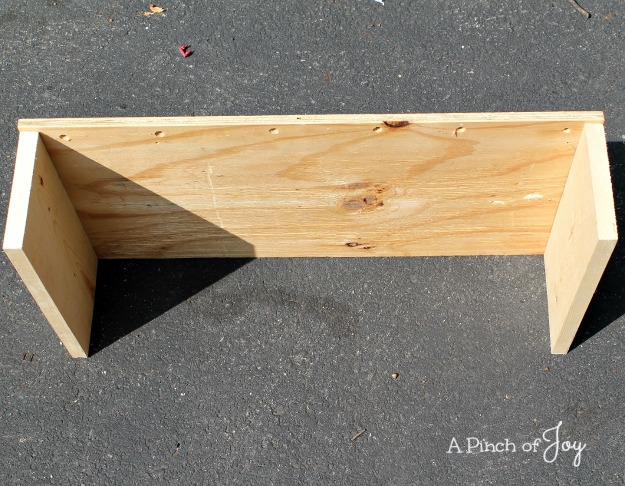 Bytes cut a piece of plywood to fit the bottom of the cupboard exactly. The plywood came from shelves we tore down in the basement. I took scrap lumber “one by” pine and tested to see which size would allow enough clearance for me to kick walking shoes underneath the cabinet. A one by six inch piece was just right. (makes me think of Goldilocks!)
Bytes cut two pieces from the 1×6 board into the correct length for each side and screwed them onto each end of the plywood. This made a platform for the cabinet to set on and gave enough clearance to store garden shoes. It also raised the top of the cabinet about six inches which was just right for the new use! (Goldilocks again!) He decided a board across the back of the platform would give a little more stability. Because of the way we installed the cupboard, there was room so he added another piece of the 1×6 across the back, stabilizing the two legs.
Bytes used a piece of 1×2 scrap pine screwed to the studs in the garage wall to set the cupboards and fasten them to the wall. This allowed us to match the depth of the existing peg board. Wheels didn’t want to remove the peg board and the logistics would have made it a much longer job! Get ‘er done now won out!
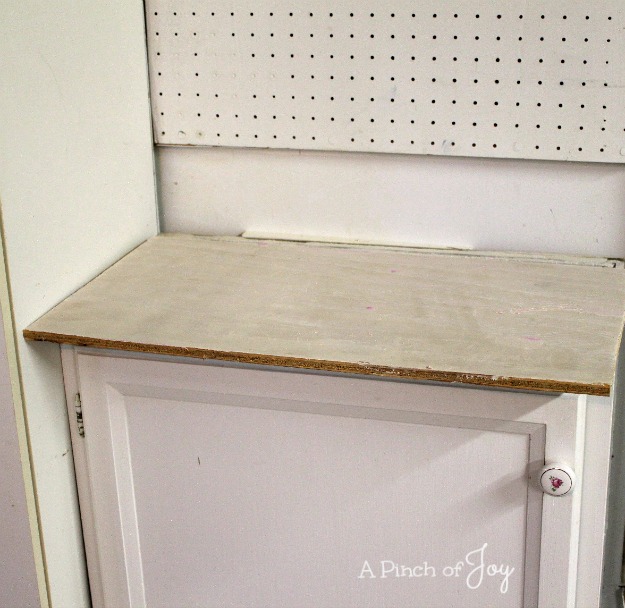
I cleaned the cupboard thoroughly and painted it with two coats. Bytes cut a piece of the repurposed plywood shelf to fit on top of the cupboard. My initial idea was to make a tile top with leftover bathroom shower tile. We might still do that when there is thin set around for the next bathroom tiling project (oh, yeah, that is coming!). But for now, the plywood top is just sanded with multiple coats of white paint.
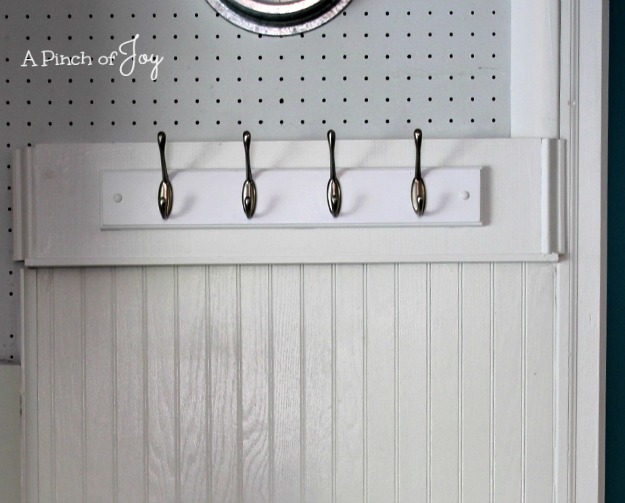
Wheels found a piece of thin bead board that was just the right size (yay, Goldilocks!). I painted it and we used it to transition the bit of open space and cover the pegboard above. Bytes tacked the bead board to the pegboard supports and the trim above and below also help hold it in place.
We used the remainder of the 1×6 pine to make the top of the mini mud room/area. I had purchased a set of mounted hooks intending to use them as towel racks in one of the bathrooms. Towels did not dry well on test hooks so this unit never was installed. This was the perfect way to repurpose. I didn’t count them in the cost because I already had them although they were about $18. If you count that, the cost of this project goes up to just over $20 – still not bad. Wheels installed the hooks on the 1×6 top.
I went through the stock pile of scrap trim and Bytes cut them to fit the need. We used baby quarter round (I’m sure that’s not the official name – it’s probably ½ or 3/8 inch quarter round!) to finish off the edges of the top. We could not find anything to cover a gap between the side of the cupboard and the adjacent storage that would allow the cupboard door to open. Off to Lowe’s. There I found a trim piece that fit the bill for $2.68.
A bit of caulk and spackle over seams, pits and nailholes, another coat of paint. Let the paint cure and begin to add the essentials. Done!
Just right, said Goldilocks. And me!
I’m so glad you stopped by today! Follow A Pinch of Joy using the icons on the teal bar at the top of the page so you don’t miss a thing! I’d love to have your company on this venture!! Share: if you found this helpful or inspiring please click one of the buttons below! Your support of A Pinch of Joy is appreciated!
Shared with these awesome link parties here
Discover more from A Pinch of Joy
Subscribe to get the latest posts sent to your email.

 Welcome! I’m Charlene. I love to share quick and easy recipes, whatever I’ve learned in our last DIY project – anything that helps make life easier, better and more fun!! I hope you will find inspiration and add a pinch of joy to your day!
Shonee says
What a great way to use a small space. You created a really great useable area! Thanks for linking up to Bewitchin’ Projects Block Party. Hope you will join us again this Sunday morning. Just wanted to let you know that I will be featuring this over at the party this week.
-Shonee
http://www.hawthorneandmain.com
Shonee recently posted…DIY Book Caddy
Jessi says
Great use of an area that a lot of people overlook! And I love seeing how others make awesome areas on a budget. I’m trying to make the area around our door in the garage more functional, so I’m bookmarking this post.