For weeks I dreamed of a stellar staircase with dark stained treads, white risers and swirling teal stenciled leaves. Then reality happened and I found out there were some questions I should have answered first. Now that we have the answers, here is where we arrived. Those stairs needed padding and floor covering. Not wall to edge as it had been before, but at least the path up and down the stairs had to be covered for appearance, sound control and traction for our pet. At first I could not find stair runners anywhere, then the nearby home center restocked. Their runners were expensive and not what I wanted at all — dark and/or busy patterns. I bought regular hallway rugs in a neutral gray beige and planned to install those. And then I found a stair runner at a discount home center that specializes in selling “leftovers”.
It was light colored which was important for the space and the gray on the edge pattern went well with the gray painted stairs. It was patterned without being really busy. And the price was right. So I popped it in the trunk and brought it home. Here’s how we installed it:
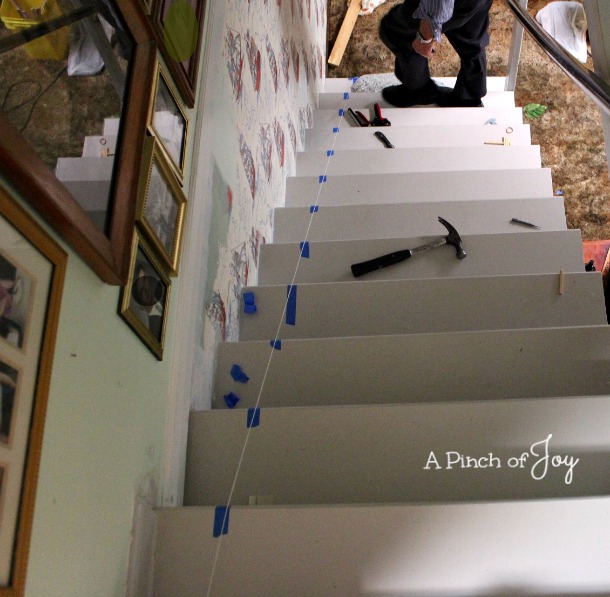 First we measured and marked our guidelines. The inside of the blue tape is where the pad edge should come. The runner edge will match up with the edge of the tape toward the wall. Measure the top and bottom steps and then run a string tightly between the two points. That will save you measuring each and every step! Just be careful you don’t move the string as you apply the tape.
See that large ancestral picture in the middle? The one with the reflection of the yellow bucket full of tack strips setting on the basement floor? That’s part of the “Mom has eyes in the back of her head” system. Don’t tell my sons but that was how I knew what they were doing in the basement without actually having to walk down the steps. A little craning and crouching and the whole room is visible 🙂 The gallery itself has changed several times, but Great Grandma’s picture remains fast!
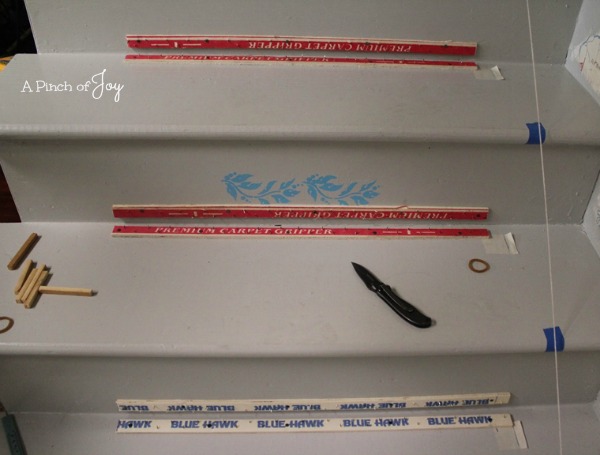
Tack strips are very inexpensive. They have tacks pointing upward so that you can catch and hold the carpet or runner. They also have small nails every few inches pointing downward so that you can easily nail them into place. Cut the tack strip with a pair of tin snips. (Garden pruning shears would also work.) Work carefully while cutting. You may even want to wear heavy gloves. They are prickly and can inflict a deep wound. The little wooden sticks on the step are actually jigs one quarter inch square. We needed the tack strip to be half an inch out from the stair riser. Two jigs side by side were an easy way to measure and gave us something to push up against while nailing the tack strip on the tread. Stack a third jig on top of the back jig and that gives a half inch rise and will hold the tack strip up while installing it on the riser. See my swirly stencilled pattern?
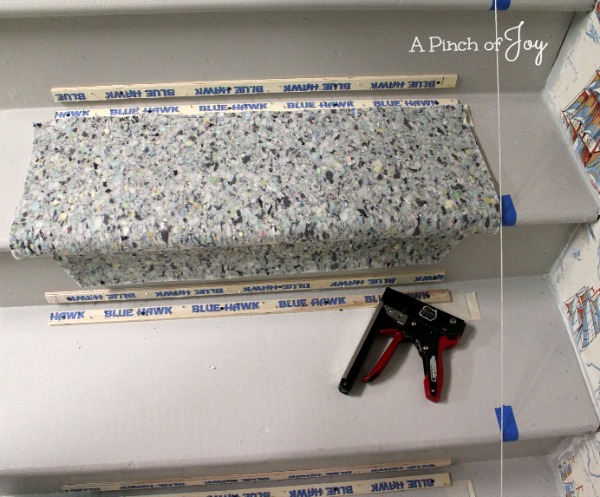
While Wheels nailed the tack strips into place I precut the pad using kitchen shears. It cut fairly easily but was tiring so I took three or four stabs at it to rest my hands, especially when I first started and had to deal with the entire piece. Beginning just below the bullnose curve on the stair tread, I cut the pad at an angle in toward the center to minimize the excess. The pad only has to come down the riser just far enough to hold the staples that keep it in place.
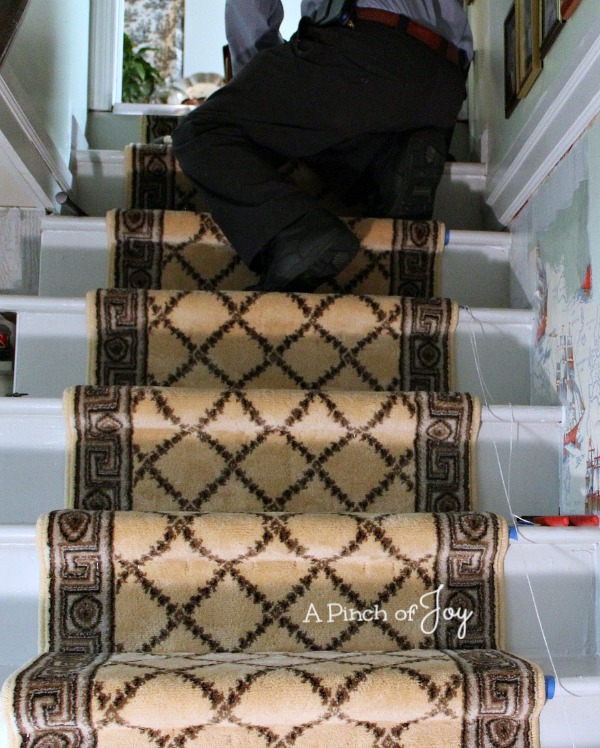
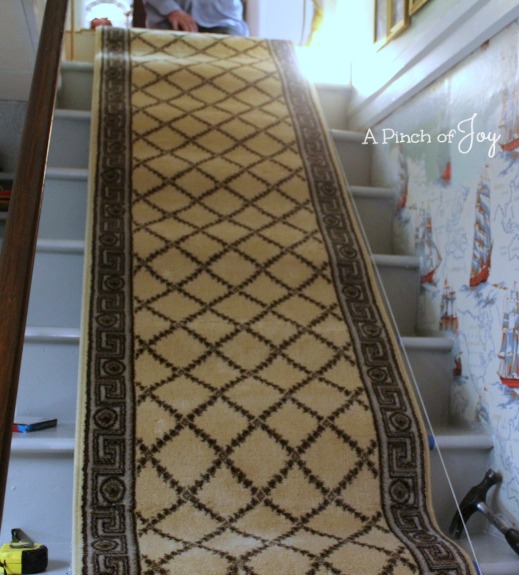 When the pads are in place unroll the runner. We had conflicting advice here, but decided to go with the “start at the bottom and work up” method because it made the most sense. Fastening it to the bottom gave a place from which to stretch the runner by pushing it up and forward. The remaining carpet was up and out of the work area and the worker is standing on what has been completed. Just much less complicated all the way around, it seemed to us. So we centered the runner on the stairs and started at the bottom.
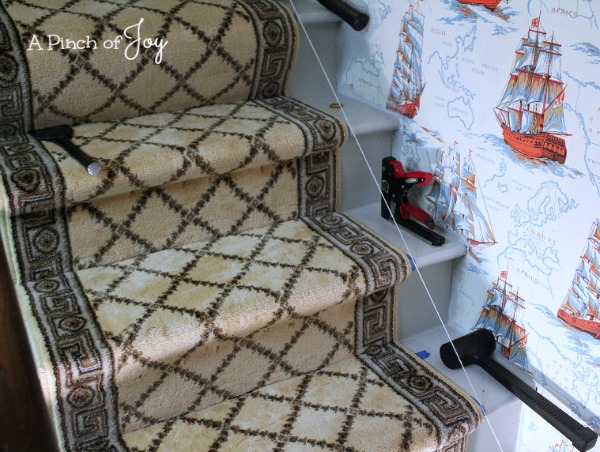 Staple and tack the runner tightly under the bullnose. Bytes used a heavy board to leverage the runner into place and lean against it to hold it tight while he stapled it. Then tacks were added as needed to keep the runner tight against the riser. Pull the runner tight, keeping it even and in alignment with your premeasured guides. Use a flat narrow tool — this one is a brick cutter from our tool bin, but there are rug laying tools also available. Begin in the middle to tap the rug between the two tack strips. As you force it into place the tacks on both strips will catch and hold it securely.
Finish by bringing the runner up the last riser and cutting it to length. This riser has no padding. Staple the runner into place. Add the metal threshold at the top to protect both the floor and the top of the riser.
This project certainly evolved as we went along. It was nowhere near the vision I had in mind, but it is what is best for the situation. It looks clean and fresh. The lighter colors brighten up the area considerably. No more clomp, clomp, clomp. The cat can make her way down to the litter box. Now to work on the wonderful wallpaper and repaint the wall. Wonder how those will evolve?????
I’m so glad you stopped by today! Be sure to follow A Pinch of Joy so you don’t miss a thing!
Subscribe by email on the sidebar or follow on Facebook, RSS feed, bloglovin’ twitter and check out my pinterest boards. If you found this helpful or inspiring please share below! Your support of A Pinch of Joy is appreciated!
Discover more from A Pinch of Joy
Subscribe to get the latest posts sent to your email.

 Welcome! I’m Charlene. I love to share quick and easy recipes, whatever I’ve learned in our last DIY project – anything that helps make life easier, better and more fun!! I hope you will find inspiration and add a pinch of joy to your day!
Diane says
What an excellent tutorial. I shared it on Pinterest. Diane
amy says
Your article on chair rails was interesting and close to the correct proportions, the rule of thirds is a good one, but historically chair rails are quite low (and the “chair” in chair rail has nothing to do with seating but rather with a part of a column) – see this article on how the ratios were calculated in the past. A home with 10 or higher ceilings in colonial proportions would often have 24 inch chair rails.
http://www.thisiscarpentry.com/2010/12/03/misused-confused-chair-rail/
kristin says
Great tutorial and it looks fabulous! Thanks for linking up.
XO
kristin
Bethany K says
hey nice job!
i’ve never lived in a place with stairs, so i can’t totally appreciate your effort here. i will say…it looks really complicated! to staple the carpet and make sure it stays in a straight line and all that. i wish your original plan had worked out, but you seem happy with this one. thanks for sharing! i love the gray color. i don’t think i’ve ever seen that before (it’s always just the natural wood color).
bethany
Bethany K recently posted…A Meal Plan for Breastfeeding Moms