We’ve broken a big job into three smaller components that you can do at different times. Small task components help utilize your time and energy more efficiently, to work around physical limitations or demanding babies, to reduce stress and find time for you. This little secret of breaking a big job into smaller ones is invaluable!
You can find Day One and Day Two by clicking the links. Today we pay attention to the freezer compartment. Cleaning the freezer is easy because generally it does not get the traffic or the spills that the refrigerator compartment does. I leave the refrigerator running as I do this because it is a fairly quick process. I also usually plan cleaning the refrigerator/ freezer just before a stock up time so the shelves are somewhat empty.
First, remove the ice bin and dump the ice cubes. If you have a garbage disposal, run the ice through to clean it. I’ve also heard that keeps the disposal blades sharp, but I’ve just taken that as a fact. Not sticking my fingers down there to find out! Running ice through will help clean the disposal, as it tosses sharp ice chunks around and down the drain. Let the cold water trickle during the process and be prepared to give a shot of hot water if a clog develops.
In the meantime, wipe down the walls of the freezer compartment where the ice maker and bin belong. Use warm water and a sponge. My manufacturer’s manual says to add soda to the water if there are any odors in the freezer. Wipe down the door gasket and the area where the gasket rests when the door is closed. By now the ice should be through the disposal (bonus chore done!). Wash the ice bin with warm water. Use soda, sponge and elbow grease to remove any buildup. Vinegar will also help remove buildup and is safe to use around food. If there are any crevices in the ice bin and mechanism, pay special attention to them using a small brush or a toothpick point if needed. Dry and replace the bin.
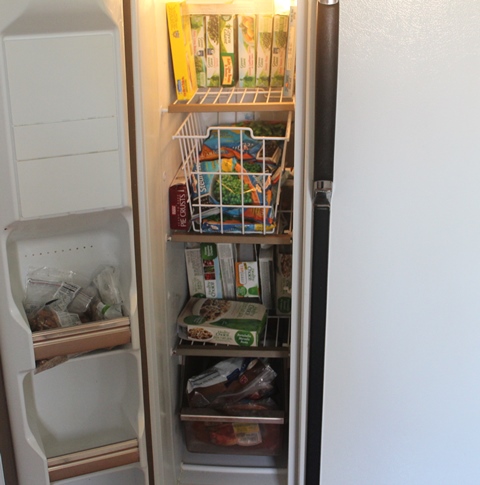
Clean the door shelves. In my refrigerator these are not removable so I wipe them with a wet and squeezed sponge. Mostly I use these for storing gel ice packs, nuts for cooking and, sometimes, Bytes’ burritos and other small things that might be needed quickly without a lot of hunting. If the shelves in your refrigerator are removable, wash them with soap and water in the sink or throw them into the dishwasher with another load. BTW, I am compelled to tell you — those lines across the door pictured above are perforated vent holes, NOT dirt! 🙂
Begin with the top shelf. Remove and sort through all the food, setting it on the counter or in empty laundry basket. Wipe the walls, clean the shelf and replace the foods that belong there. Move onto the next shelf.
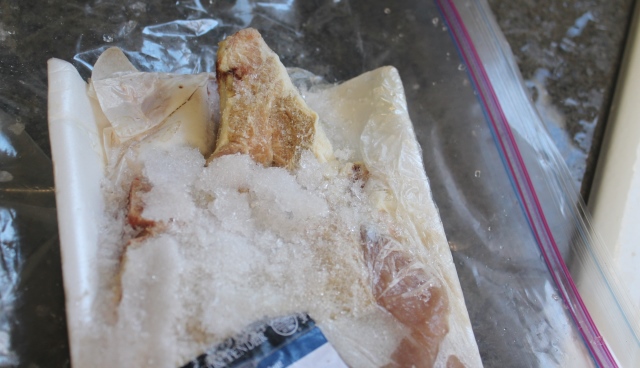
Discard anything that looks like this! The USDA says that frozen foods will not spoil, but anything with freezer burn has lost its good qualities of taste and texture. Out! Click the link for a printable USDA Freezer Storage Chart showing the optimum storage time of various foods at 0 degrees.
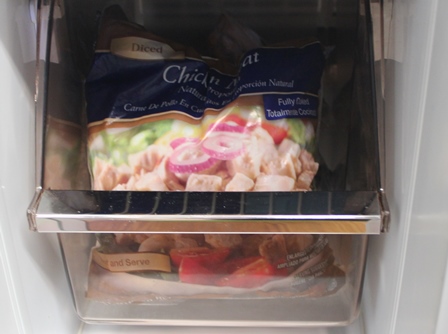
The refrigerator freezer is where I keep packages of vegetables, frozen dinners for quick meals and opened packages of frozen food. These things get “lost” in the bigger freezer and eventually just thrown away. In the refrigerator freezer, I know what I have and where it is. That package of peas that was opened to add half to a salad gets the other half added to a pot of soup because I will see it and remember to use it. I also store meat here that I’ve purchased for a special recipe (usually for you, my lovelies!) and sometimes it gets sidelined, like that package above. For the most part however, using this method has greatly reduced the amount of food that has to be thrown out.
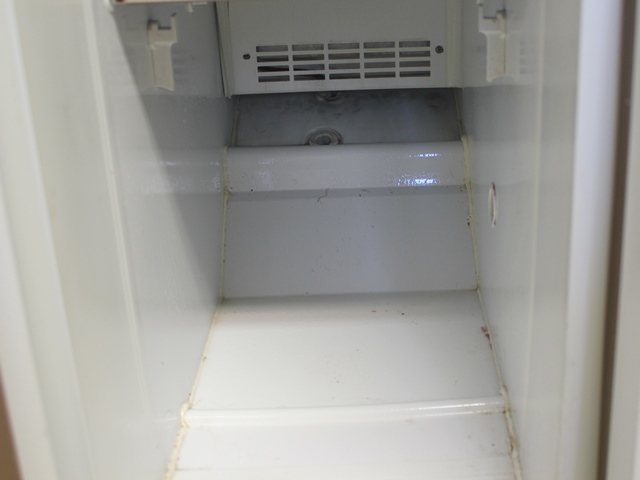
By now, we are at the bottom of the freezer where there is often a drawer. Remove. Don’t ask me how, but this area seems to collect dust, especially around that opening at the back. The opening on yours may look differently or be located in a different spot. It is where the water from the self defrosting process drains to a pan below where it evaporates into the air. Clean by pouring or squirting a solution of 1 teaspoon soda mixed into two cups of hot water into the opening. This water will also evaporate into the air. You can do this regularly as a preventive or when necessary if you notice odors.
Clean the drawer area, wash the drawer in the sink with warm water, dry and replace in freezer. Add food. This is where I keep the larger opened packages of things like chicken breast. And the inside of the refrigerator/freezer is all done.
We still have about ten minutes left in our thirty minutes allocated. Clean the outside of the unit. We did the top on Day ONE so no need to repeat. Use your favorite cleaner– squirty stuff or mix in water stuff or special stainless cleaner. Clean the doors and any sides that can be reached. Pay special attention to door handles and any crevices. Thoroughly clean the water dispenser if you have one on the door. Vinegar will help remove any water stains.
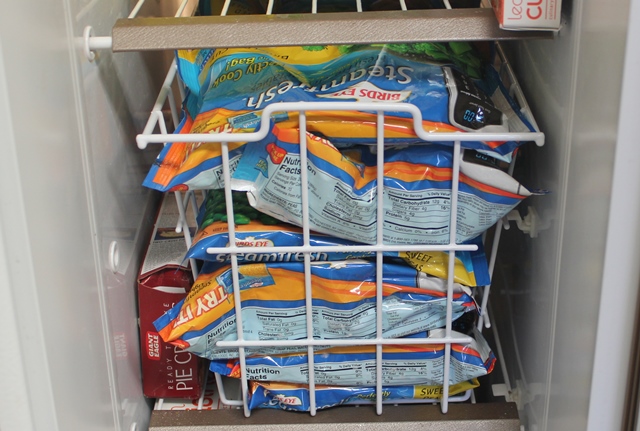
One last tip to help keep things in order for the next cleaning – and to make your life easier everyday. That wire bin that holds the bags of vegetables is wonderful. If you know me, you know I seldom pay regular price for anything. I did for that basket and it was worth every penny! You can pull it out, rifle through to find what you want and push it back in. No balancing act or scooping packages off the floor necessary.
Shhh! I know you should also clean underneath and behind but let’s do that when we deep clean the kitchen.
Just keepin’ it real – many refrigerators have something magnetic stuck on them. This is the time to throw away the magnet phone number from the dentist that retired, the broken seashell from your beach visit 10 years ago or whatever else. We live far from family so Christmas card photos often end up on the freezer door for most of the year. It gives me joy to see them each day. Display only the newest and arrange neatly. Those drawings by a three year old framed with blue paper also give me joy – I’m the one wearing earrings on your left!
And now you have a sparkling clean refrigerator inside and out, a system to manage the contents and haven’t let anything else in your busy life slide to do it! Enjoy!
Links to Day 1 Day 2
I’m so glad you stopped by today! Be sure to follow A Pinch of Joy so you don’t miss a thing!
Subscribe by email on the sidebar Follow on Facebook, RSS feed, bloglovin’ twitter or pinterest If you found this helpful or inspiring please share below! Your support of A Pinch of Joy is appreciated!
Discover more from A Pinch of Joy
Subscribe to get the latest posts sent to your email.


 Welcome! I’m Charlene. I love to share quick and easy recipes, whatever I’ve learned in our last DIY project – anything that helps make life easier, better and more fun!! I hope you will find inspiration and add a pinch of joy to your day!
Micki Weinrich Sellers says
thanks for the push in the right direction! i used shelf liners in my fridge so I don’t have to clean up the spills. but my freezer? it’s a disaster. I may tackle it next week
Jessica says
What a great idea! I love how you break it down between multiple days. I usually just get the old stuff out of my refrigerator and leave it at that because I rarely have enough time in the day to do a whole thorough cleaning. Thanks for sharing!
Bella says
This is just the kind of inspiration I need to get going on my own fridge! Thank you 🙂