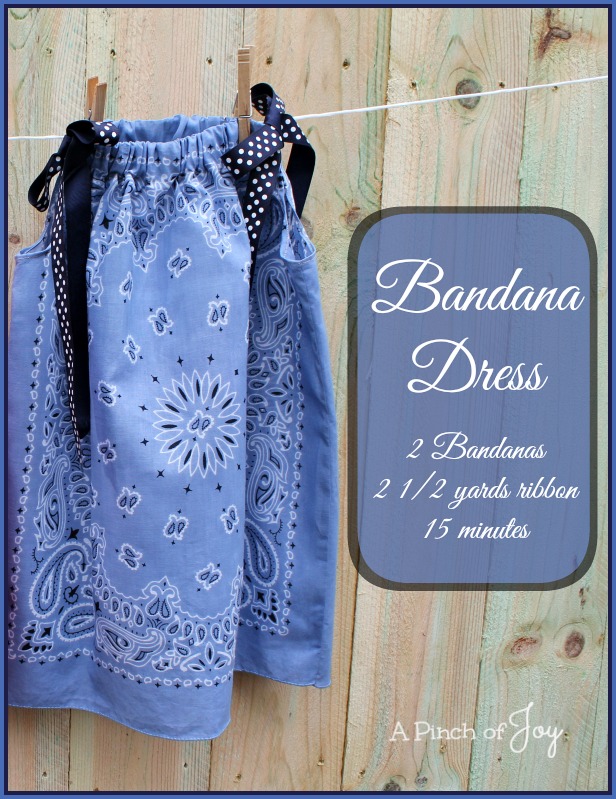
Bandana dresses are another version of the pillowcase dress — but faster and easier! They’re really cute, too! Bandanas are available in so many great colors and fun designs. I picked this classic design for the tutorial, but setting on my sewing table are polka dot, plain, chevron and party print bandanas. Can’t wait to make them into cute dresses!
A bandana makes the perfect sized dress for a toddler. The dresses are about the equivalent of a 24 month or size 2. They are full and loose around the body which any mom knows makes the size matter less. The ribbon ties make the arm holes adjustable so the bandana dress fit is even more forgiving. Growing girl just means add tights under the shorter dress and, eventually, the dress becomes a top with jeans or shorts. Big bang for the time and bit of money!
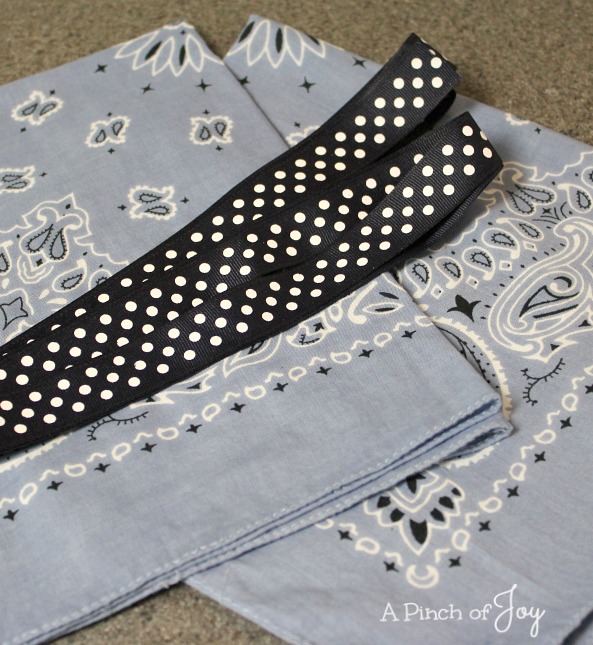
For each dress you will need two bandanas and ribbon 2 1/2 yards long. I found my bandanas at Hobby Lobby for 99 cents each. The ribbon just happened to be on sale at fifty percent off — about $2 for 5 yards. Grosgrain ribbon is the sturdiest ribbon and always looks good. I got some 1 inch wide ribbon and some that was 1 1/2 inches wide for statement bows. I don’t try to match the thread with the color of the bandana, but generally use what I have on hand. For this I used a cream white thread that blended with the cream pattern and the light blue.
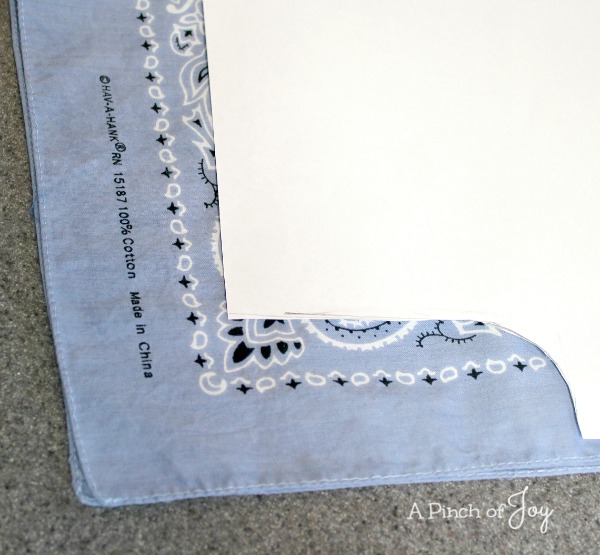
There will be printing on one end of the bandana. That end will be the top of your dress. This end will fold down to make the casing for the ribbon so it won’t show on the finished dress. Plus, the bandanas are NOT square so be sure both bandanas have the printing at the top before you cut the armholes. Don’t ask me how I know that, but it might be related to how I know what time Hobby Lobby closes on Saturday evenings!
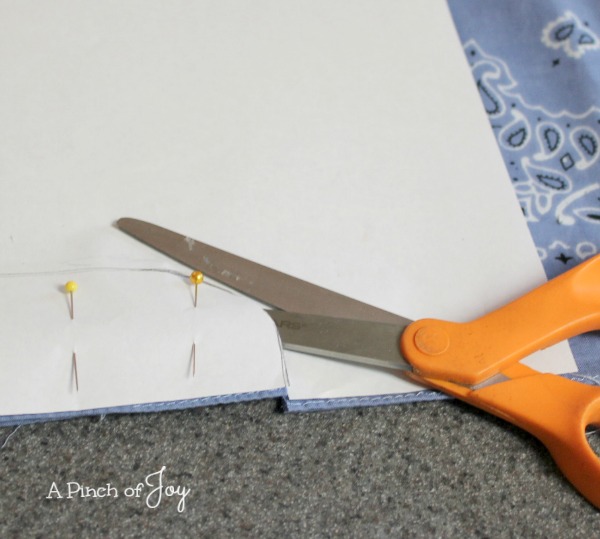
I like the pillowcase dresses with armholes because that reduces the bulk and allows freer movement for the wearer. For a one inch wide ribbon, measure in two inches from the edge of the bandana at its printed top, then measure four inches down. Make sure the bottom of the line is also 2 inches from the edge of the bandana. Mark with pins or pencil and then curve the marked corner to make a J shape. If you are using a ribbon 1 1/2 inches wide, make the downward line 4.5 inches long and two inches from the edge. These measurements are very forgiving so if you feel you need to adjust for your child, do so. I’m making several dresses so I made a paper pattern. That way I don’t have to measure every time — just match the edge of the paper to the edge of the bandana and cut.
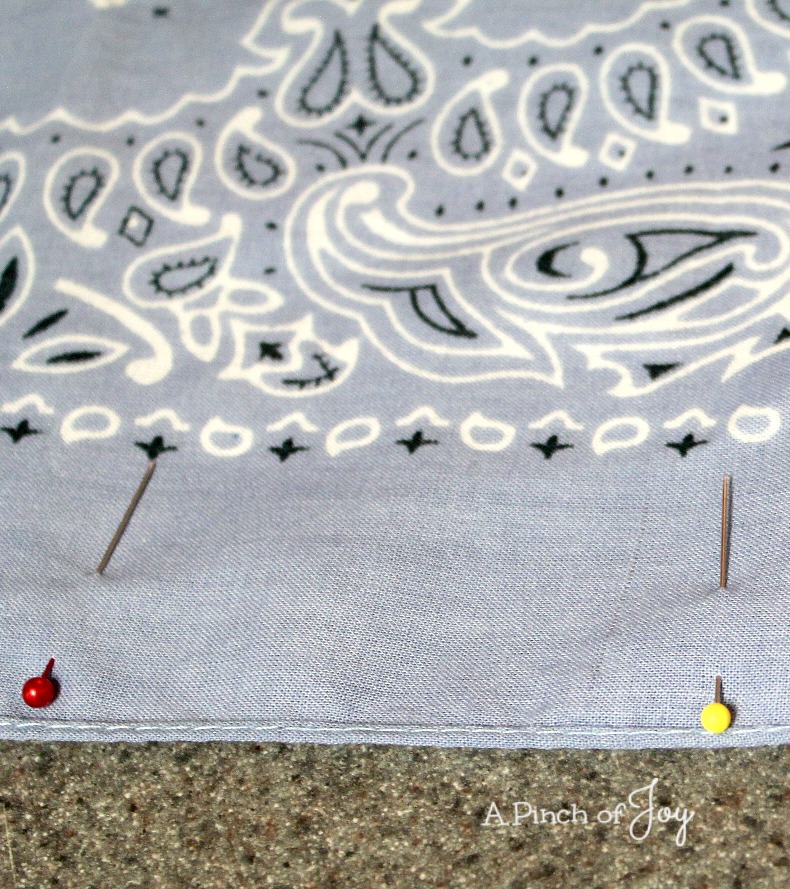
Pin the two bandanas together with right sides facing each other. If you can’t tell right side from “wrong” side, look to see which way the hem is rolled. Where you see the edge is the inside of your garment, so pin it facing outward to sew. Begin pinning at the bottom to make sure the edges meet perfectly and end at the armhole. If things don’t quite match at the armhole after stitching you can trim the fabric so it does match. Repeat on the other side. **Off topic — but its weird that the very same countertop looks so different in these pictures!
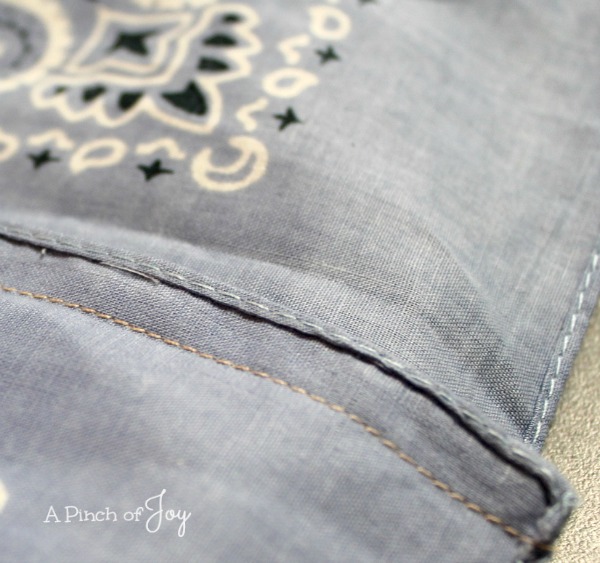
Stitch each side, beginning at the bottom. The hem is about half an inch wide. If you are a beginner and seams are a little wobbly, you can cheat. Use a wide presser foot, a multipurpose foot which is probably the one already on your machine. Place the fabric under the presser foot so the edge of the rolled hem is right next the edge of the presser foot and keep them hugging each other as you sew. If you are making a dress for a slender child, you can also make the side seams wider so there is not so much fullness in the finished dress.
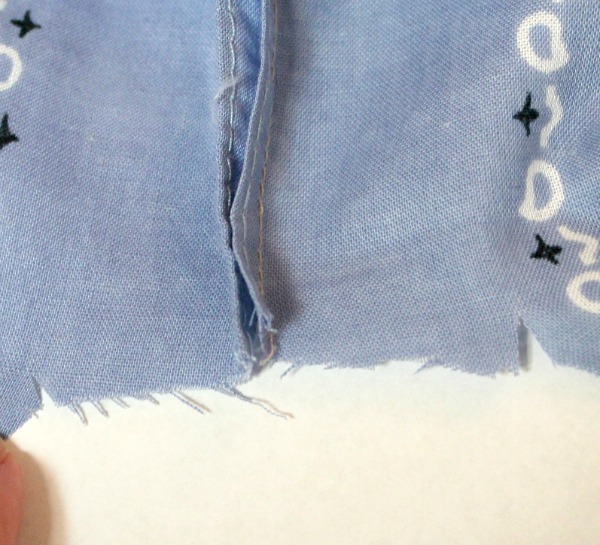
Next step is to finish the armholes. You can use bias tape for this step. I prefer to just turn the fabric and hem. The secret is to clip the fabric right at the curve on each side of the armhole. Just a little cut about one fourth inch wide. This will allow the hem to lay flat. If it doesn’t, make another clip, same size, on the curve.
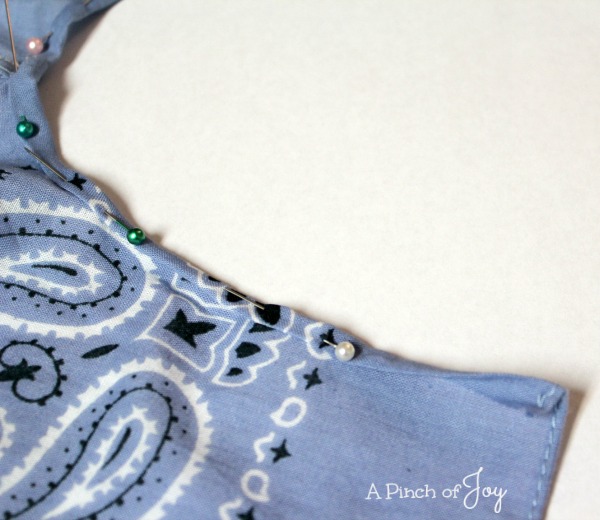
Turn the raw edge of the armhole in about one fourth inch and then fold again about one fourth inch. Pin to hold the fabric in place. Stitch, removing pins as you go. Repeat for the other side. The folded part of the hem will be on the “wrong” side of the fabric. This is the “hardest” part of making a bandana dress — and it is quite easy if you take time to make even folds and smooth the fabric by carefully clipping as directed above. This makes a good beginner project because the rest of the dress is simply straight sewing.
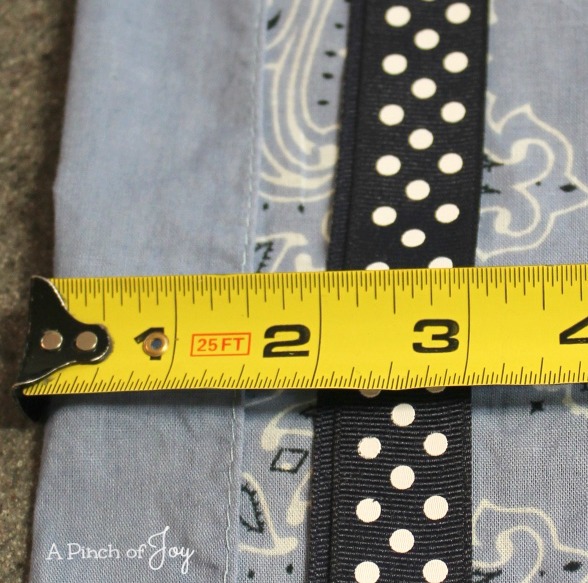
To make the casing for the ribbon, fold over the top of the dress to the inside. Remember the printing? That’s where you are making the folds. For a ribbon one inch wide, fold over one and a half inches. For a ribbon one and a half inches wide, make the fold two inches. The extra half inch gives you room for stitching and for gathering the fabric on the ribbon. Stitch along the bottom fold all the way across. To make the dress more sturdy, do a backstitch of about three or four stitches at the beginning and the end of the fold. This will keep the fabric from tearing or coming loose with wear.
If you plan to make several bandana dresses, it is worth making a cardboard template to make the folding faster and more even. Take the back of a cereal box or a piece of cardstock and draw a line across at 1 1/2 inches from the edge (or 2 inches). Lay the template on the fabric and fold the fabric over to meet the line. Adjust the fabric so the fold comes right at the edge of the template on the inside of the fold and the end of fabric is on the line. To make things even faster, press the fold before removing the template. Makes it easier to pin and reduces the number of pins you need. Because the edge of the bandana is already finished you do not have to fold the edge under as you did on the armhole.
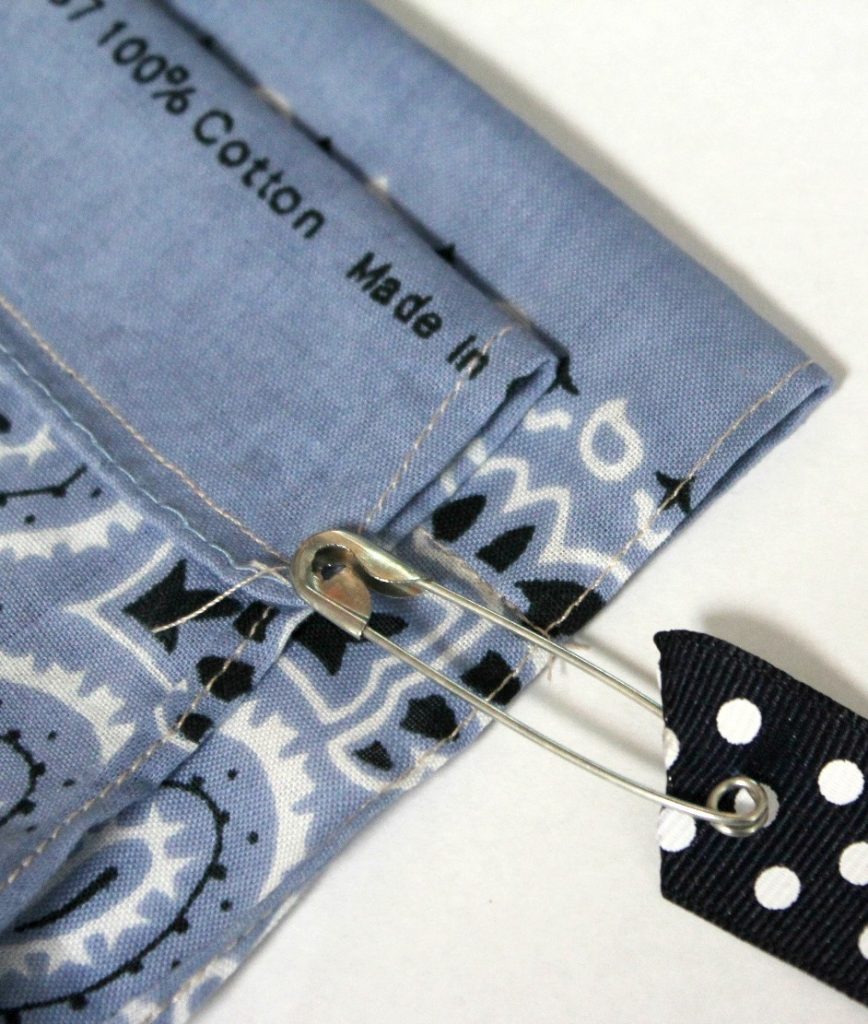
To push the ribbon through the casing use a large safety pin or diaper pin. I cut two and a half yards of ribbon in half, using 45 inches for each casing. You can see on the finished dress that is generous, so you can adjust your cut if you need or if you don’t want the long ribbon ends. Use a bit of fray check or super glue or clear fingernail polish on just the tips of the ribbon to stop fraying. Scrunch the fabric on the safety pin, then pull on the pin while smoothing the scrunched fabric over the ribbon. Easy peasy!
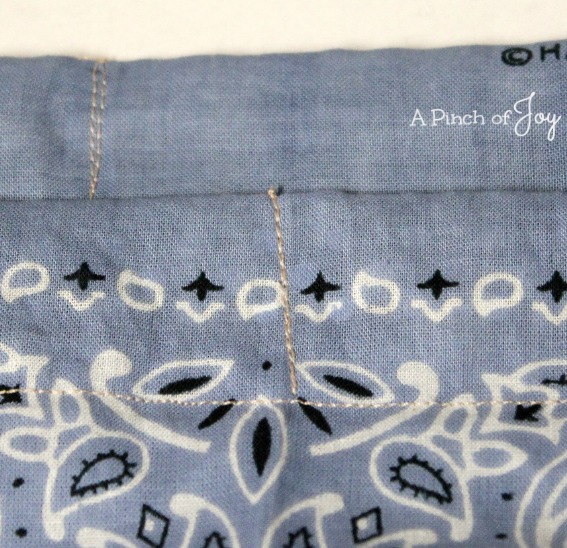
When the ribbon is pulled through, match the ends so an equal amount of ribbon shows on each side. Find the center of the casing and stitch across it as shown — once forward and once in reverse. This prevents the ribbon from being pulled out accidentally.
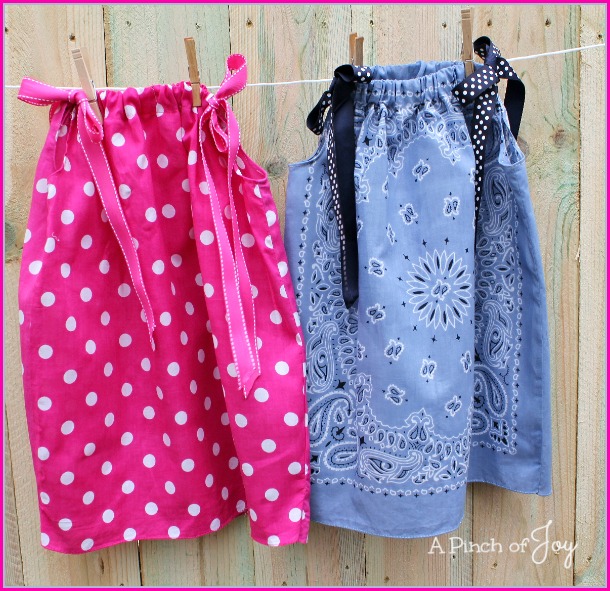
And you are done! Some little girl will have a sweet summery dress! You can leave your Bandana Dress plain as I did or your can add pockets, ties, ruffles and so much more. Check out my Pillowcase Dress Board on Pinterest here for inspiration!
Edited to add: I’ve received some questions about using bandanas and thought you might like the answers as well:
I washed the bandanas before making the dresses to make sure they didn’t shrink and to remove the fold marks. The bandanas seem to hold up well to regular washing. I found the classic bandanas and the darker colored patterns — like the polka dot — were better quality fabric than the ones with white backgrounds.
You can make this dress with regular fabric. Bandanas measure 20 inches by 21 inches with the longer measurement making the dress length. You will have to make two adjustments to the measurements. Add an extra half inch to the top measurement to allow for turning the unfinished edge under when making the casing. Add allowance for a hem at the bottom of the dress — about an inch for the hem and a half inch for turning under the unfinished edge. See my earlier post How to Make a Pillowcase Dress for more information
Welcome to A Pinch of Joy! I’m so glad you stopped by today! Follow A Pinch of Joy using the icons on the teal bar at the top of the page so you don’t miss a thing! I’d love to have your company on this venture!! Share: if you found this helpful or inspiring please click one of the buttons below! Your support of A Pinch of Joy is appreciated!
Shared with these awesome link parties here
Discover more from A Pinch of Joy
Subscribe to get the latest posts sent to your email.

 Welcome! I’m Charlene. I love to share quick and easy recipes, whatever I’ve learned in our last DIY project – anything that helps make life easier, better and more fun!! I hope you will find inspiration and add a pinch of joy to your day!
The Happy Creations says
What a great idea:)
Your instructions are very clear, I don’t know how to sew however your tutorial conveinced me to give it a go:)
Thanks for sharing.
Emily says
adorable!! I need some bandanas ;o) Thanks for sharing at Create Link Inspire! You are featured this weekend ;o) Emily
Rachel Kathyg @ onlinesisterhood says
These are just too sweet! love them. pinned. found at castparty wed. Have a great week!
Rachel Kathyg @ onlinesisterhood recently posted…Brazilian Chicken Pie (Torta de Frango)
RobyGiup says
What a wonderful idea!!! Usually bandanas have nice prints that you can’t find in fabric shops!
And it’s also easy to make. Just perfect!
RobyGiup recently posted…Un piccolo marinaio – A baby sailor
Rebecca @ Little Monkeys Crochet says
Absolutely adorable. I might attempt to make one for my niece, although I am not really very good at sewing… I think I could pull this off! (Maybe with my mother’s help) 🙂 I’d love for you to come link up at this week’s Off the Hook!
Rebecca @ Little Monkeys Crochet recently posted…Hats for the Homeless – a GiveBack Opportunity
Charlene says
This is a great beginner’s project — only straight stitching and no one will ever know or care if they are a bit wobbly! Added Off the Hook to my linky list — thanks for the invitation!
Cris says
This looks so pretty easy to make! Yours look amazing!
Cris recently posted…Baigli with nuts and poppy seeds