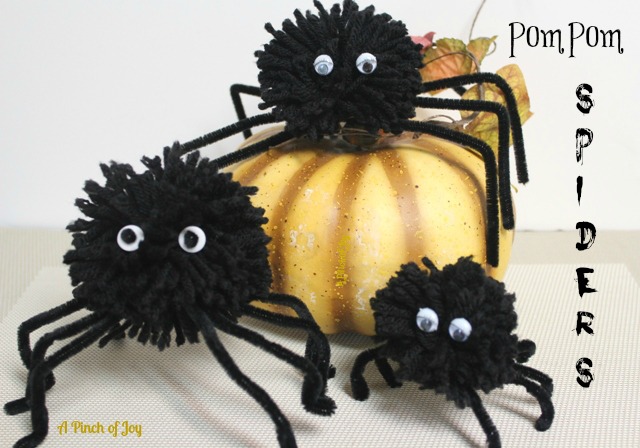
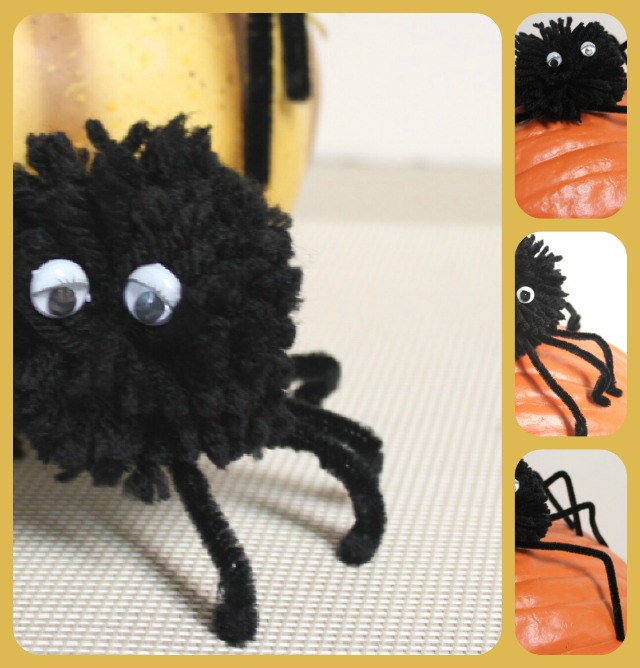
Halloween spooky but cute! These spiders are the kind you won’t mind having in your house come fall! They are made from yarn and pipecleaners so are inexpensive. And they are quick and easy to make. You (or an older child) can make several in an evening!
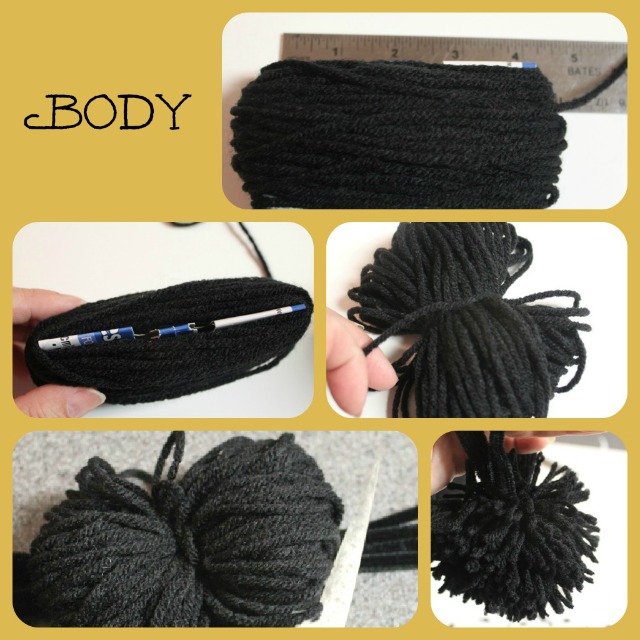
First create a pompom from black or brown yarn. If you’ve not done one before, follow the easy steps above. I used a piece of cardboard about 4 inches long and two and a half inches wide to wrap yarn around, but you can use the palm of your hand instead of cardboard. I tend to keep wrapping tighter and tighter if I do it on my hand, but can control the tension better on the cardboard. The more wraps you make, the fuller the body of your spider will be. My yarn bundle was about two inches thick when I quit wrapping. Slip the bundle off the cardboard and tie it as tightly as you can in the middle with a piece of yarn about 12 inches long. If you plan to hang the spider, this is the time to add a fishline hanger tied around the middle as well. Leave plenty of length for the hanger.
Cut in the fold of the yarn on each side. Holding the yarn tie, shake the yarn ball out upside down and begin to trim into a ball shape. Turn and trim until you have a fairly uniform shape. The closer you trim to the center the more “plush” is the finished spider. I liked the shaggy look so quit trimming when I had a uniform ball shape.
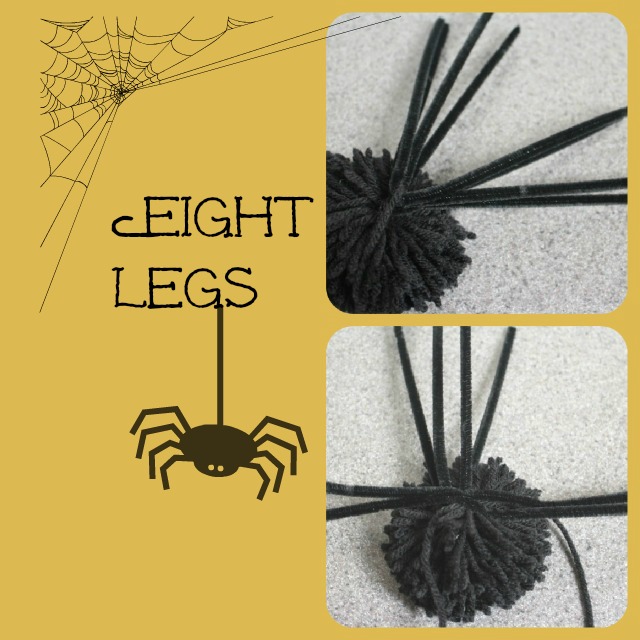
Next add the legs to your spider. Use four full length pipe cleaners. Find the center by holding all of them in one hand while matching the ends andcreasing the four pipe cleaners with the other hand. IF you are going to add button eyes (see below) add one more pipe cleaner before creasing. Tie the bundle of pipe cleaners tightly to the body using the remainder of the yarn used to cinch the body together. If you are making a small spider, cut the pipecleaners in half and assemble in the same manner. When the bundle is tied, take the opposite end of each pipe cleaner and fold it across the body and snug it down tightly against the knot. This keeps the legs from moving or pulling out of the knot when you are working with them.
If you are going to hang the spiders, go for the long legged look and leave the pipecleaners their original size. Bend all four on a side at the same time and about 2 inches up from the bottom. If you want your spider to stand, fold up an inch of pipecleaner on each leg before bending them. I found the larger standing spider needed “feet” as well, to make it sturdy and steady enough to stand. The little spider just has his pipecleaner legs folded up about an inch and pinched tightly together.
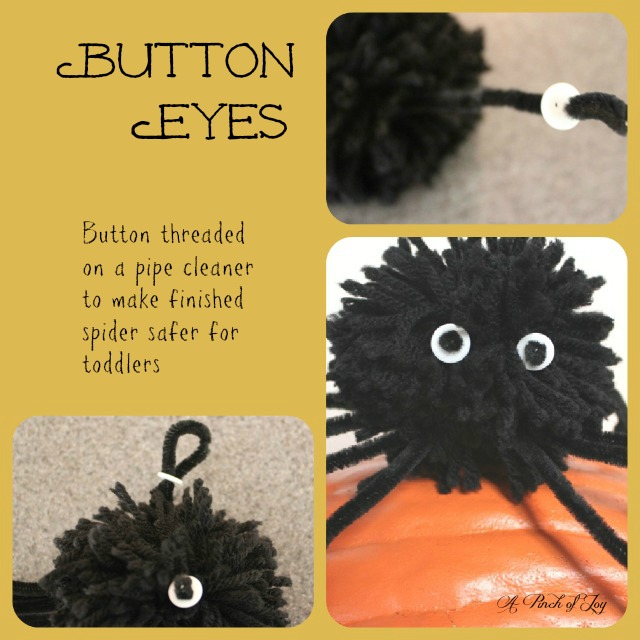
If you plan to use your pompom spider where toddlers might reach them, create secure eyes, by threading the fifth pipe cleaner mentioned above when you tied the leg bundle to the body. I used a plain white two hole button — but lime green buttons could be cute! Push the button down close to the yarn ball before bending the pipe cleaner and threading it through the second hole. Pull the pipe cleaner tight on the second hole and twist it together to secure the button. Cut off any excess. Push, pull and twist the eye into place — wherever it looks good to you.
If spiders are out of reach of toddlers, you can use stick on flirty eyes like I did or glue on googly eyes. Work with the legs until you like the way your creations look and behave. All done! Stand back and admire!
Need more Halloween ideas? Check these links: Preschool Party Snacks and Games Fun Foods for Kids Halloween Party Grasshopper Guts Smashed Frogs Zombie Brains Dirty Bones
I’m so glad you stopped by today! Be sure to follow A Pinch of Joy so you don’t miss a thing!
Subscribe by email on the sidebar or follow on Facebook, RSS feed, bloglovin’ twitter and check out my pinterest boards. If you found this helpful or inspiring please share below! Your support of A Pinch of Joy is appreciated!
Discover more from A Pinch of Joy
Subscribe to get the latest posts sent to your email.

 Welcome! I’m Charlene. I love to share quick and easy recipes, whatever I’ve learned in our last DIY project – anything that helps make life easier, better and more fun!! I hope you will find inspiration and add a pinch of joy to your day!
Das says
Brilliant! And so fun. Planning to use these for a spider race at my class’s Halloween party. Thank you for sharing!
Paula@SweetPea says
I’m sharing your project in a Halloween round-up to be published on 10/17. I hope you’ll stop by to comment and to share the post with your readers.
Paula@SweetPea recently posted…Fall Sweets Recipe Inspiration
Paula@SweetPea says
What a cute Halloween project for children! Thanks for sharing with this week’s Throwback Thursday party.
Paula@SweetPea recently posted…Fall Sweets Recipe Inspiration
Jesse @ The Empowered Momma says
I’ve been on the serious mission to find a DIY spider tutorial that is easy and toddler friendly. I love this. It’s been ‘pinned’ to my Halloween board for future reference. I would love it if you linked up with the Empowered Living blog hop. Share your creativity and empowered self with others.
Sheryl @ Lady Behind The Curtain says
I love your fun party ideas! Thanks for sharing them at Cast Party Wednesday! ~Sheryl @ Lady Behind The Curtain~
Jessie says
So cute! Featured it on the Link Up and Spook On week 2 features as well.. Have a fabulous day!
Noreen says
Your little spiders look cute crawling all over!
Maureen says
These are so cute! I’m pinning.