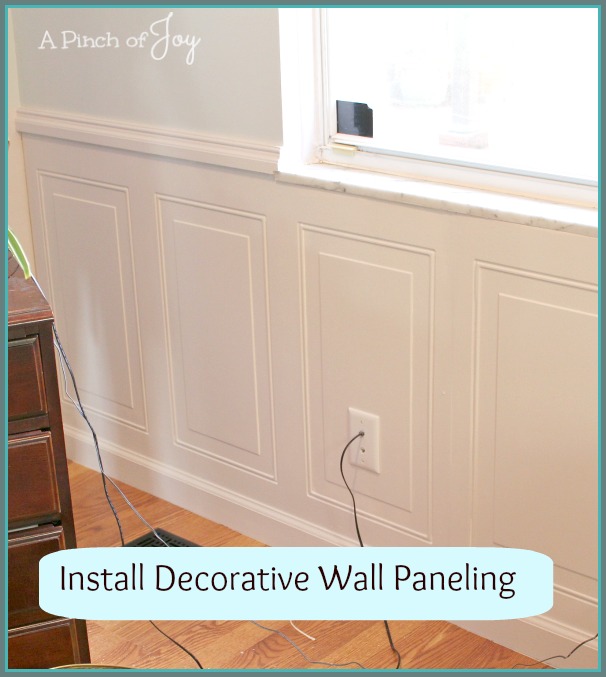
Wheels and I were moving quickly through Lowe’s Home Improvement one day on supply run. Suddenly we both stopped in our tracks and said in unison, “For the back of the kitchen peninsula”. Harmony in marriage is found in the small things. lol! We were looking at a stack of decorative wall paneling waiting to be put on the shelves. It fit the style of the picture frame moulding we had installed beneath the chair rail in the dining room. It would be the perfect coverup for the rough and not so good looking back of the kitchen peninsula. It took another sixty seconds to decide that we would also install the paneling around the adjoining office. We gathered up our own small stack of decorative paneling and brought it home.
If only all decorating decisions could be made so easily. And turn out so well.
Here’s how we installed the decorative wall paneling and how we reached some of the other decisions in doing so.

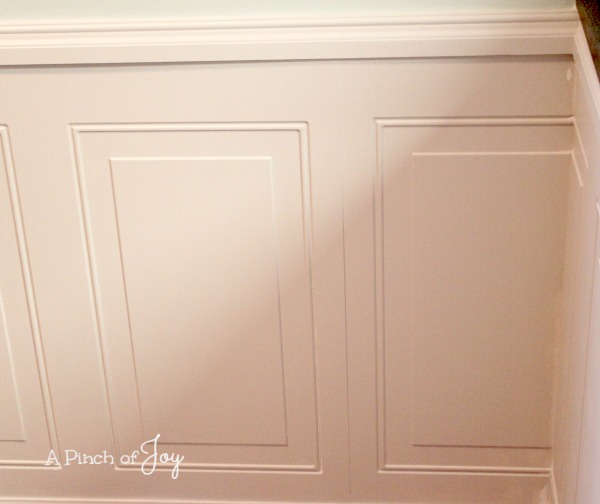
This is the closest I have to a before picture. Here is the office corner; on the other end of this wall is the kitchen peninsula. You can see through the office and the kitchen from the living room. As the first step in installing the decorative wall paneling, we did a dry run and planned the placement of the paneling. We were going to end up with a partial rectangle on one end so we decided it would look better to have that rectangle in the corner rather than at the end of the run. This was confirmed when we laid out the paneling for the back of the peninsula. Where we needed to make the cut on the paneling to fit the length of the peninsula also left a partial rectangle — just a bit bigger than the part of the rectangle cut away from the paneling on the wall. They would make a perfect corner and look like the paneling “wrapped” around the corner. There were no changes in the paneling height as it set on the floor and fit perfectly on the back of the island. There was enough plain paneling under the rectangles to install a baseboard and maintain good proportions.
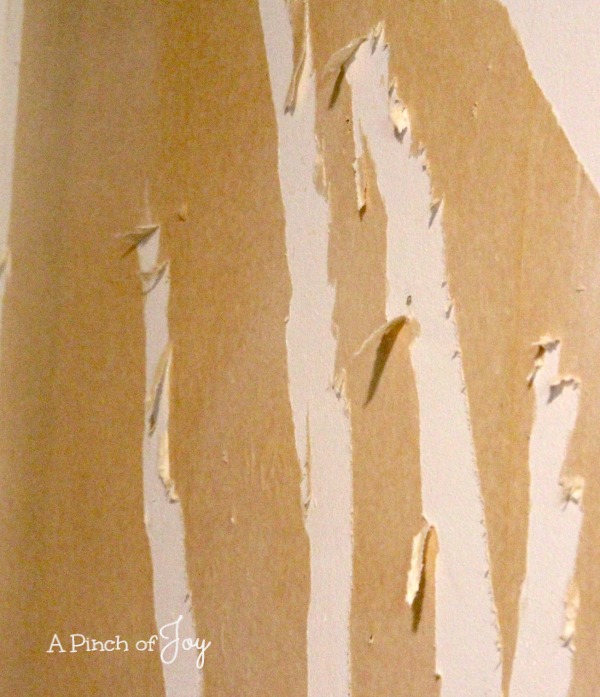
While we were planning, Bytes fired up the wallpaper steamer and began to remove the wallpaper. We’ve learned a few things about removing wallpaper — including the value of the steamer!
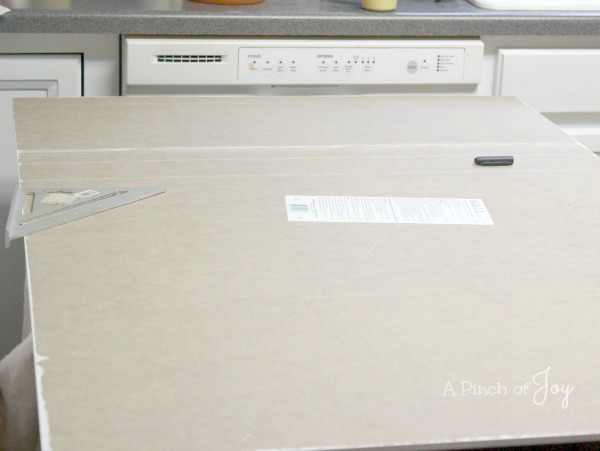
Wheels measured and cut each panel, numbering them so we knew which piece was which. Yes, that’s the dishwasher and yes, we set up the cutting station in the kitchen because it was too cold in the garage.

The wall underneath the window was not straight. This is one of the first things that home DIY’ers dicover. Walls are seldom straight. Even when they look perfectly even, they are not. No matter what we did, the one panel piece would stick out beyond its mate about 3/8s of an inch and looked terrible. The panels were not warped and were uniform in size and sure enough, laying a level across the wall showed it “bumped out” at that point. So we fitted in everything the best way possible and fastened the paneling pieces into the wall studs. And then I sanded the sticking out panel to match the other one. It worked!
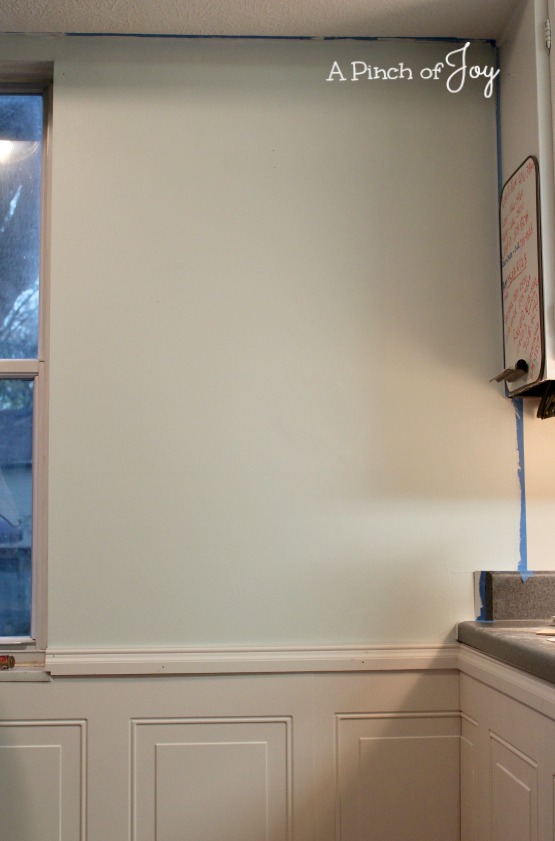
The wall was painted Morning Fog (Martha Stewart). The top moulding was made for this type of installation, with a cutback so the front edge extends down over the paneling and helps hold it in place. We nailed at the top and bottom of the paneling where the nail would be covered by trim. Since the paneling lay flat on the wall, there was no flex to worry about so we didn’t nail in the middle. Bytes and Wheels made sure the nails were placed into the wall stud underneath. The trim work also helps hold the paneling securely in place. We do not use any kind of adhesive on dry wall in our projects. Once the moulding was installed at the top, Bytes used a nail set to drive the nails just below the surface of the moulding so they could be caulked over, leaving a smooth surface. I caulked it and the seams in the paneling, including the corner.
A less shadowy view of the corner. I was happy with the way everything matched up — and without a struggle! Sometimes after caulk or joint compound dries, it will shrink. This is what happened at the visible seam. Another coat filled it in before painting.
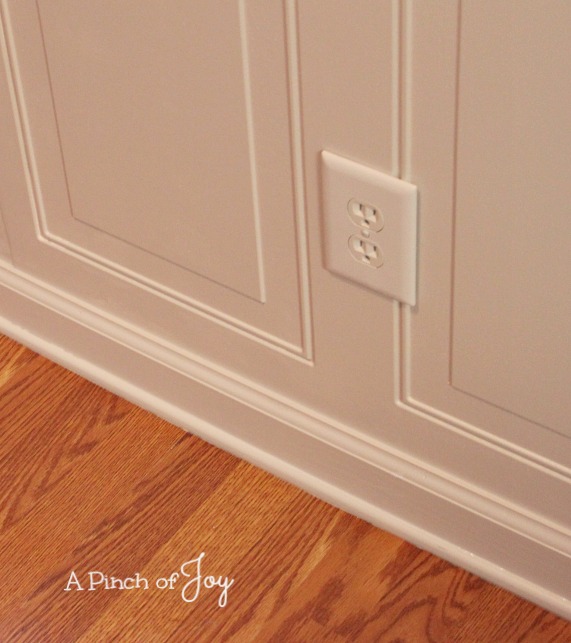
We didn’t have much choice about the placement of the outlets — although they could have been moved, it is highly likely that this one will always be covered by furniture no matter the use of the room. And I did caulk around the outlet cover after this picture so that the shadows won’t call attention to the fact that it is not ideal. The baseboard and shoe moulding were installed, caulked and painted with the rest of the installation.
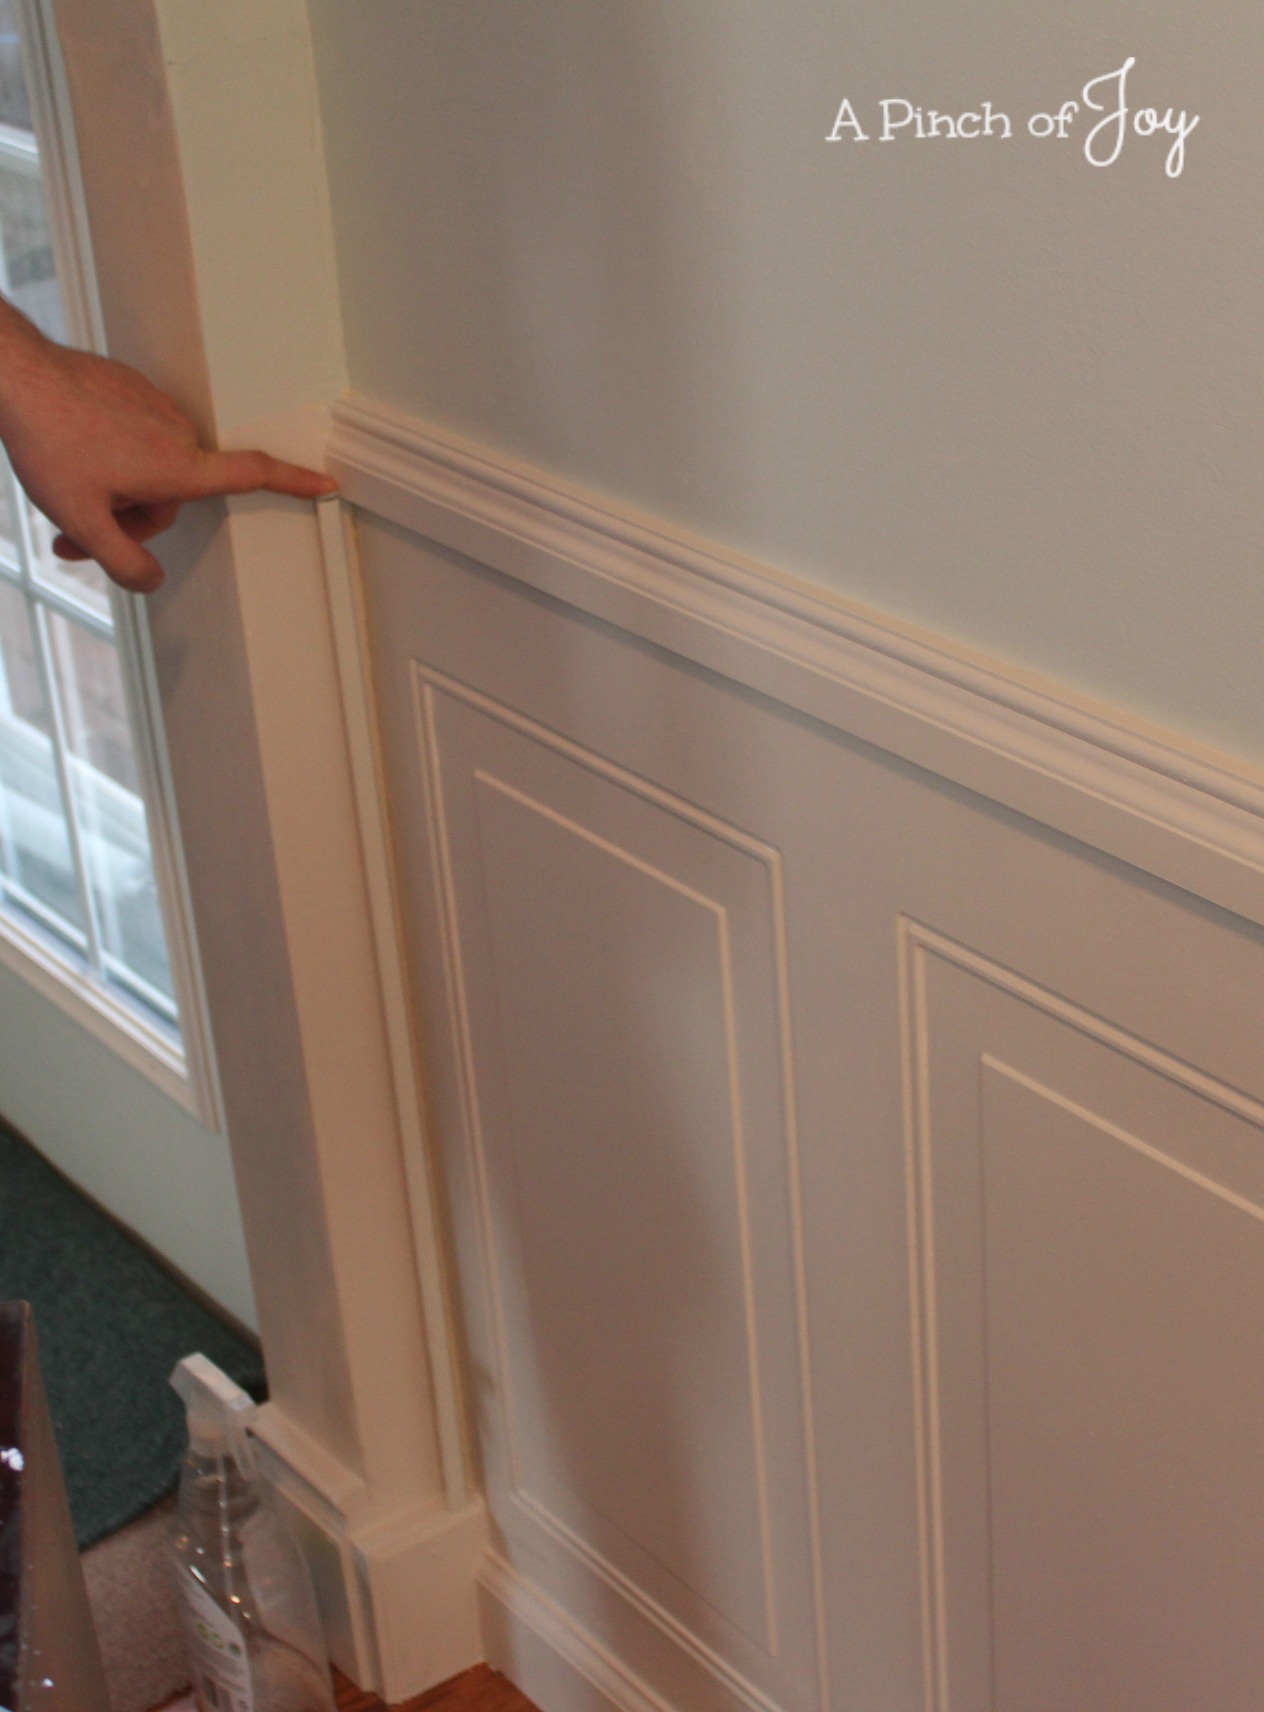 The end of the paneling run did not fit well against the opening to the living room which is another uneven application of drywall. Rather than trying to caulk everything smooth — which was an option — we decided to add a small quarter round to cover the unevenness and hide any gaps. What to do with the wall colors on that little bitty piece of wall? Here it shows our experiment in dividing it with the office wall color on top and the white on the bottom. We ended up painting it the same soft milky coffee brown of the living room wall which lets it blend in visually.
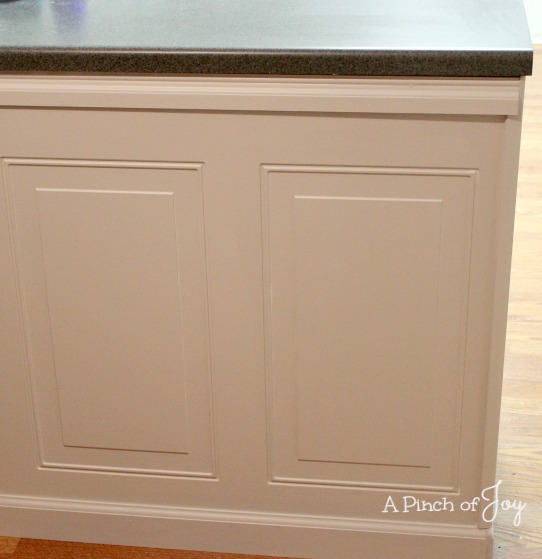
The kitchen peninsula. Project completed. I love how well this all turned out!!! It was relatively easy and overall went quickly. Planning the layout took some time, but really helped speed the installation process. Don’t skip that step!
For those who asked: The wainscot is available from Lowes. It is item #16157.
I’m so glad you stopped by today! Be sure to follow A Pinch of Joy so you don’t miss a thing! I’d love to have your company on this venture!!
Subscribe: email on the sidebar or follow on Facebook / RSS feed / bloglovin’ / twitter and check out my pinterest boards. Share: if you found this helpful or inspiring please click one of the buttons below! Your support of A Pinch of Joy is appreciated!
Linking up to these awesome parties here
Discover more from A Pinch of Joy
Subscribe to get the latest posts sent to your email.

 Welcome! I’m Charlene. I love to share quick and easy recipes, whatever I’ve learned in our last DIY project – anything that helps make life easier, better and more fun!! I hope you will find inspiration and add a pinch of joy to your day!
Brenda says
I love the look of these panels, but could not find them at Lowe’s online. Would you mind telling me what state you are in, and also, how long ago did you purchase them. I hope they still have them. I need these for my dining room with damaged dry wall. Thanks so much! They look terrific!
Charlene says
We are in Ohio. I saw them in our store yet just a couple months ago. I’ll be at Lowe’s in the next day or so and I will ask about them.
Charlene recently posted…Busy Monday 106
Feral Turtle says
Looks amazing! A great job you two have done!
Feral Turtle recently posted…Dormer Ceiling Part 16
Korilynn says
I’ve been looking all over Lowes for panels like that. I can’t even find them online. I dont feel like doing the board and batten or wainscotting myself because our house is old and the walls are uneven — so we need panels. I’ll have to keep looking. Those look great!
Korilynn recently posted…Make Your Own All-Purpose Cleaner
Lara says
I absolutely LOVE this! When my husband and I finally take that plunge and actually buy a house, we plan on doing this. Hopefully, it will have a decent sized dining room and I can paint the walls a beautiful cobalt blue and have light gray decorative wall panels! You post has really sealed the deal for me! So, pretty!
Lara recently posted…Free St. Patty’s Day Printable
Christine says
That looks wonderful! Love the detail it brings….
Christine recently posted…Sunlight & Spring 2014
Julie at Being Home says
Thank you for posting this. I have been looking for wall paneling that is not bead board. While I love bead board and may use it in another area of the house, I have been looking for the paneling you found at Lowes. I was just there the other day. Looks like I well need to go back and look again.
I love how the molding looks on the kitchen peninsula! Great job. 😀
Suzan says
Just beautiful!!!
We installed similar ones on our kitchen ceiling – and yes straight walls and ceilings do not happen – especially in homes almost a hundred years old lol – lots of molding and shims hiding that fact in my home!
Visiting from Between naps on the porch –
Have a wonderful week
Suzan recently posted…A Quick Back Splash Solution
Joy@aVintageGreen says
The panels tied everything together so very nicely. Loved seeing your work/finished project.
Joy
Joy@aVintageGreen recently posted…Small Project ASCP Provence and a Frame