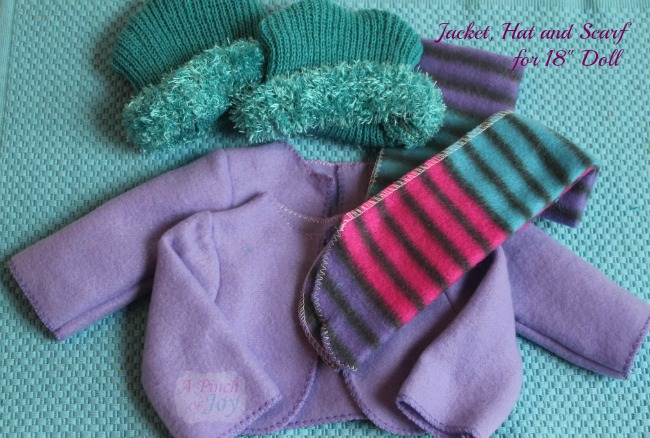
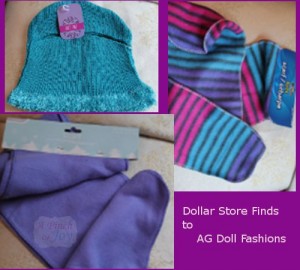
I walked into the Dollar Store to pick up sandwich bags. As I passed a rack of scarves and hats, this teal and lavendar color combination caught my eye. Hmmmm . . . I also had doll clothes on my mind as there are three little girls on my list that absolutely adore their American Girl and My Generation dolls! I picked up the bags and returned to the rack of hats and scarves. An idea had begun to blossom and as I sorted through the offerings, it began to take shape. A ribbed hat that was pretty stretchy, a big scarf as wide as the doll body and a striped kid’s scarf to tie the colors together. For only a $3 investment, I decided to see what that nubbin of an idea would turn into!
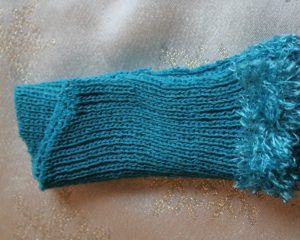
HAT: Sorry –I got so wrapped up in making things happen, I forgot to take a picture of it before cutting. But you get the idea of what it looked like. The 18 inch dolls have a head that is 12 inches around. This hat would stretch that far folded flat which meant it was 24 inches around so I knew it would make two hats. I cut the top of the hat off as shown above, using about 5 and a quarter inches from bottom of hat to make the doll hat.
For the individual hat, I folded the piece in half as shown and then cut the excess off the bottom side so both sides matched. Then I stitched around the open sides with a straight stitch as a way of basting them together. This knit was a double layer so I had to be sure I caught all the edges. Then I zigzagged over the cut edges so the knit would not ravel. And all done!
SCARF: From the striped scarf that measured 22 inches by 5 inches, I made two doll scarves. Fold it half, cut in the middle so you have two 11 inch long pieces, trim the cut ends to match the scarf’s ready made ends and zig zag. Done in one sentence.
JACKET – CUTTING: Making the jacket was a little trickier. The scarf was 8 inches by 54 inches. I wanted to use the finished edge as the edge of my garment. I didn’t have a long sleeved jacket in my pattern stash, but I found a couple of patterns I could alter and mash together. And then to figure out how to maximize the finished edge. I began by using the ends and side to form the front of the jacket.
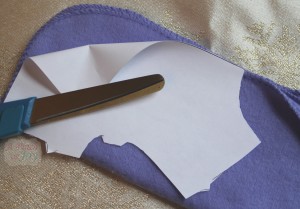
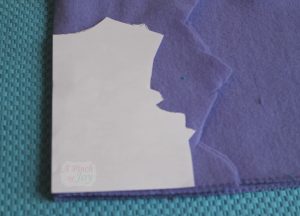
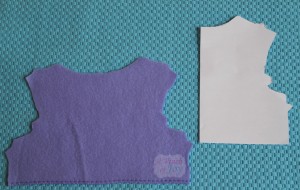
Fold the scarf in half, taking care to match the corners (or rounded corner) exactly. I matched the front edge of the pattern with the long edge of the scarf and the bottom edge of the pattern with the end of the scarf. Cut out the other two sides — around the neck and shoulders and around the sleeve and side. Do not cut anything on the bottom or front of the jacket.
This is what the finished cut will look like. Note the finished edges do not match the square bottom of the pattern.
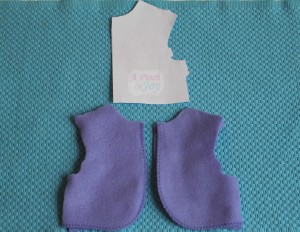
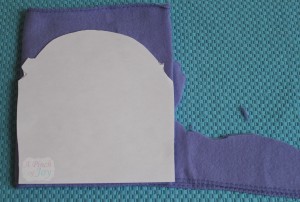
Fold the scarf as shown and place the back pattern on the fold with the bottom edge on the finished edge of the scarf.
The cut out piece will look like this — note the finished edge on what will become the jacket bottom.
Fold scarf again so you can cut two sleeves. Place pattern so bottom of sleeve is on finished edge of scarf.
JACKET ASSEMBLY: Match front shoulder seam to back and stitch. Repeat for other side. Match notches on sleeve to notches on armhole in jacket, placing right sides together. Gently ease fabric around curve. Repeat for other side. Beginning at bottom of jacket, place right sides together and stitch a continuous seam to bottom of sleeve. Repeat for other side. Turn jacket right side out. Finish neck by running a zig zag stitch on the edge.
Done. I cut both jackets out at once — but if you want to be really accurate or don’t want to handle that many thicknesses at once, you can cut the first and then cut the second one from the second half of the scarf, following the same sequence as above. Repeat assembly directions for second jacket.
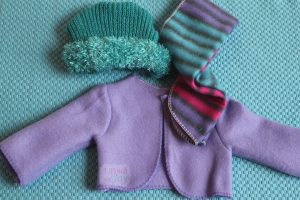
Two outfits, two hours and three dollars.
Jacket, scarf and hat for any 18″ doll.
Have fun — you know the little one who receives this cute outfit will!
Other 18″ doll projects:
How to Make a Parka for 18 inch doll
Jacket, Hat and Scarf from Dollar Store purchase with jacket pattern
Pillowcase Dress for 18″ Doll with pattern
Party Dress for 18″ Doll
Sleeping Bag for 18″ Doll
Fiesta Skirt made from a fat quarter
Follow A Pinch of Joy by clicking the like button to the left or sign up to receive new posts by email. Or follow on twitter or RSS. Don’t miss a thing!
Like what you just read? Say thanks by sharing — use those cute little buttons below!
Linking up to these awesome parties here
Discover more from A Pinch of Joy
Subscribe to get the latest posts sent to your email.

 Welcome! I’m Charlene. I love to share quick and easy recipes, whatever I’ve learned in our last DIY project – anything that helps make life easier, better and more fun!! I hope you will find inspiration and add a pinch of joy to your day!
Shan says
I love it. Our youngest has an AG type doll from Micheal’s and is getting a My Generation doll from a secret Santa we were not planning on. I found hats and scarves meant for little dogs in the dollar bins and have felt to make 2 jackets and your pattern is just the right size for the amount of felt I have and I found a cute hand embroidered snow flake pattern using silver sequence. I just happen to have some left from Barbie dresses for the granddaughter’s for Christmas, Thank You
Charlene says
I am so glad the pattern works for you! Love your creativity in using doggie scarves and hat. I am sure your little one will love the doll clothes!
Charlene recently posted…Busy Monday 92
Ginger says
This project has opened my eyes to all kinds of possibilities. I am just starting on American Doll with one Granddaughter. Thank you for sharing.
Charlene says
Grand daughters are wonderful! There are so many ways to dress AG dolls without breaking the bank, if we can be a bit creative!
Charlene recently posted…Bacon Pecan Green Beans
Chang-O says
Merci beaucoup pour le partage de ce joli modèle.
bizzz, véro
marie says
love this…
Natasha says
Thanks for linking up to Serenity Saturday Link Party
Natasha xx
serenityyou.blogspot.com
Shari @For the Little Doll In Your Life says
The color of that hat is amazing. It would have stopped me dead in my tracks too.
Melody of ChattyChics.com says
Precious! Oh my goodness! It makes me want dolls again! 🙂 Thanks for sharing at my place!
Rebecca says
LOOOOOOOOOOOOOVVVVVVVEEEEEE IT! Even without having dolls of my own, I want to make this just because of the sheer cuteness of the SIZE!-lol! Adorable!
toysinthedryer says
I love this! Found you on Skip To My Lou. Would you please share this with our readers for Fun Stuff Fridays? http://www.toysinthedryer.com/2012/02/fun-stuff-fridays-11.html
Jill @ KitchenFunWithMy3Sons.com says
Love this! We just posted our 2nd Kitchen Fun and Crafty Friday Link Party and would love for you to share this! http://kitchenfunwithmy3sons.blogspot.com/2012/02/kitchen-fun-and-crafty-friday-link_16.html
Joy says
SO simple! I’m always looking for AG clothes ideas and patterns. Found you partying @ Homemaker on a Dime. EnJOYing your site. I invite you to come over to my blog to check out my doll clothes I’ve made from used items. I’m also pinning this page as I have some followers on my “Doll” board. Thanks, JOY
Tisha @ Delectable Home says
So cute and simple! I’d love it if you’d share this at my Show & Tell party, going on now @ the Delectable Home.
Jessica says
Wow, that’s so cute. Thanks for the patterns. Would you share at my made for you monday link up? http://www.clipwithpurpose.com/?p=8933