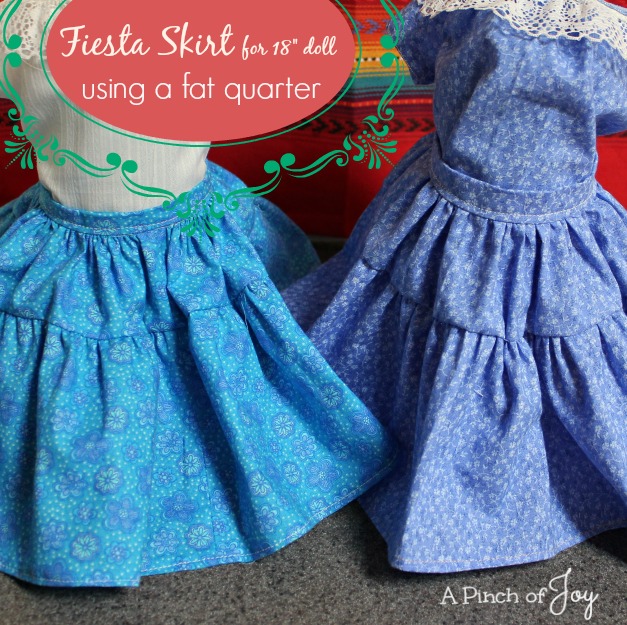
A brief visit to Mexico a couple of years ago gave us the opportunity to see some spectacular traditional Mexican dancers. I have some pictures but they are all a blur because of the speed and intricacy of the dances. One set was particularly eyecatching because of the beautiful full dresses worn by the women. The Fiesta Skirt is modeled after those dresses. Each tier is double in fabric to the one above it — a lot of swirl! A fat quarter from the quilter’s corner of your favorite fabric store will yield one two tiered skirt.
Cotton fabric usually comes in 45 inch widths. If you buy a quarter yard you end up with a skinny piece nine inches wide by 45 inches long. Instead: Cut a yard from the bolt, then divide that yard into fourths. Each quarter is 18″ by 22.5 inches. That’s a fat quarter! Much more versatile than the skinny quarter yard.
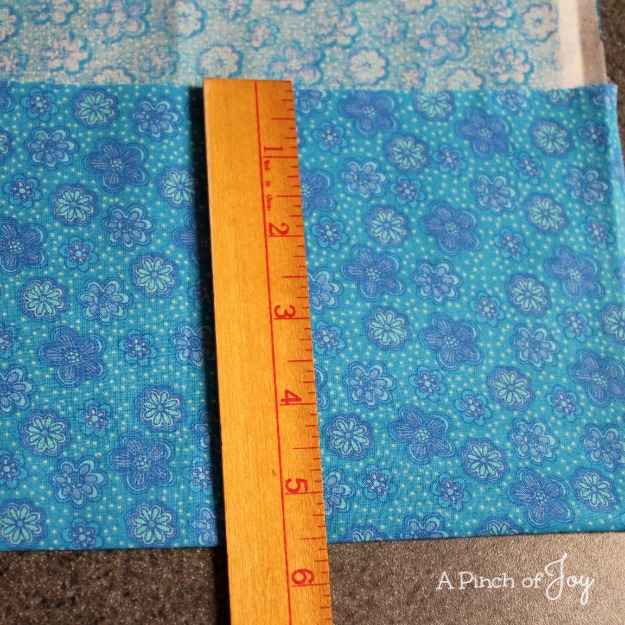
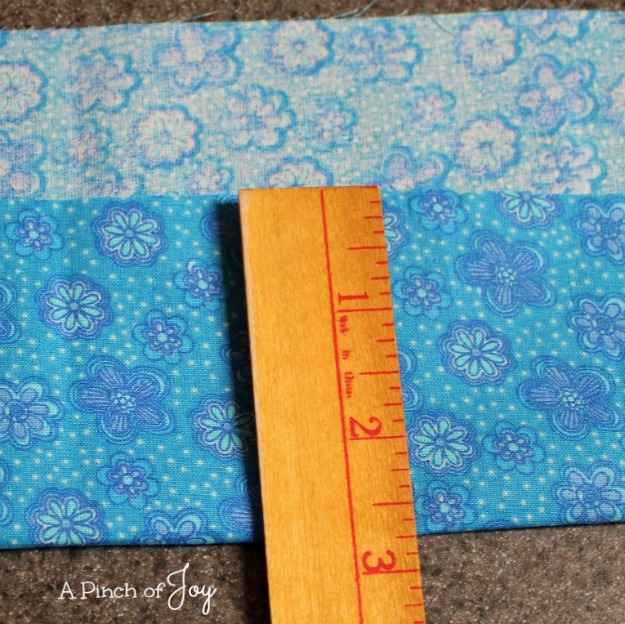
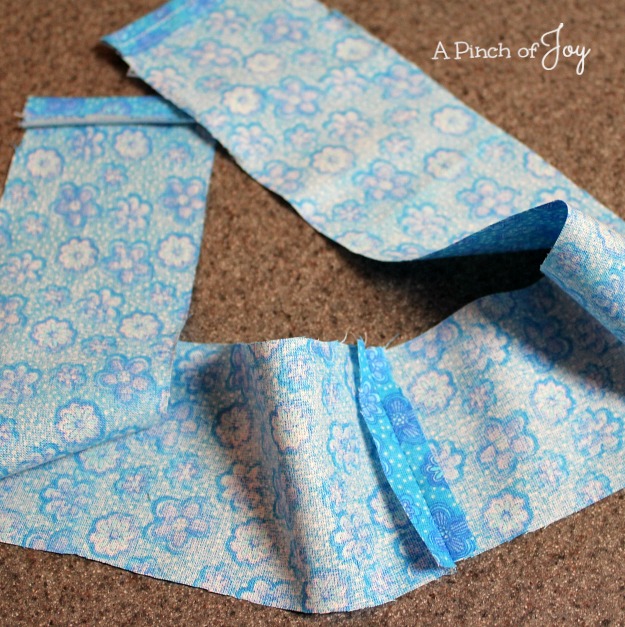
Make the bottom tier of the skirt first. Cut two pieces from the 22″ length of the fat quarter. Each piece is 5 1/2 inches wide.
Place right sides together and stitch the two pieces together along the 5 1/2 inch side.
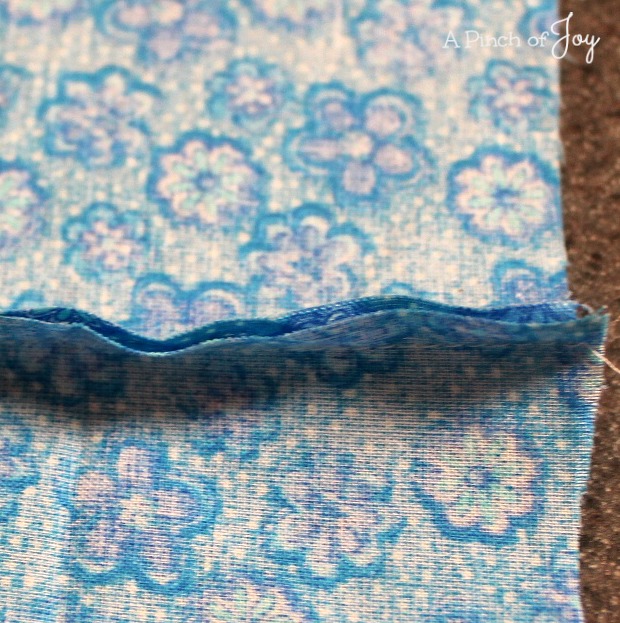
Make a 1/4 wide hem on the other two ends. For doll clothes, I do not trim selvages. Just fold over once to make the 1/4 inch wide hem and stitch. For most sewing projects, do not include selvages when cutting patterns. Selvages may shrink, causing puckering. They may lay differently than the rest of the fabric, causing it to pull. Selvages may have extra bulk which will effect the final appearance. But on doll clothes, using selvages allows you to save time and to squeeze the most use from the smallest piece of fabric. There’s a time to break the rules — and making doll clothes for play is one of those times! If you are making those $900 dresses that sell on eBay for collectors — that’s a whole ‘nother stratosphere!
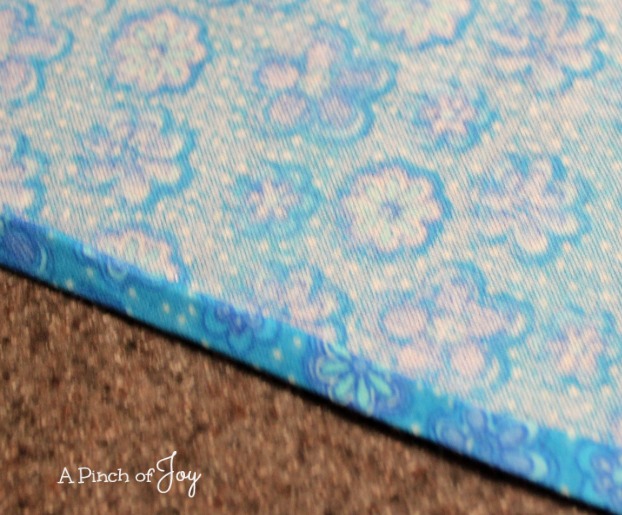
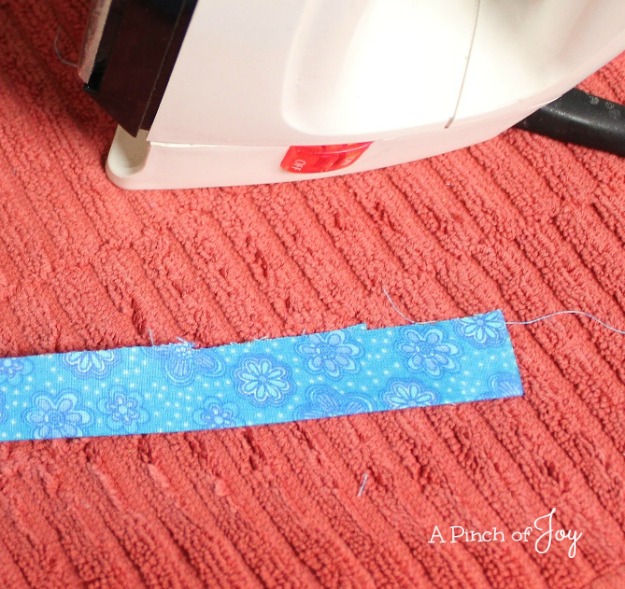
Hem the bottom by turning the fabric up a quarter inch, pressing as you go. Turn over another quarter inch, pressing again. Stitch near the folded edge of the hem.
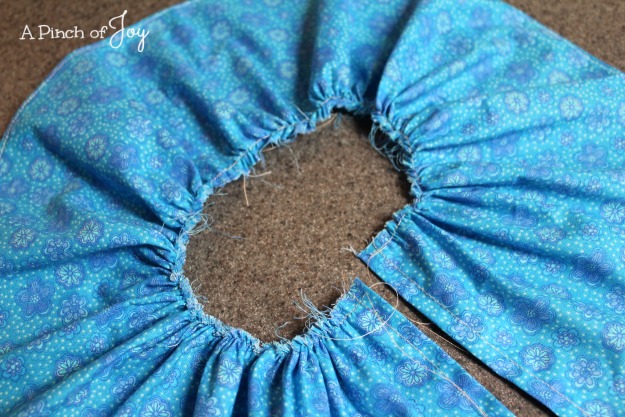
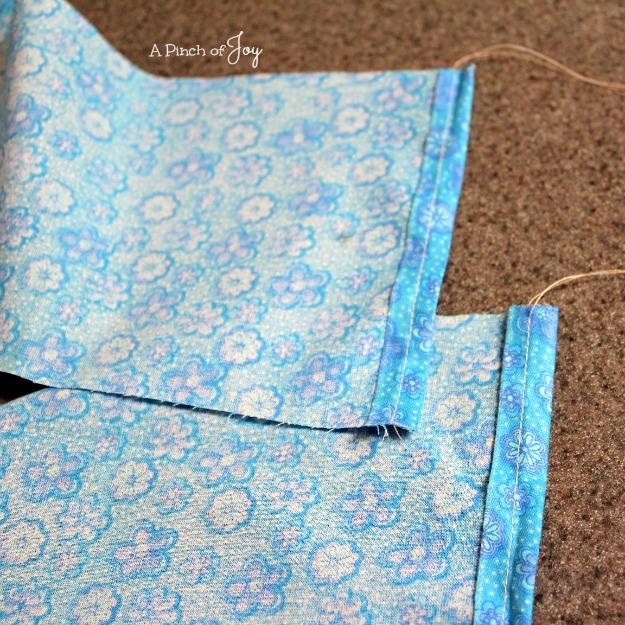
Set stitch length for a long basting stitch, Leaving a long tail of top and bottom threads, stitch near the top edge of the skirt. Cut thread leaving another long tail. Gently pull of the top thread to gather the fabric. Work from both ends, alternating, to keep the gathers even. Set aside.
Cut fabric for top tier.
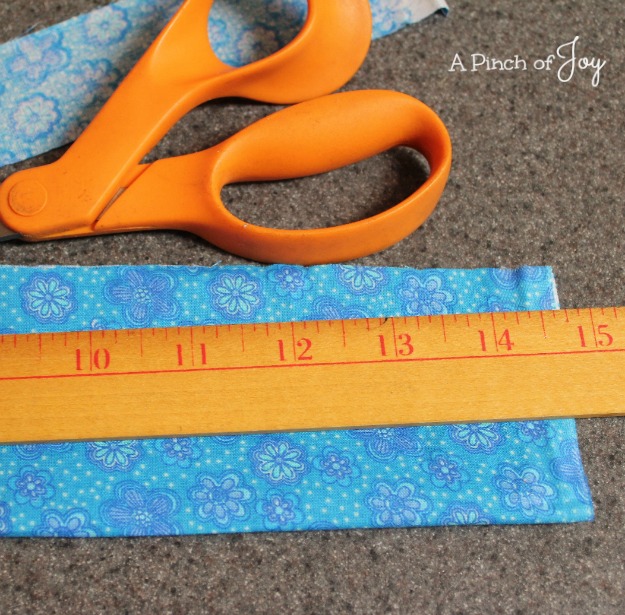
Cut two pieces 14 3/4 inches long and 2 3/4 inches wide.
Stitch the two pieces together and hem the short ends.
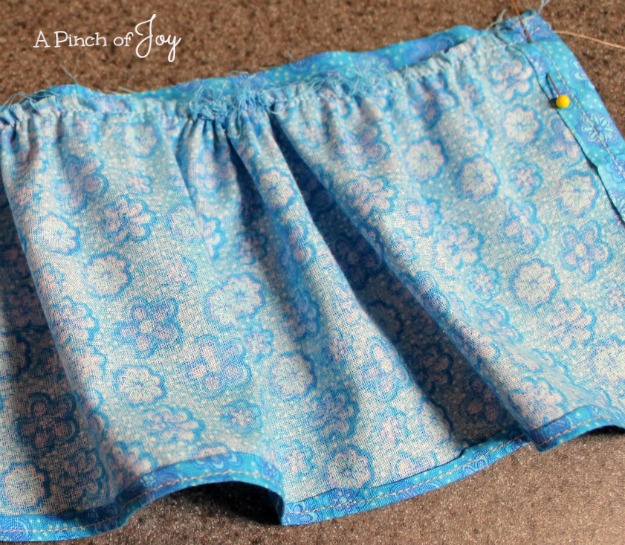
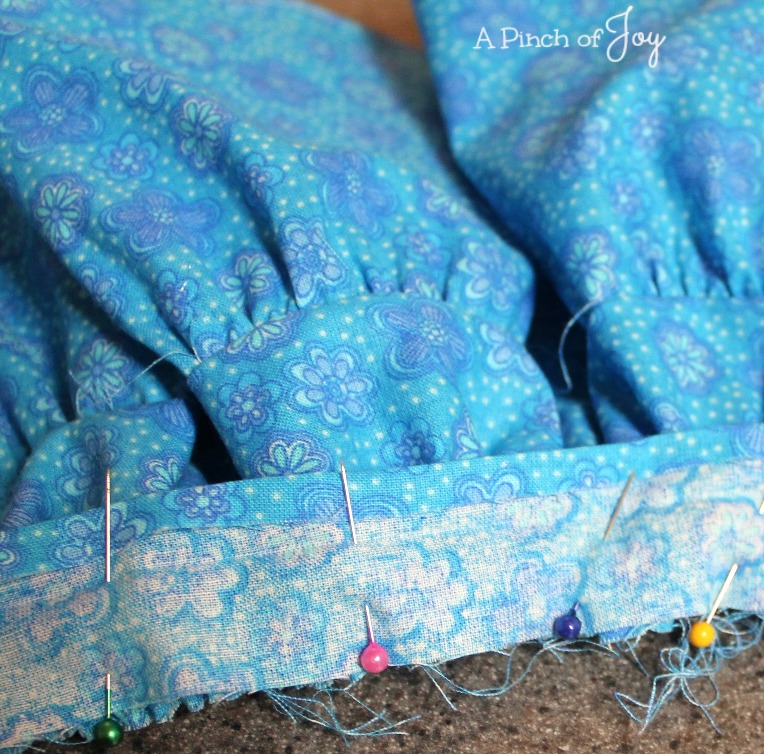
Pin the hemmed and gathered bottom tier to the top tier, gently working fabric so that gathers are even across the entire top tier and the ends match.
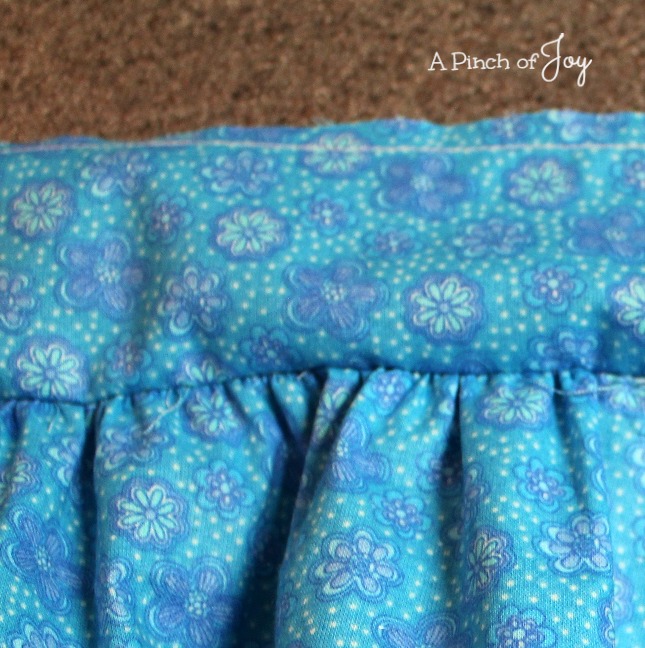
Stitch gathered bottom tier to flat top tier. It will look like the skirt above. Set stitch length to long basting length and sew along the top tier, leaving two to three inches of thread on each end. This will be used to gather the top tier and fit it to the waistband.
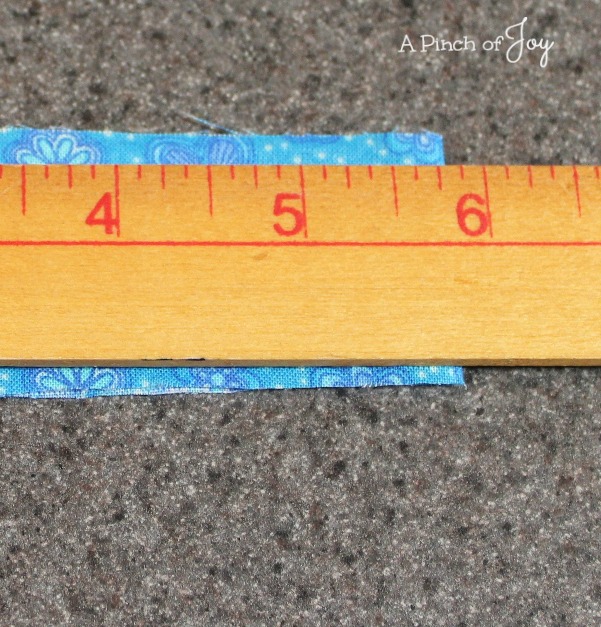
To make waist band, fold fabric in half. Measure from the fold 5 3/4 ” and mark the spot. The width of the waistband is 1 1/4 inches. When you unfold the fabric, you should have a piece that is 11 1/2 inches long and 1 1/4 inches wide.
Fold waistband in half and press to form crease. Fold up 1/4 inch on the long side of the waistband and crease with iron. You can finger press the folds. Ironing is more precise, easier to follow the ditch for stitching and much faster. I place a cutting board on the counter with a folded, heavy towel on top for pressing while sewing small items rather than setting up the ironing board.
Gently work gathers along the gathering thread, working from both ends. Evenly distribute the gathers and fit the top tier gathers to the waist band, pinning in place. Leave a quarter inch of the waistband beyond the gathered tier on each end. Stitch on the long crease to create a quarter inch seam, keeping gathers uniform and straightened as you sew. Sew across the short ends of the waistband, using the quarter inch you left on each end of the waistband to the seam. Fold on the center crease, pinning the waistband in place. Stitch across the bottom of the waistband.
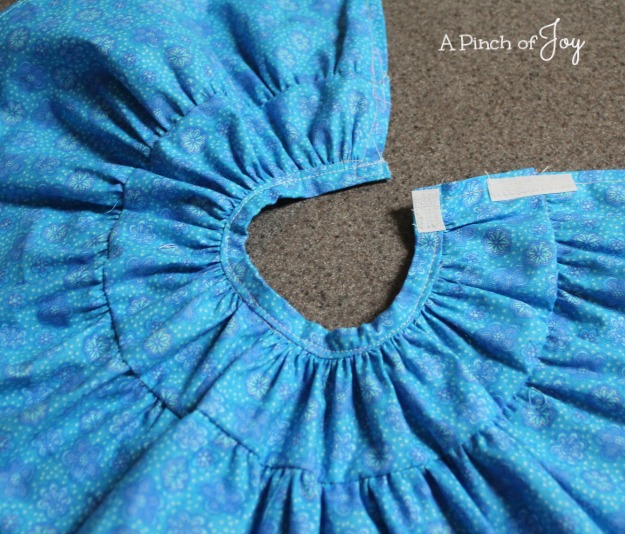
Add hook and loop fastener to both sides of the skirt. The top (loop) is sewn on the inside of the skirt and the bottom (hook) is sewn on the outside of the skirt as shown.
Other 18″ doll projects:
How to Make a Parka for 18 inch doll with pattern
Sleeping Bag for 18 inch doll
Jacket, Hat and Scarf from Dollar Store purchase with jacket pattern
Pillowcase Dress for 18″ Doll with pattern
Party Dress for 18″ Doll
I’m so glad you stopped by today! Be sure to follow A Pinch of Joy so you don’t miss a thing!
Subscribe by email on the sidebar or follow on Facebook, RSS feed, bloglovin’ twitter and check out my pinterest boards. If you found this helpful or inspiring please share below! Your support of A Pinch of Joy is appreciated!
Discover more from A Pinch of Joy
Subscribe to get the latest posts sent to your email.

 Welcome! I’m Charlene. I love to share quick and easy recipes, whatever I’ve learned in our last DIY project – anything that helps make life easier, better and more fun!! I hope you will find inspiration and add a pinch of joy to your day!